INTERACTION DESIGN 310
Emily Carr University, Spring 2020, Section 2
Instructor: Dr. Garnet Hertz
Lab tech: Bobbi Kozinuk (Wednesdays)
Course location/date: D1347 (WIP Lab), Mondays and Wednesdays 1-4pm
Spring 2020 office hours: Monday 4-5pm, Wednesday 4-5pm, Room C4246 (The Studio for Critical Making)
Email: garnethertz@gmail / Lab phone: 604-630-7427
NOTE THAT EVERYTHING HERE WILL FREQUENTLY CHANGE OVER THE SEMESTER
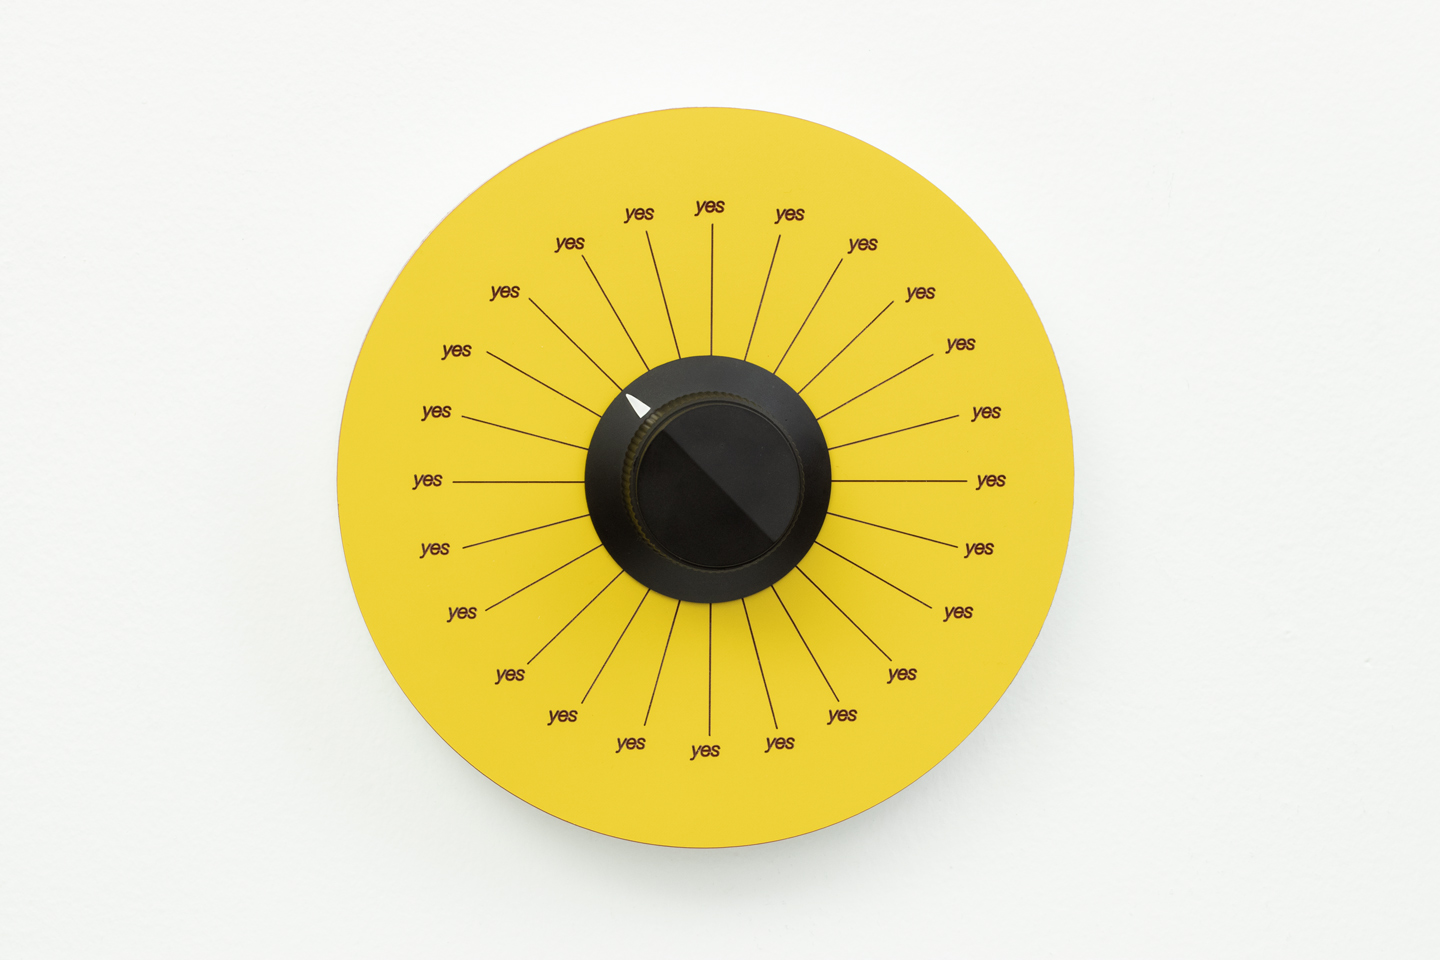
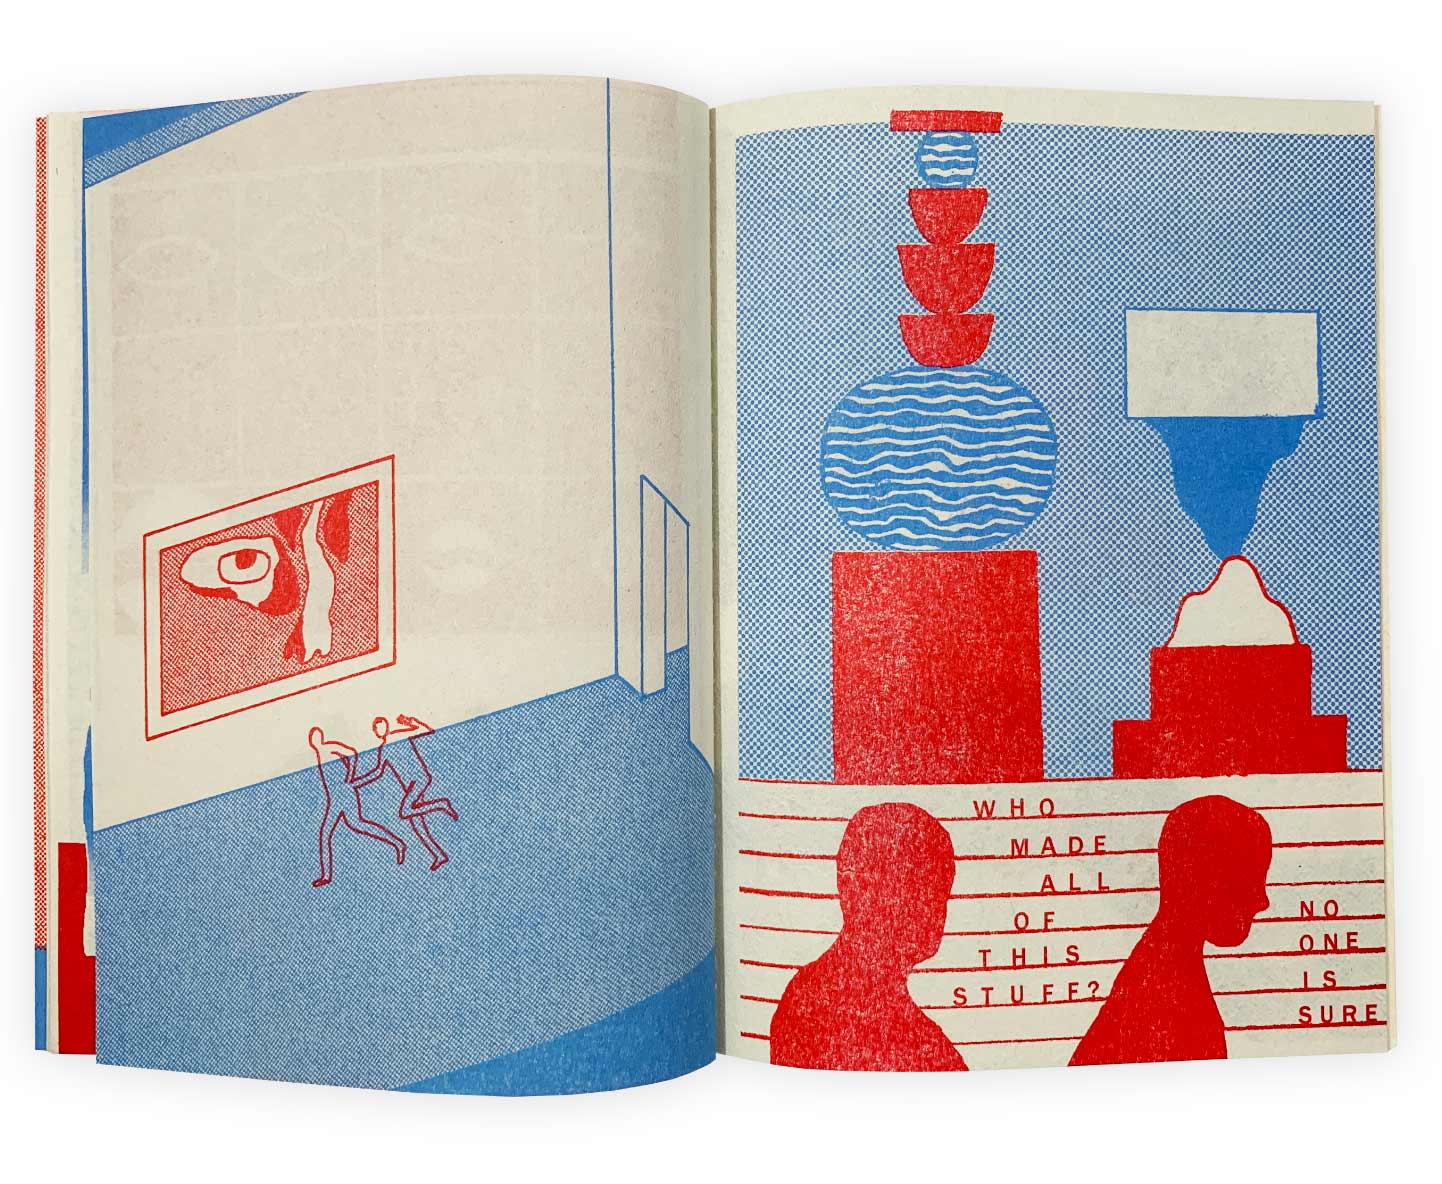
(Image above: Daniel Jolliffe, Yes, Yes and Yes (2019))
Last updated - 24 February 2020
DESCRIPTION
INTD 310 S002: Core Studio Interaction Design. This 6-credit core studio allows for an intensive project-based learning experience in interaction design. Students will be exposed to skills and theories that build on the knowledge from second year, expand their design capacities, and prepare them to work independently in fourth year.
Course content: Speculative and fictional approaches have long been implemented in human-computer interaction and design techniques through scenarios, prototypes, forecasting, and envisionments. In this course, you will design and build interface projects that are provocative, raise questions, and challenge how we think about the everyday world and technology. An emphasis of this course will be to develop unconventional physical/tactile interfaces using physical computing tools like the Arduino along with the rapid prototyping of real-world objects. During this course we will explore "post-optimal" design, or design that is concerned with more than just trying to make products easier to use, faster or more convenient. In the process, students will practice taking on the role of the designer as a cultural or social agitator.
Students in this course will combine critical thinking with DIY and design methods to explore 'critical making'. Students will implement and critique the practice of making through both literature and hands-on studio work. Foundational literature from the fields of design, informatics and the humanities will be explored to provide a context for the field, including reading on the topics of design fiction, speculative design, maker culture, values in design, ludic design and adversarial design. Hands-on studio work will include high and low-fidelity prototyping techniques including sketching, physical prototyping, electronics and physical computing. Students will envision and create devices and experiences that critically explore contemporary social and culturally relevant technological themes such as, agency and presence, community, privacy, intimacy, environments, health, education, economics and activism.
COURSE STRUCTURE
Project Grading
Grading in this class happens in many small assignments and activities, not as one big deliverable at the end of the semester: this studio course is situated under one semester long project done in 20 short phases. The key to performing well in this class is showing up, participating and continued effort over the entire semester.
Course Format
The course is divided between two weekly studios on Monday and Wednesday afternoons lasting 3 hours each. For the semester, we are scheduled to meet in room D1347 (The Wearable and Interactive Products Lab, or 'WIP Lab') with the amazing Bobbi Kozinuk. We may meet in alternate spaces for presentations as required. Most electronic-based work will be done in the WIP Lab. There is no textbook - all readings will be made available to you electronically. Students must come to class with at least one question pertaining to each required reading. Note that two special events in collaboration with Will Odom's SFU SIAT class are planned this semester with mandatory participation - they should be fun.
Process and Documentation
Students are expected to document their process throughout the course, including: class notes, ideation processes, observational studies, practicing of techniques, concept sketches, different drawing strategies (conceptual, pictorial, orthographic), fabrication research and details, user criteria, critical observations of designs you see or use, and examples of other designers work used as sources of information/inspiration. Digital documentation of final solutions should also be included. The process documentation is submitted at the end of the course and evaluated on the content as described.
Course Learning Outcomes
Upon completion of the course students are expected to demonstrate:
- Knowledge of the applications and theory of critical design, including in industry, research and the arts.
- We collaboratively produce a printed book that highlights our studio work completed in this course before the end of the semester.
- Demonstrates ability to externalize ideas iteratively as part of design process.
- Able to manage a project through to completion, encompassing design, building, testing.
- Shows ability to work independently and take initiative.
- Demonstrates knowledge of different forms, approaches and theories of critical making.
- Demonstrates ability to articulate ideas in verbal presentations.
- Can explain their design thinking, how and why they made decisions.
- Demonstrates ability to document and articulate scenarios in printed (book) format.
- Uses a variety of techniques to communicate persuasively (sketches, illustrations, photographs, multiple types of prototypes) and presents work in a professional manner (visual and verbal).
- Demonstrates ability to distribute work through clearly written open source documentation.
- Demonstrates a standard of quality in models and presentation, attention to detail.
- Understands basic electronics and Arduino microprocessor platform.
- Knowledge of CNC fabrication including template production, toolpath preparation and finishing. (UP FOR DISCUSSION)
POLICIES
Participation and Discussion
Required readings are due before the start of class in which they are listed. Students are expected to have carefully read the readings before class. Students must come to class with at least one question about each required reading and be prepared to share it. These questions will form the backbone of our discussions. In addition to this, participation refers to:
- having the requested work completed in stages as defined in project schedule
- displaying active engagement and interest in class work
- responding to and asking questions and taking notes
- displaying general interest in learning
- showing respect to classmates and assisting them when possible
Late Policy
Late assignments will be graded -10% per day late per assignment, prorated from time due in hour increments. In other words, an assignment submitted an hour late will be -0.42%, while an assignment submitted 50 hours late will be -20.8%.
Academic Integrity
Students are expected to be familiar with the details of the Emily Carr Academic Integrity Policy. In summary, any form of plagiarism (the intentional misrepresentation of someone else's work as your own) will result in you failing the course. This includes pasting in Wikipedia articles into assignments without citing it. Also note that you also cannot submit the same project to two courses.
WEEK 01a - January 6th 2020
- Speculative Fiction Icebreaker: The date is January 6th 2050. Select a partner that you've never collaborated with before. Interview them about what they've done over the past 30 years, and write a short (30 second) bio for them. Also, make a 1 minute hand-drawn sketch of the person in 2050. Be prepared to introduce your partner by reading the bio and showing your sketch to the class (circa 2050). You will submit this for 2% of your final grade.
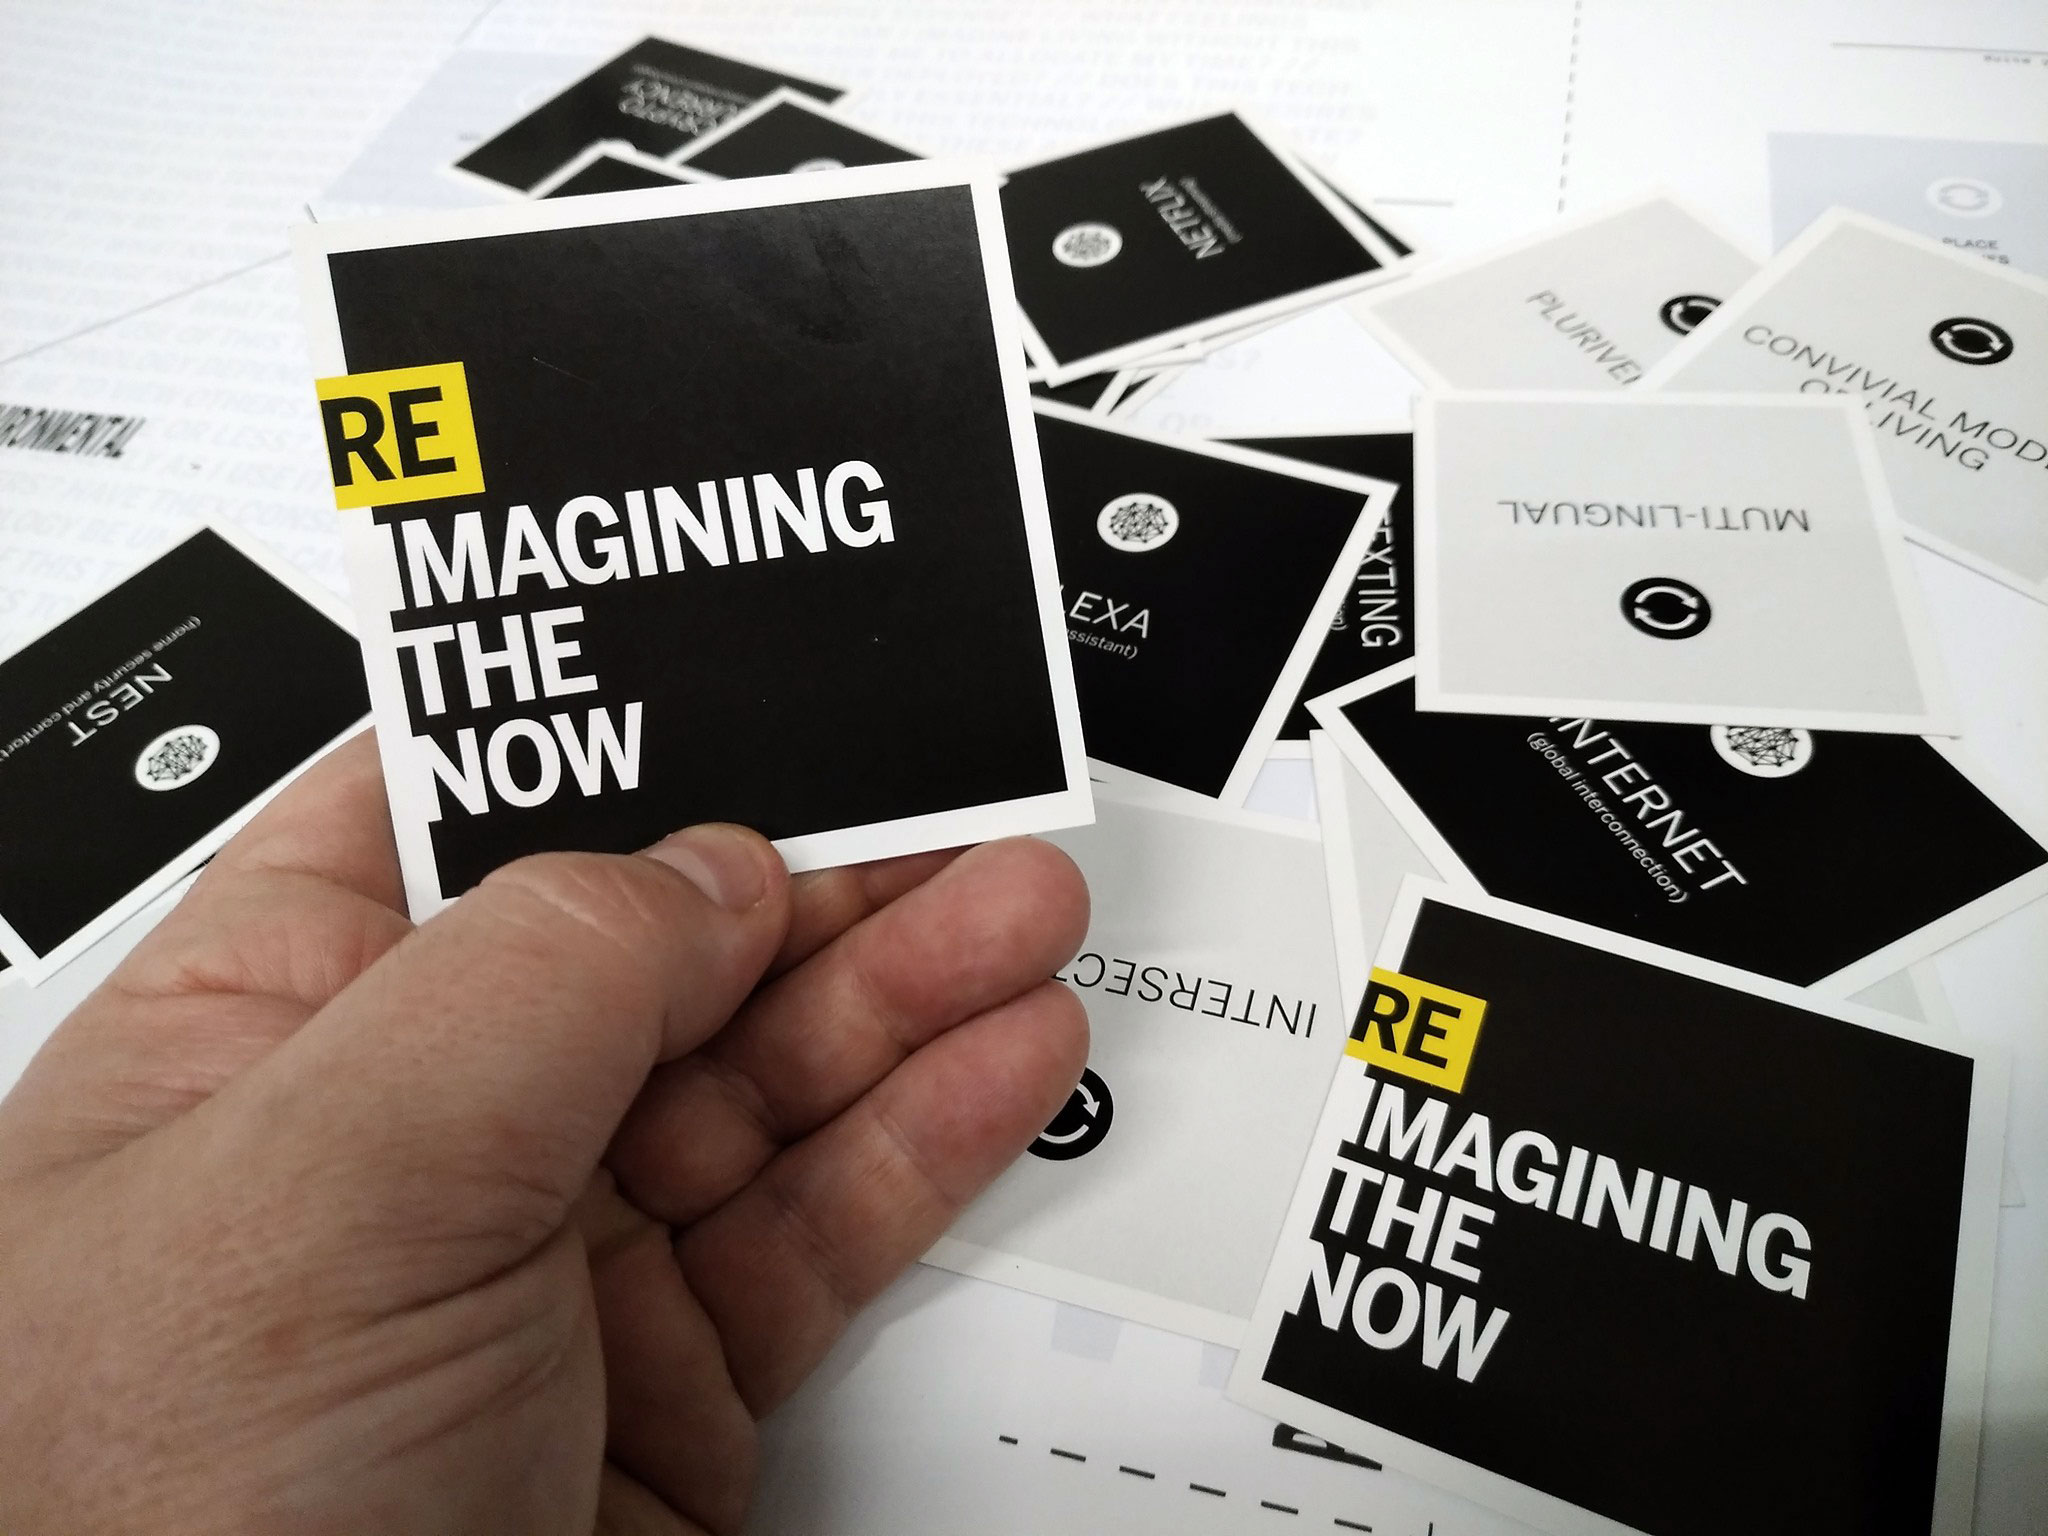
- Reimagining the Now: We are going to do a design activity that I've developed with Gillian Russell and Craig Badke - see details at http://conceptlab.com/reimaginingthenow. Let's use cardboard, hot glue guns, with miscellaneous parts/scrap materials.
- [BREAK]
- Course Overview and Discussion: Let's review the course. I am interested to hear what you would like to learn in the course, and am happy to change the course (to a certain extent) to fit your goals. Questions include:
- What aspects of this course excite you or interest you the most? Why did you enroll in this class?
- How technically familiar are you with physical computing, Arduino and electronics?
- How much technical instruction on physical computing, Arduino and electronics do you want?
- How interested are you in making prototypes actually work versus non-functional concept prototypes?
- Are you interested in learning about CNC fabrication or 3D printing?
- Some different course options include:
- 4 Technical workshop assignments + 1 capstone project
- 1 smaller project + 1 capstone project (w workshops interspersed)
- 1 large, iterated and refined project (w workshops interspersed)
- Assignment for Next Class (Wednesday January 8th @ 1pm) - Prepare a 5-10 minute presentation on you and your work, providing a context for who you are, what work you've done in the past, what values are important to you, what concerns/worries you, and what your goals are for the future. Please include details regarding your technical knowledge of Arduino or Raspberry Pi - and your interest in continuing in this. Conclude the presentation with some thoughts on what you'd like to accomplish in this course. [WORTH 2% OF FINAL GRADE.]
Hi everybody,
It was great to meet all of you today - thanks for your effort in the 2050 Biographies you prepared and presented. The Reimagining the Now design sketches you made were also fun. We survived! At the end of class I outlined the assignment for Wednesday. Here's the blurb posted online (at http://conceptlab.com/teaching/intd310/):
"Assignment for Next Class (Wednesday January 8th @ 1pm) - Prepare a 5-10 minute presentation on you and your work, providing a context for who you are, what work you've done in the past, what values are important to you, what concerns/worries you, and what your goals are for the future. Conclude the presentation with some thoughts on what you'd like to accomplish in this course. [WORTH 2% OF FINAL GRADE.]"
In other words, on Wednesday I'd like to learn more about you and your work. This helps me flex the course around your interests, talents, or working on addressing gaps in knowledge.
In particular, I'm interested in seeing a wide survey of the design work that you've done. Cram as many images as possible of your design work and go quickly through them. As an idea, just showing a bunch of images for ~10 seconds each while only giving a few verbal notes about the projects is fine for this presentation. If it is important to you, you can also show images of other objects that you've made like artwork, clothing, craft, or other things/accomplishments that are important to you. Give a 60 second highlight of one particular project that you've done that you're the proudest of. I'd also like to see your attempts at doing physical computing (especially Arduino) work, and your honest opinion about what you loved and/or hated about that process.
I also want to hear from you what you want to be taught. Here's a menu (more or less) of some of the more skill-oriented items that I can offer - and as a forewarning I've gone a bit overboard with this. These items could be done as short workshops, breakout/affinity groups, or larger themes. Take note if some of the following items pique your interests:
- Making a book together - Past books I've made include http://disobedientelectronics.com, http://conceptlab.com/criticalmaking/, http://conceptlab.com/problems/, https://vimeo.com/84977518 and others. I would oversee print production on a Risograph press. Students get free copies. We mail free copies to 100 of the world's most interesting people/libraries/places.
- Topic: What is HCI? Human computer interaction (HCI) researches the design and use of computer technology, focused on the interfaces between people (users) and computers. An introduction to the field would be provided, focusing on recent research published at ACM CHI, Designing Interative Systems (DIS) and Ubicomp conferences. Priority given to speculative/critical design research.
- Research through Design (RtD). Read stuff like https://www.interaction-design.org/literature/book/the-encyclopedia-of-human-computer-interaction-2nd-ed/research-through-design and tilt our project production schedule to a RtD-style methodology.
- Computer programming - programmatic thinking, state machine design, pseudocode, how to code/compile/debug, working with data, how programming languages differ, IDEs, code development exercises in Processing (Java), tutorials on programming visual effects, physics & particle systems and emergent behaviours using Shiffman's https://natureofcode.com/.
- CNC fabrication & 3D printing. Students would actually learn the basics of operating a CNC router, rudimentary CAM and toolpaths, laser cutting, vinyl cutter/plotter, 3D printing, custom devices.
- Embedded computer systems and "smart object" development. What is the Internet of Things? Domestic computing.
- Gizmos, Gadgets, Robotics & Mechanisms. Physical linkages, tactile interfaces, buttons, springs, rubber bands, paper clips, wheels, knobs, levers, traps, Rube Goldbergism, kludges, DIY, https://www.reddit.com/r/thereifixedit/, jugaad, frugal innovation.
- Making Your Experimental UX Project into a Printed Circuit Board.
- Consumer electronic product design and development. Tactile interface design.
- How to get experimental UX design work into exhibitions, galleries, museums, and festivals. How to travel the world for free doing odd non-commercial design work or artsy UX. (Hint: it's not easy.)
- The Politics & Impact of Design and UX.
- Artistic UX - The Crossovers Between Experimental UX & Media Arts.
- Designing Alien UX - Have Noel Rubin (https://www.instagram.com/teknoelogy/ and https://www.fastcompany.com/3025661/how-a-kid-grew-up-to-design-the-alien-uis-of-star-wars) come into class and talk about how he designed alien UX for George Lucas in Star Wars.
- Heavy Metal Madness - Learn How to Solder Metal, Weld Metal, Melt and Cast Metal while listening to the very best in heavy metal music. (Very much subject to facility availability. Music available whenever.)
- Bad Design Challenge - Make the Absolute Worst User Interface Olympics.
- Stop Just Trying to Make All Your Stuff Look Cool. Your Vision of the Future is Boring. There is No Such Thing as Universally Intuitive Design. Trying to Make Things Seamless is Often a Bad Idea. Pay Attention to the Complexity and Weirdness of Life if You Want to Make Interesting Design.
- Project Propaganda - How to Make Your Projects Look Amazing.
- A Century of Artistic Interfaces - How Artists, Builders and Designers have made artistic technological devices over the past hundred years.
- How to Come Up with Interesting Design Ideas. Hits, memes, marketing, fame, viraility and brainmagnets. Design concepts that initially strike a chord with a wide audience, but then continue far past a one-liner tagline or gag: they drill down with a substantial amount of intelligent research and design.
- Designing with Paper: Making cardboard/chipboard tactile interfaces, paper screen UX, other control panel and UX prototypes made from paper, folding, specialized cutting tools and assembly, Pepakura. Folding Techniques for Designers (Paul Jackson).
- Physical computing crash-course. Learn how to design, program, build, wire up, test, deploy your own custom device with an emphasis on UX-style haptic buttons, knobs, sliders, rocker switches, small displays and dials. See https://www.danieljolliffe.ca/cp/cp.htm or https://ewajustka.tumblr.com/ for ideas.
- How to Build an Interactive Environment. Architectural-scale design, lights, motion, sensors, outputs, sound, DMX, projection mapping concepts, science-center-ish interfaces, VJ, laser projection, LED boards, Makey Makey, Kinect. Maybe have a party or showcase at the end of the semester as a group capstone.
It's going to take forever on Wednesday afternoon if we're all talking about the points above - so for your 5-10 minute presentation, try to keep your comments on the course direction short. For example, "I hated Raspberry Pi, and I am really interested in academic and industry research in HCI, plus I'd like to hear the Star Wars guy talk" is decent enough for me to note your specific course interests. We'll take time during the second half of class on Wednesday to talk as a group about what we most want to learn. We'll strive to have a course map sketched out by the end of the class Wednesday by 3:50pm (fingers crossed).
See you Wednesday, and please forward this to those in the process of registering for this course (especially Tien - I don't have his email) or others that might want to transfer.
Thanks,
Garnet
--
Dr. Garnet Hertz
Canada Research Chair in Design and Media Arts
Emily Carr University of Art and Design
520 East 1st Avenue, Vancouver, BC, Canada V5T 0H2
WEEK 01b - January 8th 2020
- Self-Introduction Presentations: 5-10 minute presentations per person.
- [BREAK]
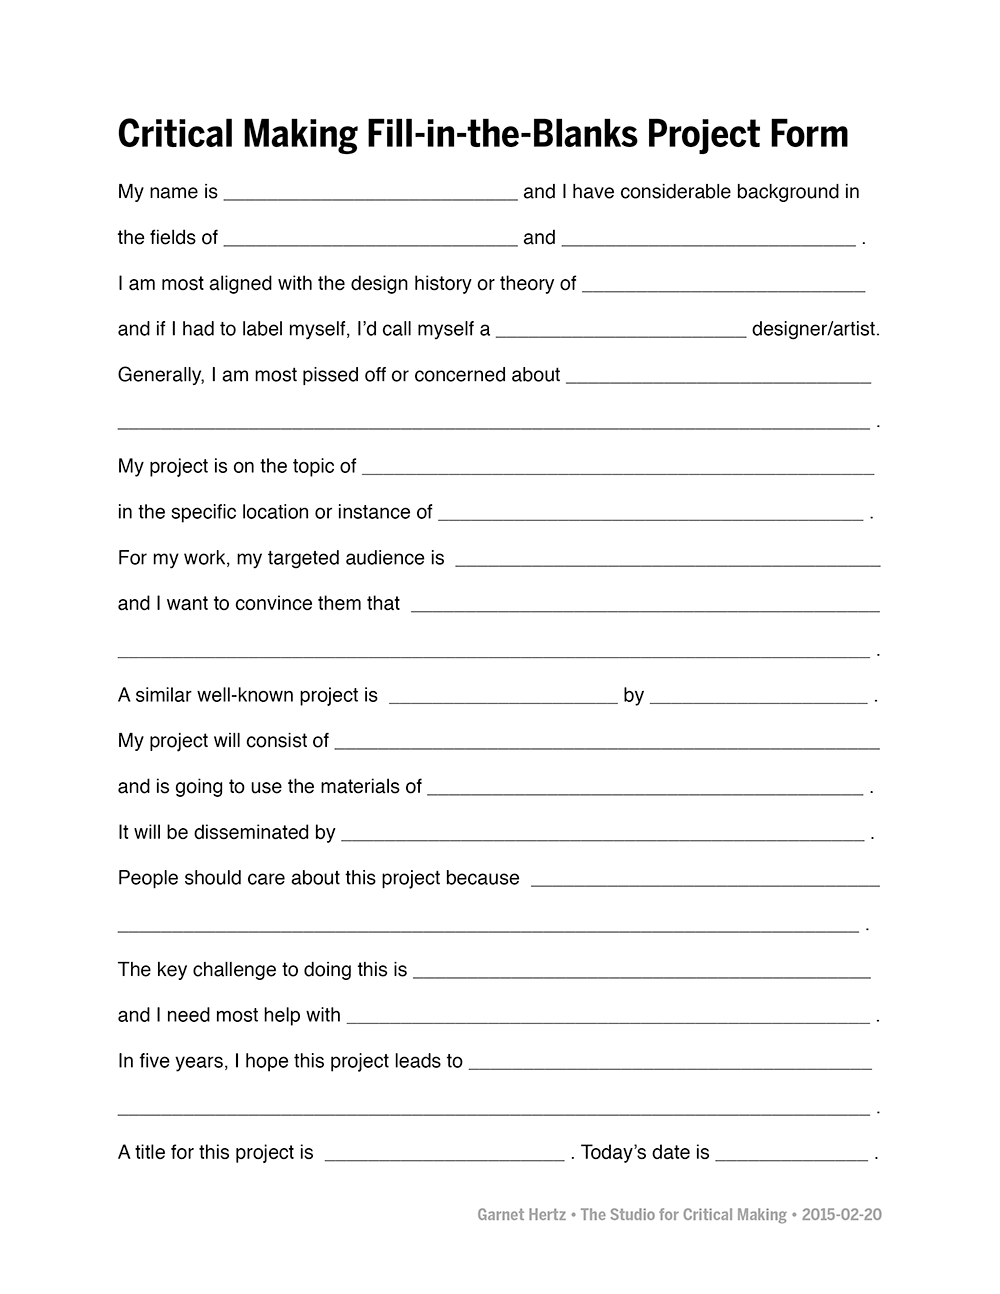
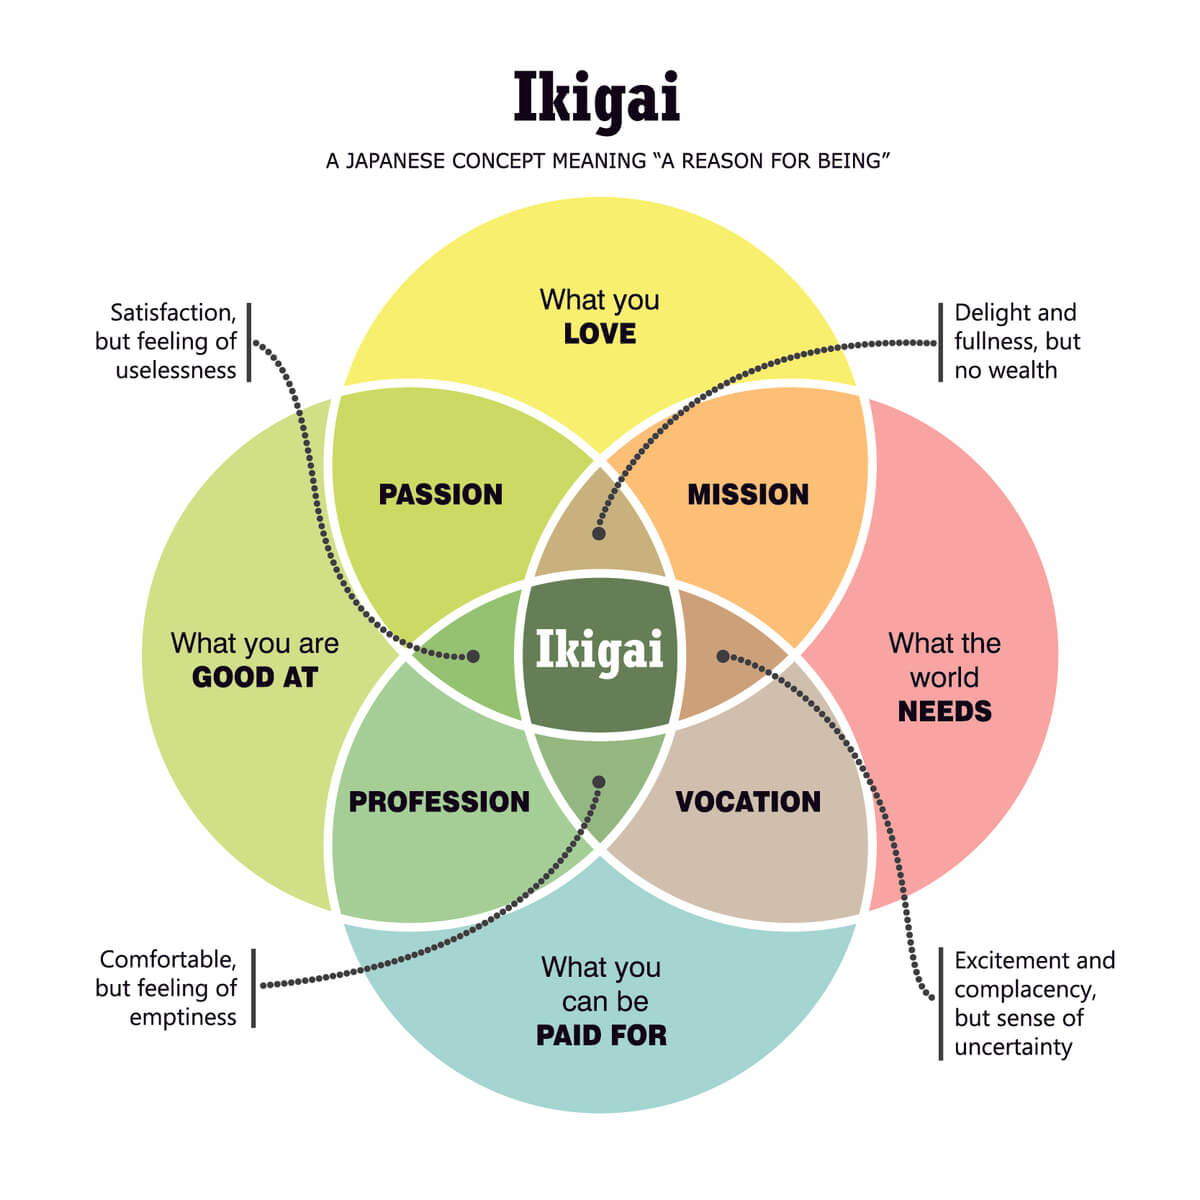
- FILL-IN-THE-BLANKS PROJECT & IKIGAI IN-CLASS ACTIVITY: Complete the "Critical Making Fill-in-the-Blanks Project Form", and fill in the "Ikigai" quadrant on the back of the page, outlining what you 1. Are good at, 2. What you love, 3. What the world needs, 4. What you can be paid for.
- Assignment for Next Class (Monday) - Prepare four one-page annotated design sketches using the prompts below.
- Speculative Design / Design Fiction: Like science fiction, an object can point to a speculative future that only partially resembles the present day. How can a designed object act as a cautionary tale about what the future might hold? In what ways might the future be distopic, and what devices might we need in it? If specific variables change and drastically alter the world (global warming, oil, water, population) what would we need to survive? What would present-day things be like if the past was considerably different (like steampunk)?
- Ludic Design: How can an object be built to be playful, ambiguous, or confusing? How can a sense of wonder or mystery in the world be enhanced?
- Critical Design: How can an electronic object be built to critique mass-market electronic products? How can an object increase mindfulness or existential awareness in the user? What happens when an object is designed that makes the user feel uneasy?
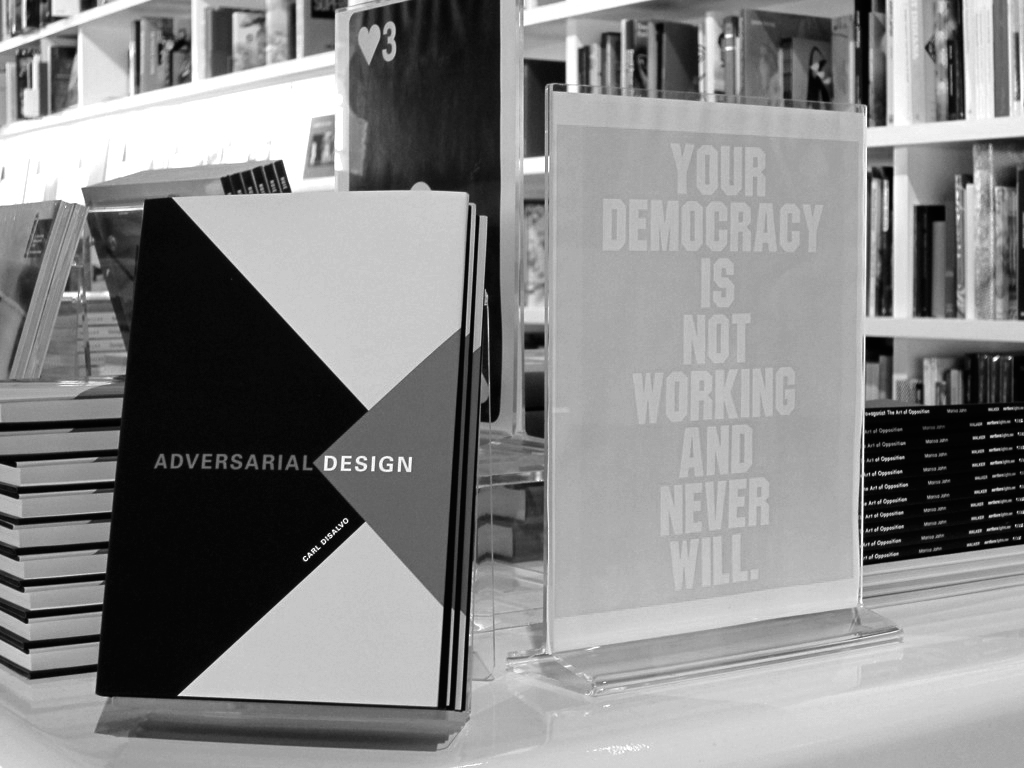
- Adversarial Design / Tactical Media / Hack: How can a project be built to be highlight the unfair use of power? What marginalized individuals, groups or opinions can be highlighted in a clever way? Who is voiceless, and how can you amplify their voice? How can existing systems be modified, hacked or misused to reveal how they are biased? What happens when an object is built to communicate an argument in an interesting way?
- Disobedient Objects: Most objects are designed to do exactly as they are told. What would happen if objects could do as they pleased? What would they want? What would they dream about? What would they do for work, fun, or entertainment?
- Unconventional Users: Most objects are built to be used by humans with ten fingers, two hands, two legs, two eyes and a 'standard' body. How would objects be designed if they were used by individuals without these types of bodies or senses? How would objects be redesigned if they did not have binary assumptions around gender? What would an object be designed like if it was built for a non-human to use?
- Slow Interaction: Most products are designed to be easy to use, quick, and efficient. How can systems be improved by slowing them down? How can focus be increased? How can interactions be made more meaningful?
- Bespokeness: How would an object be redesigned if it was highly customized for one particular person? (Do not build it for yourself: customize it for another person at least 10 years older or younger than you.)
- Reflective Design: How can an object expose the unconscious adoption of values within conventional technological products or culture? How can you highlight the biased assumptions built into the artifacts around us? What values are taken for granted? Can you make something that makes the invisible into something visible?
- Make an App-Thing: If an app would exist as a physical thing, what would it be like? What would it look like and how would it work? Alternately, how could a machine be built to use one specific app on your phone, like a piece of meat attached to a spinning shaft continually swipes Tinder?
- OK Boomer: Thoughtfully make an interactive object that highlights unique economic/social/etc issues that millennials face. Make the device legible and useable to boomers in an interesting way.
- Email sent out Friday January 10th:
Hi folks,
After hearing your presentations, talking to some of you one-on-one, and giving it some thought, I'm going to propose that the semester ahead follows this structure:
1. During the next three weeks, let's focus on generating a lot of project sketches, maquettes, and ideas. I agree with the feedback that a lot of courses slam you into committing to a concept right away. Instead, I'd like to focus on how to come up with innovative project concepts that have both wide appeal (virality) and deep insight (intelligence) - that combination is a path to creating awe-inspiring design work. This will include some reading related to current HCI research, me showing examples, buiding rapid prototype concepts, and workshopping ideas and interfaces.
2. I think that the book idea is 100% a go. I think it's a good way to disseminate our work in a novel (and durable) way that will have significant payoff in the future.
3. Making fully functional custom hardware projects (Arduino or RPi) can be super damn hard - in a course, it's a massive struggle to make something actually function like a piece of consumer electronics. If the thing has any chance of working, it is likely going to look like crap. Code examples are crashed through in a panic while quickly sinking and trying to keep your head above water. It's not fun. On the other hand, actually knowing how to code is going to be a huge asset to you when you hit the job market. To help resolve these two things, I think the following approach would be best for our group: teach a systematic step-by-step introduction to programming using Arduino. The focus would be on trying to gain an intuitive knowledge of how programming works in general, with skills that are transferrable to other programming languages and environments. Another way to think of this is for me (and Bobbi) to teach you the core skills in programming so that it is way easier for you to teach yourself to code in any language. Ardino is going to be useful if you go into exhibition design or hardware stuff, but the real moneymaker is going to be if you know enough coding concepts that can teach yourself Ruby on Rails, Python, Java, C++ or whatever else comes your way.
4. Functional hardware is hard to make - everything from the code, the soldering, the knobs/buttons, the enclosure & mechanisms can be a massive pain. I think a decent goal instead of trying to do =all= of this is to focus on the front-end UX: the enclosure, the knobs, buttons, screens, lights. In other words, focus on building stuff that looks good, but only works good enough to shoot a video or do a "smoke and mirrors" demo. One way to think of this is to build props/wireframes/devices that are "Kickstarter video" ready. This massively reduces complexity. In practical terms, this means more attention paid to front-end things you can see as opposed to back-end stuff like networking, databases, complex logic or code stability/ruggedness.
5. Let's talk about this on Monday, but I think I'll briefly teach about 3D printing. 3D printing is about 10x easier to do than CNC fabrication (especially if you're doing the CNC cutting yourself) - and it is something that for about $350 you can get a decent 3D printer on your own at a later date and do it on your own for fun or for work. I'm happy to do CNC with some people individually if their projects warrant it, but at this point I don't think it's useful for me to take everyone through the CNC journey.
6. We will do something for sure with Will Odom's class at SFU. More on Odom can be found at http://willodom.com/ and the lab he's in is http://eds.siat.sfu.ca/. We'll for sure have at least one event where we get together - and maybe have Will come for a talk/crit in our class (and vice versa with just me going to SFU and doing a talk/crit with that group).
If you're still working on the 4 annotated sketches that are due on Monday, hopefully the notes outlined above will help guide you.
Thanks, and see you Monday,
Garnet
WEEK 02a - January 13th 2020
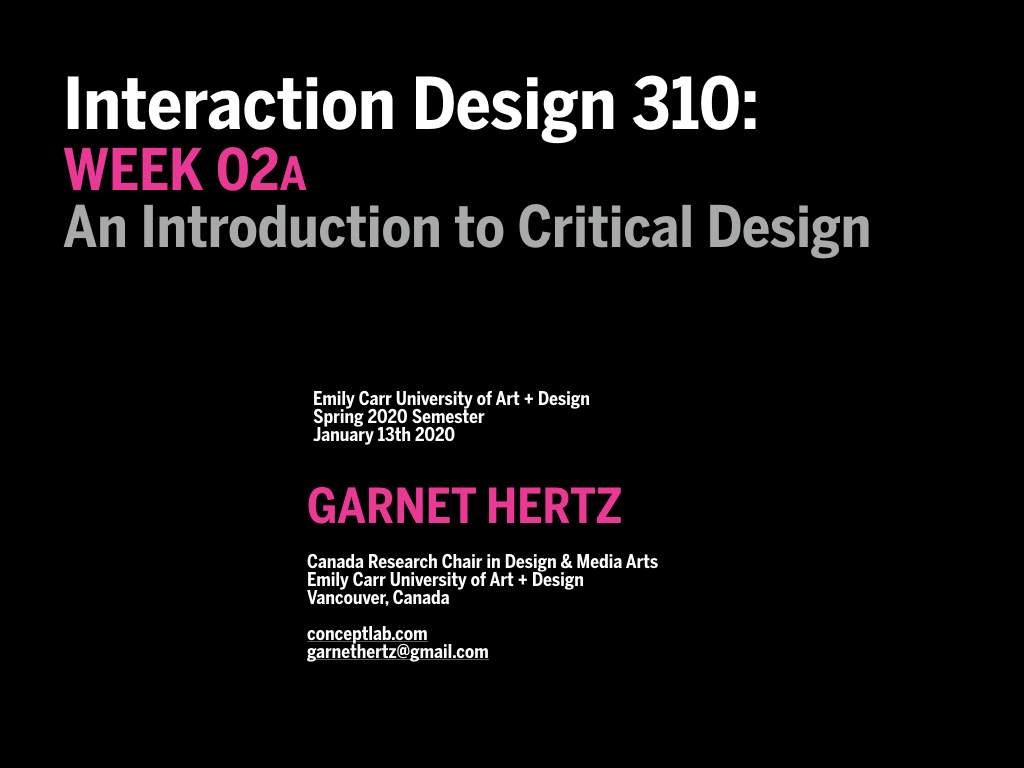
- Hertz Presentation: What is Critical Design? - Lecture Slides (114 MB PDF)
- [BREAK]
- Assignment Due Today - Four one-page annotated design sketches.
- Today's Charette Activity: Pair up with a classmate and each present your 4 project sketches to the other person. Spend 10 minutes giving each other critique on all of the projects, writing your feedback on the sketch sheets. After 10 minutes, partner up with a new person and repeat.
- Readings Due Next Class - Come to next class (Wednesday January 15th) with either one 5 minute project sketch or one direct question related to each of the following readings. Use 4 physical pieces of paper, placing either your question or your sketch on a single piece - and please indicate on the paper the your name and the reading you are responding to. Be prepared to show and share your questions/sketches with the class.:
- Introducing Adversarial Design (Carl DiSalvo) in Critical Making: Manifestos, Garnet Hertz (ed.) Telharmonium, 2012.
- Critical Design FAQ (Anthony Dunne & Fiona Raby) 2007.
- The Critical Engineering Manifesto (Oliver, Savicic, Vasiliev) 2011.
- Pick one project from Disobedient Electronics (Hertz, 2016) that most closely aligns with your interests or that you have a strong reaction to (positive or negative). Be prepared to tell the class (in 2 minutes) why you picked the project. It may help to think about what audiences you think the project was designed for, and what technical/fabrication tools were used in building the project.
WEEK 02b - January 15th 2020

- Class cancelled - Emily Carr campus closed due to snow. See https://bc.ctvnews.ca/emily-carr-university-to-remain-closed-until-oct-15-1.4630201 for details. Items slated for today will take place during the next class on Monday January 20th 2020.
WEEK 03a - January 20th 2020
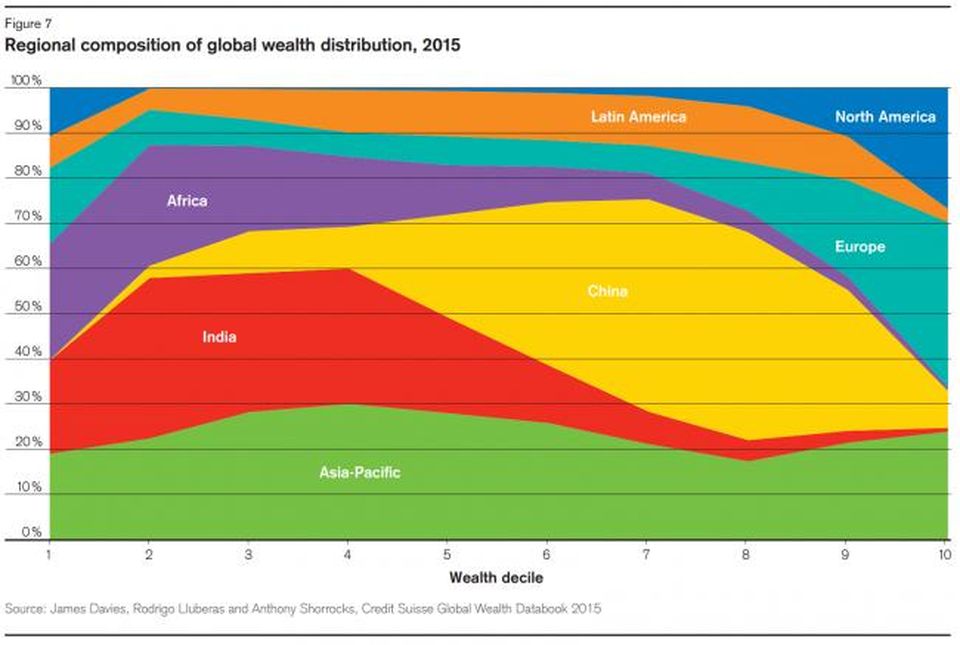
- Welcome Video - The 79 Percent Work Clock (2016) [2 minutes: start class at 1:03pm, 1:03-1:05]
- Course Roadmap Discussion [10 minutes, 1:05-1:15]
WEEK DATE ACTIVITY Week 01 Jan 06/08 Design Charettes, Reading, Project Brainstorm Sketches Week 02 Jan 13/14 What is Critical Design, Project Brainstorm Sketches, Reading Week 03 Jan 21/23 WE ARE CURRENTLY HERE - Project Brainstorm Sketches, Reading, Programmatic Thinking (Logic Diagrams, Program Organization) Week 04 Jan 27/29 More Project Brainstorm Sketches, Reading, Programmatic Thinking (Writing Pseudocode, Arduino Desktop IDE) Week 05 Feb 03/05 Guest Speaker, Even More Project Brainstorming, Rapid Prototyping (cardboard), Reading, Sensors / Switches Week 06 Feb 10/12 Selection of Project, 3D Printing Tutorial, Arduino Syntax, Installing Libraries Week 07 Feb 17/19 Reading Week - No Class (Fabrication and Coding) Week 08 Feb 24/26 Semifunctional Cardboard Project Due, Peer Reviews, Actuators / Displays / Creative Output Week 09 Mar 02/04 Continue Fabricating Project or Ditch it and Pick a New One Week 10 Mar 09/11 Finishing Techniques, Code Stability, Drafting a Project Statement Week 11 Mar 16/18 Functional Project Due, Peer Reviews Week 12 Mar 23/25 Refinements, Documentation, Project Statements Week 13 Mar 30/01 Documentation Due, Project Statements Due, Book Layout Due Week 14 Apr 06/08 Book Production (print, fold, bind, trim, ship) TBD TBD Party/Event (Date to be determined, possibly April 08) - Readings Due Today - Bring out either one 5 minute project sketch or one direct question related to each of the following readings. Ensure that you have used 4 physical pieces of paper, placing either your question or your sketch on a single piece - and please indicate on the paper the your name and the reading you are responding to. Be prepared to show and share your questions/sketches with the class today:
- First, let's discuss Introducing Adversarial Design (Carl DiSalvo) [10 minutes, 1:15-1:25]
- Second, let's discuss Critical Design FAQ (Anthony Dunne & Fiona Raby) 2007. [10 minutes, 1:25-1:35]
- Thirdly, let's discuss The Critical Engineering Manifesto (Oliver, Savicic, Vasiliev) 2011. [10 minutes, 1:35-1:45]
- Lastly, let's hear which project from Disobedient Electronics (Hertz, 2016) that you picked. The assignment was that you were to pick a project that most closely aligns with your interests or that you have a strong reaction to (positive or negative). Tell the class (in 2 minutes) why you picked the project. It may help to think about what audiences you think the project was designed for, and what technical/fabrication tools were used in building the project. [30 minutes, 1:45-2:15]
- First, let's discuss Introducing Adversarial Design (Carl DiSalvo) [10 minutes, 1:15-1:25]
- BREAK [15 minutes, 2:15-2:30]
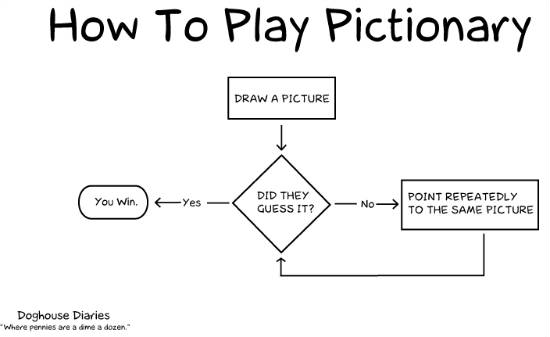
- Let's start our tutorials on programming, beginning with the idea of sketching the logic of a program. We will use a simplified version of a state machine diagram. [30 minutes, 2:30-3:00]
- Activity: Let's try to make a simplified logic diagram (or "directed graph") of Phone Safe 2.1 - here's a video of it in operation. [30 minutes, 3:00-3:30]
- Let's draw circles for the states, and labelled arrows for the inputs/transitions.
- For the time being, the most important thing to remember is that diagramming out a flowchart or state machine diagram of how you want a thing/system to work is a good step to help you understand how to code.
- For our purposes today, we will only be doing simple states (circles) with transitions (arrows) - also called a 'directed graph'. We will not be using truth/state tables, complex input-output, flow chart symbols, Mealy machines, etc.
- QUESTIONS [5 minutes, 3:30-3:35]
- IKIGAI ACTIVITY [10 minutes, 3:35-3:45]
- WHITEBOARD DISCUSSION: What does the world need? What do you hate, or what really bothers you? What issues are important to you?
- WHITEBOARD DISCUSSION: What does the world need? What do you hate, or what really bothers you? What issues are important to you?
- Assignment due for next class [15 minutes, 3:45-3:50]
- First, watch this video (especially the first 6 minutes):
- Next, spend 15 minutes filling out the pink Ikigai sheet with written details about: A. what you are good at, B. what you love, C. what the world needs, and D. what you can be paid for.
- Lastly, prepare one annotated project sketch per quadrant, spending 15 minutes on each sketch. Complete 4 sketches. Please use single sheets of 8.5" x 11" (letter) paper and include the date and your full name. Your sketches should incorporate some aspect of physical computing; in other words the sketches should involve some form of computer-based system in some physical shape. (Optional: If desired, you can use categories from January 8th outlined above - Speculative Design / Design Fiction, Ludic Design, Critical Design, etc. - to help guide your designs.)
- Estimated time to complete assignment: 1.5 hours - WORTH 2% OF FINAL GRADE. (Grading Rubric: Do 4 sketches of any quality: C. Do 4 sketches of decent quality: B. Do 4 sketches of good quality w attention to detail: A. Using 4 pieces of physical paper and including name and date: +1 lettergrade.
- First, watch this video (especially the first 6 minutes):
WEEK 03b - January 22nd 2020
- WELCOME VIDEO - Rafael Lozano-Hemmer [5 minutes - 1:05-1:10]
- IKIGAIFEST - It's going to be a party! (official soundtrack) [55 minutes total - 1:10-2:15]
IKIGAIFEST SHARING - You've filled out the pink Ikigai sheet with written details about: A. what you are good at, B. what you love, C. what the world needs, and D. what you can be paid for. We also have completed one annotated project sketch per quadrant. Let's do mini-presentations where each person takes 5 minutes to show their diagrams and their 4 project sketches at the front of the class. Let's discuss and give feedback to each person. - DISCUSSION - What does the world really need?
- BREAK [15 minutes - 2:15-2:30pm]
- TECH WORKSHOP / DISCUSSION: [60 minutes - 2:30-3:30pm]
- What can an Arduino do and not do?
- What is a computer program?
- How is code structured?
- ASSIGNMENT: [10 minutes - 3:30-3:50pm]
Prepare two (2) detailed project proposals that describe final term projects that you might do. USE THE RUBRIC BELOW INITIALLY FROM JANUARY 8th. You can reuse the ideas from sketches you've already done in the class, but please revise them. Include a: 1. an annotated sketch, 2. a short description of what the project would be trying to do, and 3. an attempt at a state machine diagram of how it would work. TAKE ONE HOUR PER SKETCH/PROJECT: 2 HOURS TOTAL
- Speculative Design / Design Fiction: Like science fiction, an object can point to a speculative future that only partially resembles the present day. How can a designed object act as a cautionary tale about what the future might hold? In what ways might the future be distopic, and what devices might we need in it? If specific variables change and drastically alter the world (global warming, oil, water, population) what would we need to survive? What would present-day things be like if the past was considerably different (like steampunk)?
- Ludic Design: How can an object be built to be playful, ambiguous, or confusing? How can a sense of wonder or mystery in the world be enhanced?
- Critical Design: How can an electronic object be built to critique mass-market electronic products? How can an object increase mindfulness or existential awareness in the user? What happens when an object is designed that makes the user feel uneasy?
- Adversarial Design / Tactical Media / Hack: How can a project be built to be highlight the unfair use of power? What marginalized individuals, groups or opinions can be highlighted in a clever way? Who is voiceless, and how can you amplify their voice? How can existing systems be modified, hacked or misused to reveal how they are biased? What happens when an object is built to communicate an argument in an interesting way?
- Disobedient Objects: Most objects are designed to do exactly as they are told. What would happen if objects could do as they pleased? What would they want? What would they dream about? What would they do for work, fun, or entertainment?
- Unconventional Users: Most objects are built to be used by humans with ten fingers, two hands, two legs, two eyes and a 'standard' body. How would objects be designed if they were used by individuals without these types of bodies or senses? How would objects be redesigned if they did not have binary assumptions around gender? What would an object be designed like if it was built for a non-human to use?
- Slow Interaction: Most products are designed to be easy to use, quick, and efficient. How can systems be improved by slowing them down? How can focus be increased? How can interactions be made more meaningful?
- Bespokeness: How would an object be redesigned if it was highly customized for one particular person? (Do not build it for yourself: customize it for another person at least 10 years older or younger than you.)
- Reflective Design: How can an object expose the unconscious adoption of values within conventional technological products or culture? How can you highlight the biased assumptions built into the artifacts around us? What values are taken for granted? Can you make something that makes the invisible into something visible?
- Make an App-Thing: If an app would exist as a physical thing, what would it be like? What would it look like and how would it work? Alternately, how could a machine be built to use one specific app on your phone, like a piece of meat attached to a spinning shaft continually swipes Tinder?
- OK Boomer: Thoughtfully make an interactive object that highlights unique economic/social/etc issues that millennials face. Make the device legible and useable to boomers in an interesting way.
- NEXT CLASS: BRING LAPTOPS, ARDUINOS, and ALL OF YOUR PAST SKETCHES TO SUBMIT
WEEK 04a - January 27th 2020
- WELCOME KEYNOTE - Interaction Design 310: WEEK 04a - Some detailed ikigai sketch feedback [30 minutes - 1:05-1:35]
- TODAY'S SKETCHES - [40 minutes - 1:35-2:15] - Let's put them on whiteboard, each person presents on their sketches (4 mins max each person).
- [BREAK] - [15 minutes - 2:15-2:30]
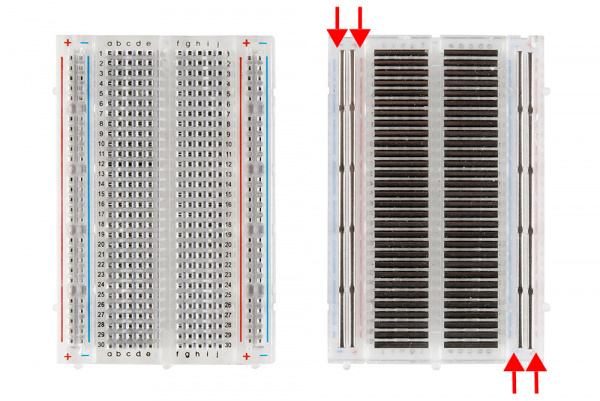
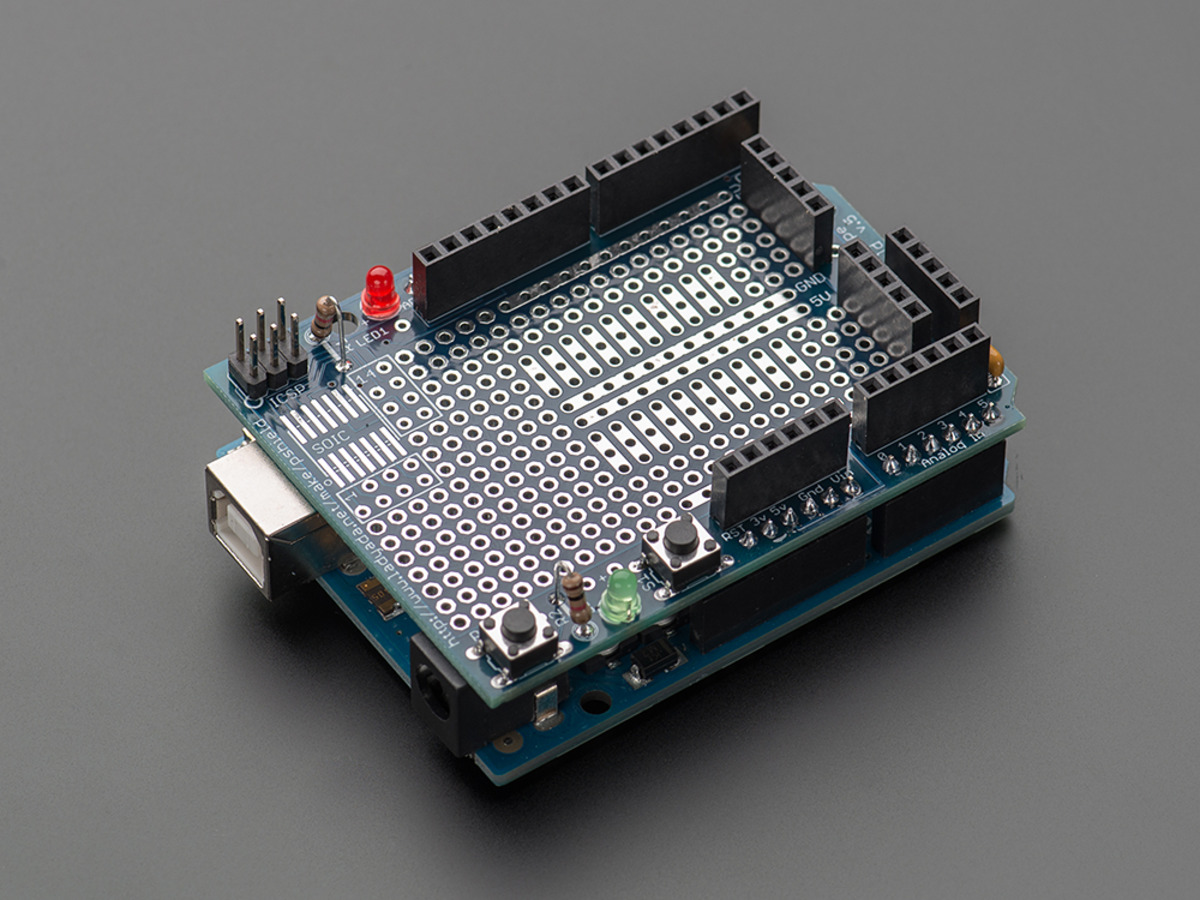
- LET'S REVIEW A FEW BASICS - [10 minutes - 2:30-2:40] - How a breadboard works. See https://learn.sparkfun.com/tutorials/how-to-use-a-breadboard for details if this is new to you.
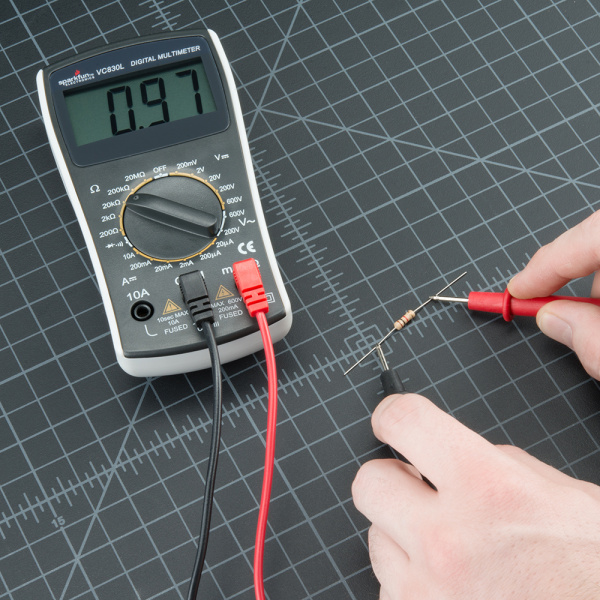
- LET'S REVIEW A FEW BASICS - [10 minutes - 2:40-2:50] - How to use a multimeter (also called a voltmeter) to test resistors. See https://learn.sparkfun.com/tutorials/how-to-use-a-multimeter/measuring-resistance for a good overview
- ACTIVITY [50 minutes - 2:50-3:40] : Work on your projects, talk to classmates to see if you want to consolidate and work on a group project. Try to form some affinity groups around topics or technologies. Start on your assignment for next class (see below) - a 5 minute PowerPoint presentation on what project you propose to do in this course.
- ACTIVITY (Simultaneously happening): Hertz talk to each student one-on-one about their projects, 5 minutes each. [50 minutes - 2:50-3:40]

- ASSIGNMENT FOR NEXT CLASS [10 minutes - 3:40-3:50] : Finalize what you are going to attempt for a project for the term. It is okay if this evolves over the semester. Ambitious team projects are welcomed. Prepare a 5 minute visual PowerPoint presentation (which will be submitted as a PDF) that outlines in more detail how you plan on executing your project. This should include a shopping list of what supplies and parts you think you might need to pull this off. If it is a team project, determine who will be on the project and specific details about what each person will be doing. It is highly suggested that you include a proposed timeline for your project. If helpful, you can include a SWOT Analysis, although this is optional. [2 HOURS WORK EACH PERSON, worth 4% of final grade]
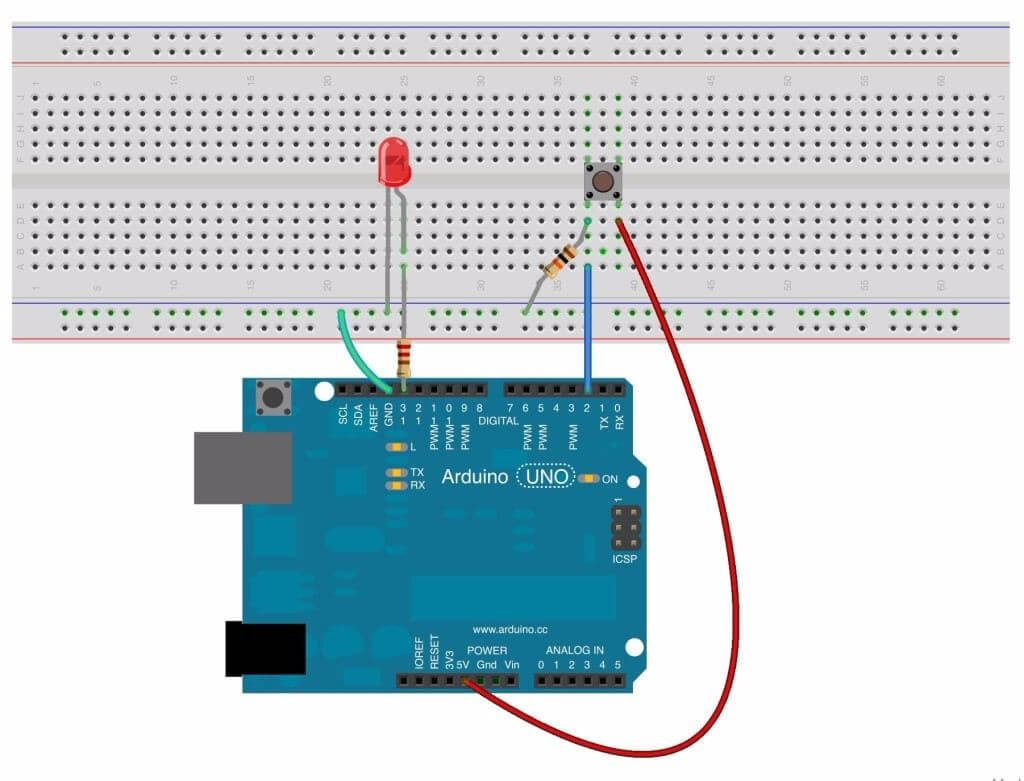
- BONUS POINT ASSIGNMENT FOR NEXT CLASS: Make an attempt to complete https://www.programmingelectronics.com/tutorial-17-using-a-button-old-version/ (+1% FINAL GRADE Bonus Points if you complete this before class and send me an emailed photo of it working). We will thoroughly review this sketch during next class.
- INVITE: I have a couple pieces in the faculty show on the 2nd floor opening on Thursday @ 4pm - you're welcome to come if you like. (Not graded, but apparently there are free refreshments.)
Week 04b - January 29th 2020
- OPENING 10-SECOND STAND-UP COMEDY ROUTINE: I thought I saw one of you a couple days ago walking along the street, but it wasn't him. Colby?
- PRESENTATIONS! [5 minutes each - 1:05-2:00] : Present a 5 minute visual PowerPoint presentation (which will be submitted as a PDF emailed to garnethertz@gmail.com) that outlines in more detail how you plan on executing your project. This should include a shopping list of what supplies and parts you think you might need to pull this off. If it is a team project, determine who will be on the project and specific details about what each person will be doing. It is highly suggested that you include a proposed timeline for your project. If helpful, you can include a SWOT Analysis, although this is optional. [2 HOURS WORK EACH PERSON, worth 4% of final grade - email PDF today before 4pm to garnethertz@gmail.com]
- ARDUINO CODING MINI-TUTORIAL: [15 minutes - 2:00-2:15] Let's all walk-through and complete https://www.programmingelectronics.com/tutorial-17-using-a-button-old-version/ - this is a basic Arduino sketch that provides several of the basics
- [BREAK] [15 minutes - 2:15-2:30] Meet back at after the break in my studio - C4246 at 2:30pm sharp!
- FIELD TRIP [5 minutes - 2:30-2:35] The Studio for Critical Making, Room C4246. We will be gone from here by 2:35 and will be returning back to the classroom (WIP Lab).
- 5 MINUTES ON DESIGN CONSIDERATIONS FOR 3D PRINTING vs CNC [5 minutes - 2:40-2:45]
- SOLDERING DEMO: [15 minutes - 3:20-3:35] Soldering is easy! (Guide by Mitch Altman)
- CARDBOARD + ARDUINO BUTTONLIGHT + SOLDERING CHALLENGE: Attempt to make a 'functioning' cardboard prototype of your project concept, using the Button Arduino sketch. Practice your soldering skills by soldering wires (approximately 30 cm in length) to each leg of the LED and the button.
- ASSIGNMENT: Due Monday, worth 2% of final grade.
- Solder wires (red for positive, black for negative) of about 30 cm in length to your LEDs. Add shrink wrap to your soldered connections.
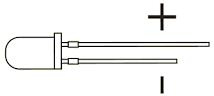
- Solder wires (any color) of about 30 cm in length to a button.
- Come to class on Monday and be prepared to do one-on-one desk crits with Amelia Guimarin and Noel Rubin. The more you bring/present, the better quality feedback you'll get.
- Solder wires (red for positive, black for negative) of about 30 cm in length to your LEDs. Add shrink wrap to your soldered connections.
- INVITE: I have a couple pieces in the faculty show on the 2nd floor opening on Thursday @ 4pm - you're welcome to come if you like. (Not graded, but apparently there is unlimited free refreshments.)
Week 05a - February 3rd 2020
- HERTZ GONE: Hertz is currently away presenting at the Disruptive Design and Digital Fabrication Symposium at York University's School of the Arts, Media, Performance & Design.
- OVERVIEW: Today's guest instructors are Amelia Guimarin and Noel Rubin. Rubin will start with a 20 minute overview of his interaction design work, then both Guimarin and Rubin will do short desk crits giving feedback on each of your projects. While desk crits are in progress, attempt to make a cardboard model of your project that uses the Button circuit (above) with the cardboard to approximate your system.
- GUIMARIN ATTENDANCE: Amelia Guimarin takes attendance. While taking attendance, have each person show their soldered LED and button that was due today (assignment outlined above). The soldered connections should have shrinkwrap.
- NOEL RUBIN PRESENTATION: Noel Rubin gives a 20 minute overview of his interaction design work.
- DESIGN CHARETTE: Make a cardboard model of your proposed term project. This can be full size (preferred) or a scale model. Build the maquette out of cardboard and hot glue. You may use other materials if you like. Mount the Button circuit inside of the device, and use the circuit as a stand-in for your final circuit. Attempt to implement your button in a way that illustrates how users will interact with your project. The goal of this exercise is to think about the physical form and dimensions of your system.
- DESK CRITS: Running simultaneously with the design charette (above), both Amelia Guimarin and Noel Rubin will meet with each student to give them feedback on your project. The more you bring/present about your project, the better quality feedback you'll get.
- [15 MINUTE BREAK AT SOME POINT]
- DUE NEXT CLASS: Complete your cardboard model of your proposed term project. This can be full size (preferred) or a scale model. Build the maquette out of cardboard and hot glue. You may use other materials if you like. Mount the Button circuit inside of the device, and use the circuit as a stand-in for your final circuit. If needed, the button wire length and button type can be modified. Attempt to implement your button in a way that illustrates how users will interact with your project. The goal of this exercise is to think about the physical form and dimensions of your system. You may make more than one model if you like. SPEND UP TO 2 HOURS TOTAL ON THIS ASSIGNMENT. WORTH 3% of FINAL GRADE. Please bring this completed model on Wednesday.
Week 05b - February 5rd 2020
- HERTZ BACK: I was away presenting at the Disruptive Design and Digital Fabrication Symposium at York University's School of the Arts, Media, Performance & Design.
- Photos and press coverage. (Provide overview of work shown at conference/exhibition.)
- Tips on travelling with projects: everything that can go wrong will go wrong.
- The economics of travelling with projects: honoraria, fees, expenses.
- REVIEW: How did Monday go with Amelia Guimarin and Noel Rubin?
- PRESENTATION OF MODELS: Let's share our cardboard models of our proposed term projects. Were you able to implement your button in a way that illustrates how users will interact with your project? How are you thinking about the physical form and dimensions of your system? You may make more than one model if you like. (2 HOURS / WORTH 3% of FINAL GRADE).
- [15 MINUTE BREAK AT SOME POINT]
- CODE EXAMPLE 1: http://www.arduino.cc/en/Tutorial/Fade
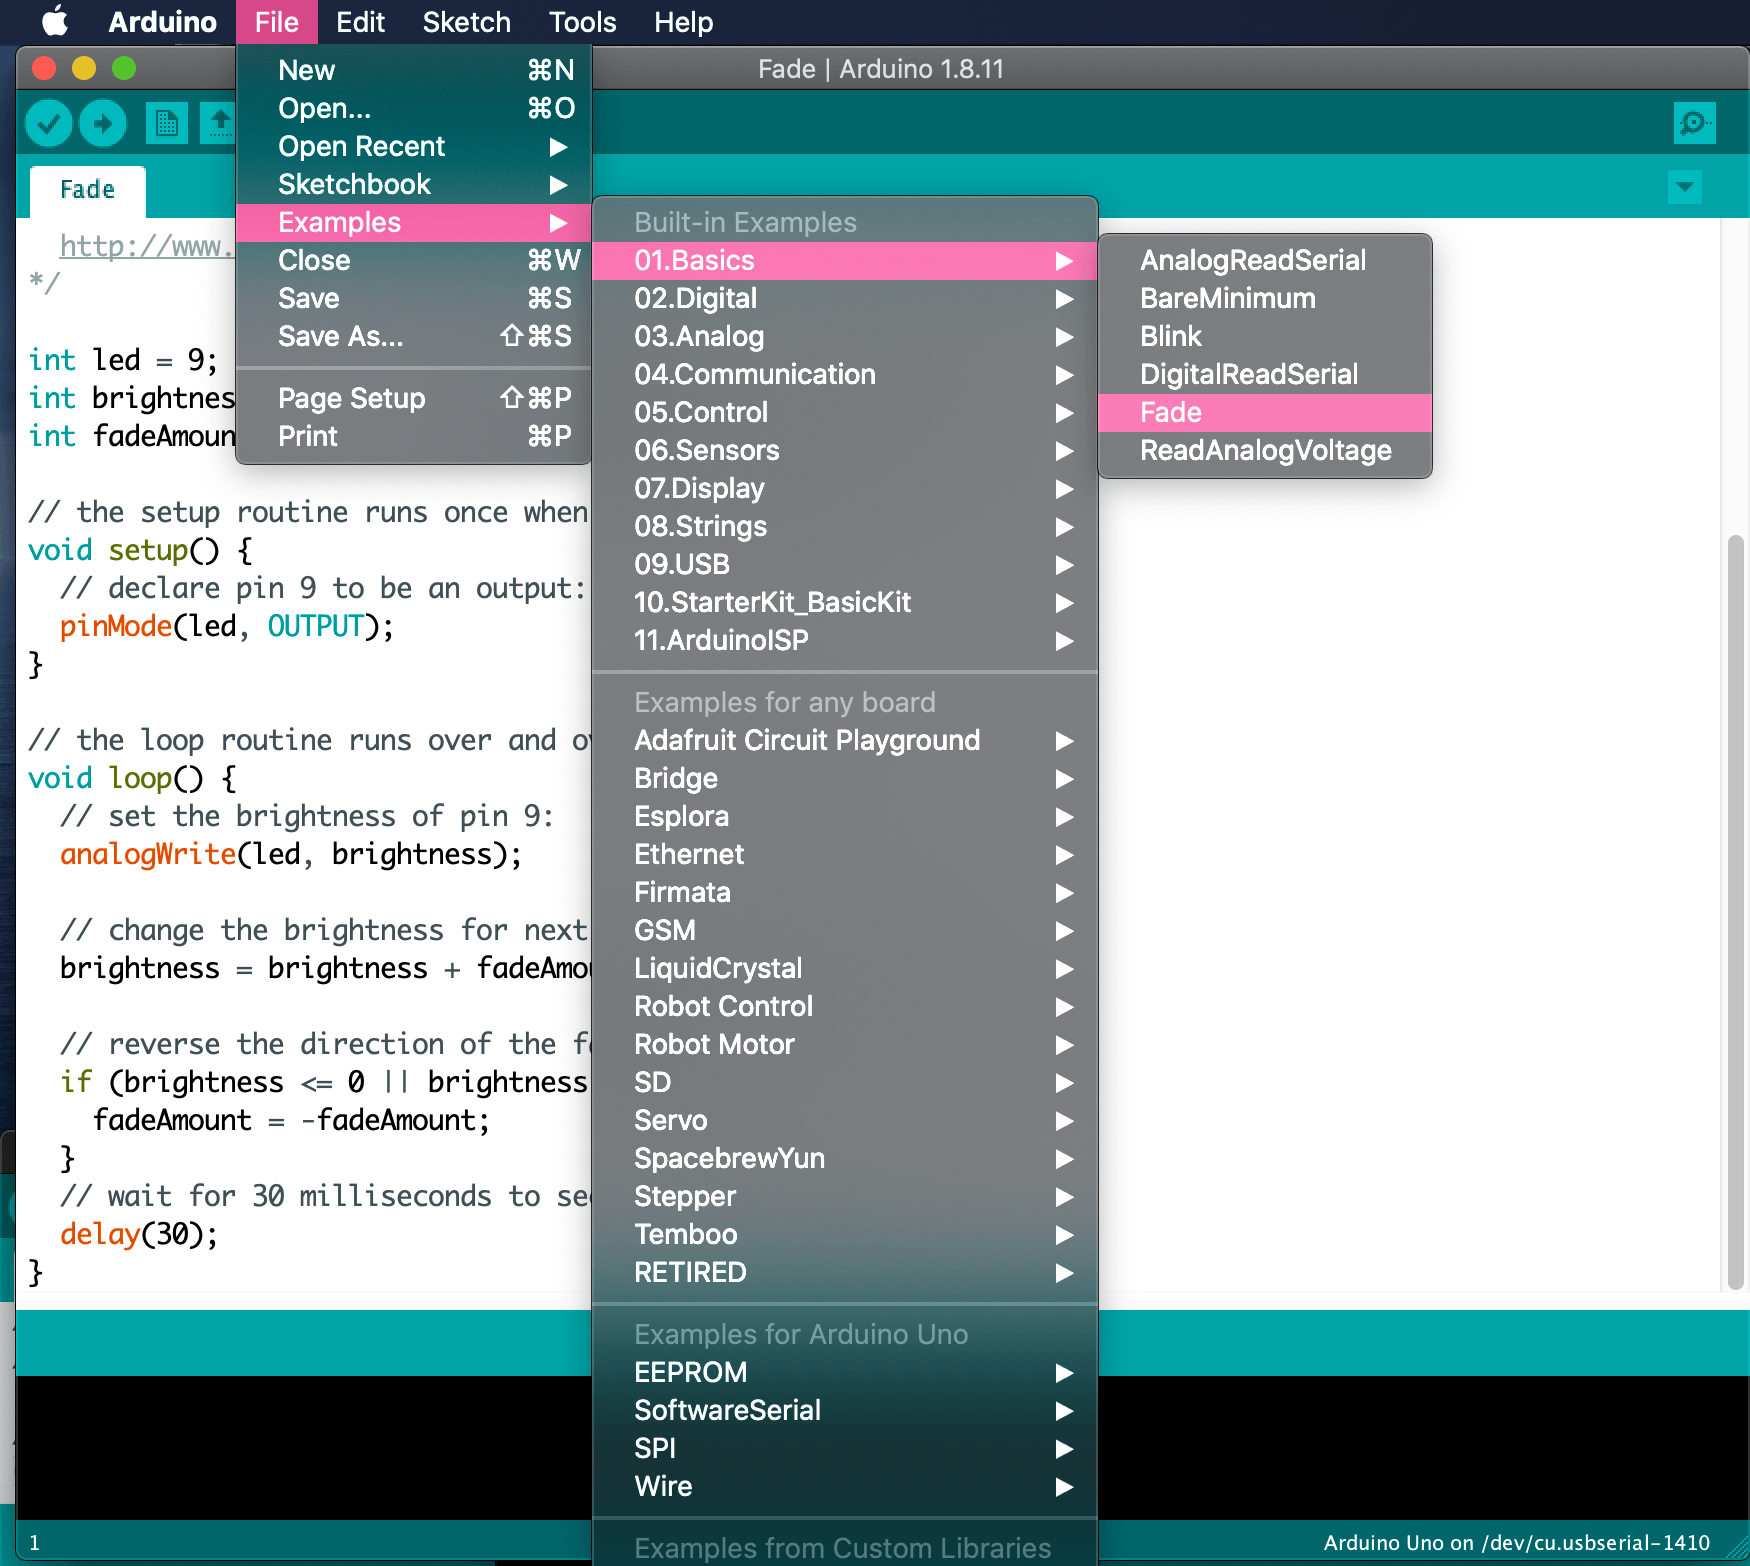
Fade: This example shows how to fade an LED on pin 9 using the analogWrite() function.
It is also a good example to start to understand the main program loop (void loop() {}) and variables: pay special attention to thebrightnessandfadeAmountvariables, and especially this:
  if (brightness <= 0 || brightness >= 255) {

    fadeAmount = -fadeAmount;

  }
- CODE EXAMPLE 2: http://www.arduino.cc/en/Tutorial/IfStatement

Conditionals - If statement


  This example demonstrates the use of if() statements.

  It reads the state of a potentiometer (an analog input) and turns on an LED
  only if the potentiometer goes above a certain threshold level. It prints the
  analog value regardless of the level.


  The circuit:

  - potentiometer

    Center pin of the potentiometer goes to analog pin 0.

    Side pins of the potentiometer go to +5V and ground.

  - LED connected from digital pin 13 to ground


  - Note: On most Arduino boards, there is already an LED on the board connected

to pin 13, so you don't need any extra components for this example. - DESK CRITS: Hertz will meet with students to give them feedback on their projects. The more you bring/present about your project, the better quality feedback you'll get.
- DUE MONDAY: Choose one subcomponent (physical part, circuit, some code, anything) of your final term project and complete it for Monday's class. Spend more than 90 minutes on this.
- EMAIL SENT FEB 6th 2020:
Hi everybody,
One thing that has repeatedly come up in discussing people's projects one-on-one with them is the idea of writing up a detailed persona for your project. In other words, pretend as if your project had a personality: is it curious, slow-moving and tender, aggressive, paranoid, neurotic, needy, or a diva?
Taking a human-like approach to thinking of your project is one way to help make something truly interesting and innovative. If you think about it, many, many consumer projects are simply servants-in-waiting without much personality. Siri, for example is very bland. One way to think of the role of smaller-scale designers (startups, R&D labs, artsy types, design innovators) is to hit outside of the ordinary and "average" kind of approach that if it was a pizza would be a bland cheese-and-sauce general purpose variety thing.
I really think that this also has to do with similar concerns with inclusivity in design - it's not just wierdo stuff in a gallery. Adding more personality and uniqueness to your work is a similar move to thinking about users in a broader and expanded sense. Both involve getting outside of yourself and thinking about the world from different perspectives. It's partially about learning to be empathetic.
So, if you're stuck on figuring out how your projects should actually work, draw up a personality profile (persona) and a backstory around your project as if it was a person or an animal. I'll use Brandon's and Dianne's projects as examples:
FISH TANK THAT DUMPS WATER AS AN ALARM
Questions to answer:
- Why does it want to dump the water? What motivates it?
- Why does it care if the person sleeps in or not?
- What does it think of fish? Does it care about them? Love them? Hate them? Want to kill them? Why?
HEARTBEAT MUSIC PLAYER
Questions to answer:
- Does it like when people stick fingers into it? Does it please it? Annoy it?
- Is it hungry for fingers? Does it like the taste of fingers?
- What is the device's relationship to music? Why music? What kind of music does it like? Why?
Figuring out these details - to actually enter the mindset of the object - is a key to making a project that people percieve as magical. It's also essential to make complex and emergent intelligent behaviour (AKA "personality") in an interactive system. If you want to learn more about how to make very complex behaviours using simple programming, see https://www.youtube.com/watch?v=A-fxij3zM7g about Braitenburg Vehicles - truly understanding this will (hopefully) blow your mind in terms of easily making complex behaviour. The video also walks through an Arduino code example. This principle of giving things personalities (through logic rules) can be applied to visual drawings as well to make incredilby complex things: https://reas.com/compendium_lecture/ is an example.
Hopefully this is helpful. Let's continue the discussion on Monday.
I also encourage you to come visit me in the gallery if you'd like to chat about your projects.
Thanks,
Garnet
Week 06a - Monday February 10th 2020
- PROJECTFEST TODAY!
- DUE TODAY: Show one subcomponent (physical part, circuit, some code, anything) of your final term project and complete it for Monday's class. Spend more than 90 minutes on this.
- ASSIGNMENT: Make a 1. Personality profile for your project, 2. Create a Bill of Materials ("BOM") with specific parts, part numbers, suppliers, cost, ordering considerations (time). Have both of these approved by Hertz (and optionally Kozinuk).
- PROJECTFEST: Work on your projects today.
Week 06b - Wednesday February 12th 2020
-
Hi!
I woke up sick, but still want to meet with you today.
Let's still plan on having a work session today, and I'll log in at 1pm on Hangouts, Skype, etc. - I'd like to talk to each of you about your projects. It'd be fabulous if one of you could connect once w me and pass your laptop around the room.
Google Hangouts: garnethertz@gmail.com
Skype: garnethertz
As usual, Bobbi will be there today (but gone for two weeks after Friday).
As a reminder, there is no class next week - it's reading week. After this is midterm in the semester, and on Feb 24th (Monday) I'd like 5 minute presentations of a fully functioning prototype of your projects. I'll flesh out more details after I talk to everyone and see where each of you are at.
Thanks - take care, and talk to you soon,
Garnet
READING WEEK - February 17-21 2020

(image: Casey Reas)
-
Hi everybody - hope you're having a great reading week. I'm feeling much better now, and I wanted to send out an email update.
I hope you're all busy building your projects - see below for details about what's in store for Monday when we get back:
3D PRINTING TUTORIAL
The plan for Monday is that I will provide a tutorial on 3D printing, and I will address design considerations between 3D printing, CNC and laser cutting. We will then have a walk-through tour of the 3D printing / laser cutting lab, and I've arranged that the technician (Logan Mohr) will give a live demo of the systems there. It should be fun!
PEER REVIEW SESSION
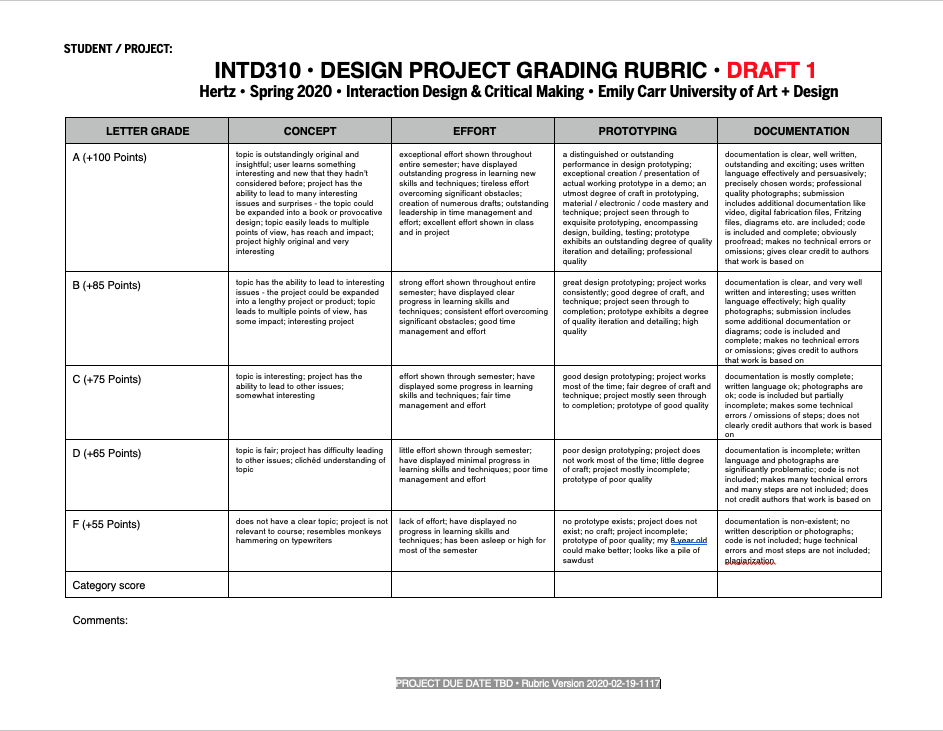
For Monday, we're also going to do some peer evaluation of each other's projects, so please bring all of your sketches, code, cardboard, circuits, prototypes, or whatever you have available. Bring everything you have. We will be using the attached draft grading rubric for this - please have a look at it. This rubric is also up for debate/feedback - I'm proposing that this is the main way your studio work will be evaluated, so we'll also be reviewing this on Monday.
CODE QUESTIONS
Have you run into a roadblock with the code in your project? Do you have specific code questions? If so, send your questions (and code!) my way - I'll try to pick one example to go over and explain in class. Just email me!
If you have general questions about your project - shopping lists, your idea, how to try to implement something, etc. - please also email me. I've set up evening Google Hangouts calls with some people that are wanting to chat about their projects - I'm happy to do this with you if you like.
That's it for now - talk to you soon, and see you Monday!
Garnet
Week 07a - Monday February 24th 2020
- RUBRIC PREVIEW + 5 MIN DEMOS + 3D PRINTING FIELD TRIP + HOW TO PUT TWO SKETCHES TOGETHER (CODE MASHING TECHNIQUES)!
- NEW CHEAT SHEET POSTER! https://github.com/liffiton/Arduino-Cheat-Sheet/blob/master/Arduino%20Cheat%20Sheet.pdf
- RUBRIC: Here's the proposed grading rubric I emailed out last week - let's briefly discuss it: [1:05pm-1:10pm]
- 15 MINUTE REVIEW ON THE DIFFERENCES BETWEEN 3D PRINTING, LASER CUTTING, CNC [2pm-2:15pm]
- Here's a quick diagram reviewing some of the differences between formative (making molds), subtractive (laser, CNC), and additive (3d printing) processes.
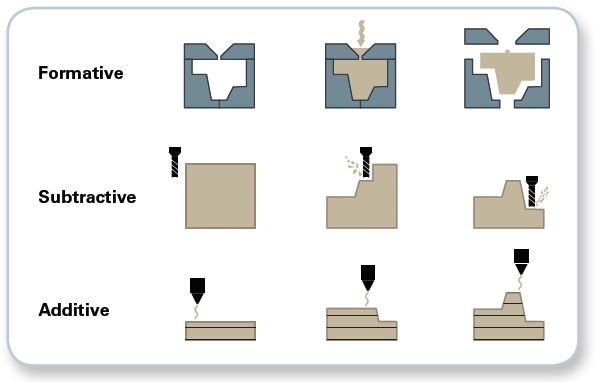
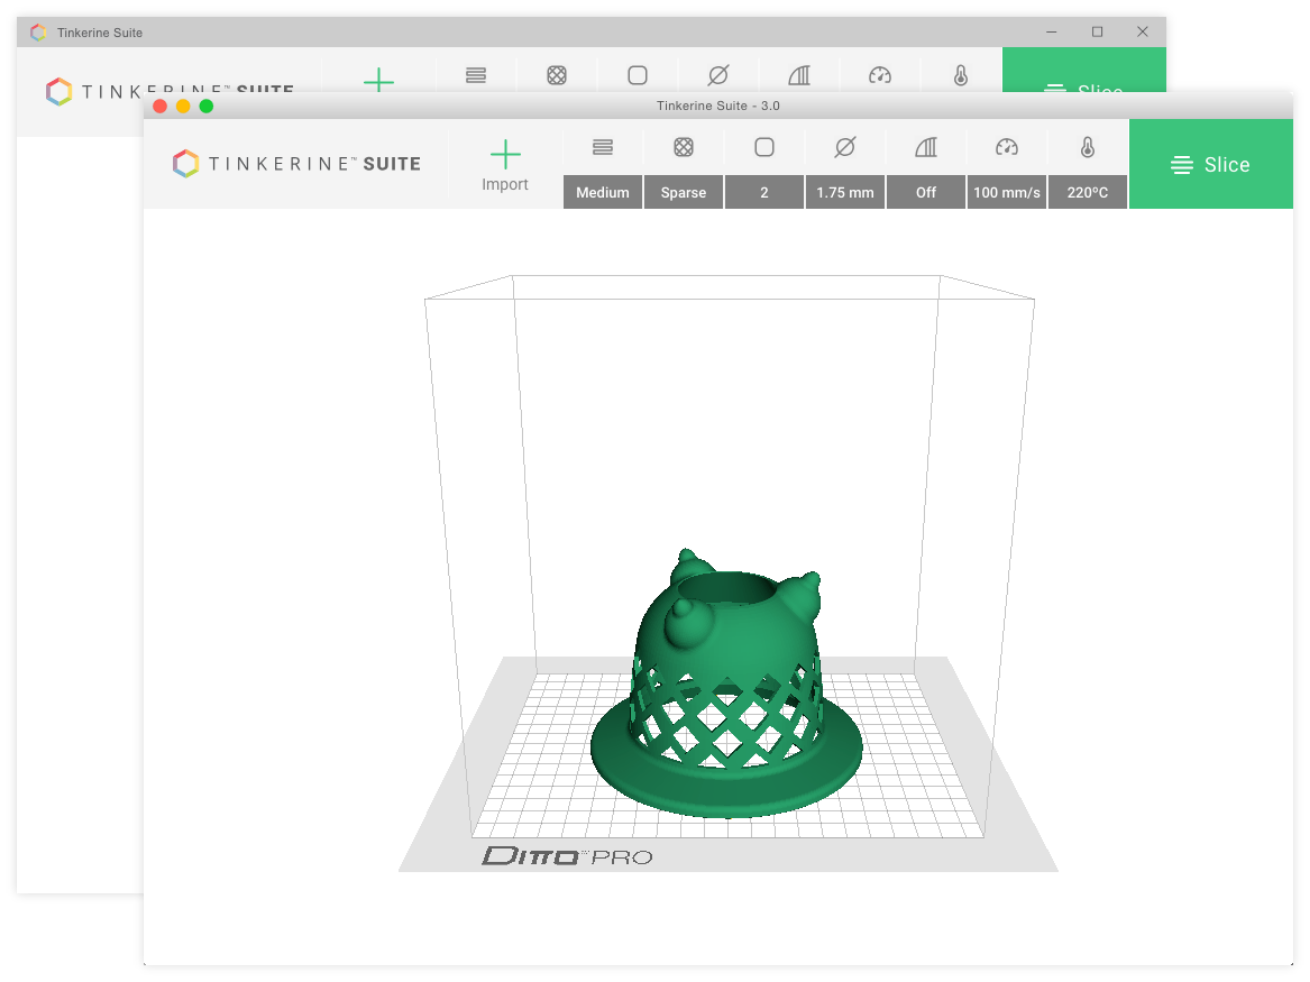
- 3D PRINTING: Limited set of materials, relatively cheap and easy, virtually any shape. At Emily Carr, we primarily have Tinkerine Ditto Pro 3D printers. If you plan on doing any 3D printing (or are just curious) you can download the Tinkerine Suite software which is used to prepare ("slice") your files. Generally speaking, 3d printing software uses STL files - so export STL files from your 3d apps, then import them into Tinkerine Suite.
- LASER: Generally speaking, laser can only etch the surface (burning it) or cut straight through. Laser will always burn edges, which may or may not be an issue depending on your project. More material options.
- CNC: Lots of materials, generally cut from one side, limited by endmills, most complex production workflow.
- Here's a quick diagram reviewing some of the differences between formative (making molds), subtractive (laser, CNC), and additive (3d printing) processes.
- BREAK! [2:15pm-2:30pm]

- MINI FIELD TRIP! The ECUAD Digital Fabrication Lab! [2:30-3pm]
- The Digital Fabrication Lab (D1340) is a serial production and prototyping facility which leverages computer-aided design (CAD) for output. The Digital Fabrication Lab supports 3D printing, laser cutting and CNC milling.
- Our tour guide is Logan Mohr (Technician, Office: D1340, loganmohr@ecuad.ca).
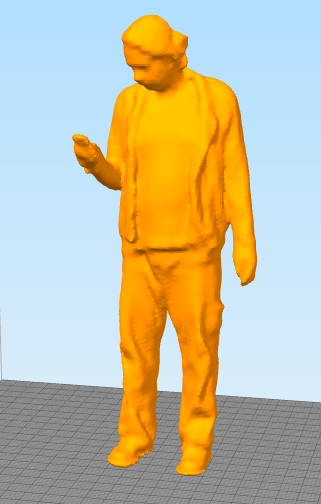
- We have an amazing 3d test model: Bobbi!
- HOW TO PUT TWO SKETCHES TOGETHER (BEGINNER CODE MASHING TECHNIQUES)
- In these examples, I'll use Jayme's project as an example. In the project, she wanted neopixels (individually addressable RGB LEDs) to be triggered with a proximity sensor. In my example, I'll be using a 50 neopixel WS2811 string with a Sharp analog infrared proximity sensor.
- The code I'll be using is https://github.com/FastLED/FastLED/blob/master/examples/Fire2012/Fire2012.ino with the AnalogInput code included below
- Make sure you have both sketches working independently.
- Make sure you clearly understand both sketches - try to carefully read through the code to get a grasp about what is going on generally. Pay attention to libraries, variables, constants, items in the loop(), any functions. As an exercise, try tracking (with your finger) through the code to follow its flow.
- Make both sketches able to run (one at a time) with their own circuits on the same breadboard. This should ensure that you aren't using the same pin twice between sketches. Make sure both circuits use the same ground (-) connection.
- Note: It is generally easier to copy the smaller / less complex sketch into a more complex one.
- To prepare the smaller sketch to be cut up, move all comments from it into an inline comment after the specific line of code using the // comment command.
- Note that Arduino sketches can only have one setup() and one loop() - so make sure you aren't pasting so that you get two of them in one sketch.
- Paste in the code, regularly compiling it so that you can more easily debug when/where problems are introduced. Make sure you get everything except for the setup() and loop() lines, more or less.
- After all of the code is pasted, check to see that your code compiles.
- Note that you may need to redefine where some things are plugged into the Arduino.
- Important Hardware Tip: If you are combining two circuits (and/or two power supplies) make sure that all of the grounds are CONNECTED TOGETHER (GND, GROUND, NEG, -, etc.). This will save you a lifetime of grief! (or at least a few hours)
- An decent overview video of this process can be seen at https://www.youtube.com/watch?v=mFprp4UCx1g - although I suggest maintaining comments by moving them from blocks to inline comments.
- HOW TO MAKE TWO SKETCHES ACTUALLY WORK TOGETHER (INTERMEDIATE CODE MASHING TECHNIQUES)
- Let's assume that your frankenstein code compiles (with the instructions above), but perhaps the code that you added doesn't actually run.
- HACK A VARIABLE: The easiest way to connect two sketches together is to replace a constant or variable from one sketch with a variable or sensor reading (see below) from another sketch.
- Understanding this sketch is essential for learning to connect sensors: https://www.arduino.cc/en/tutorial/AnalogInput - a simplified version is below:
	//collects data from an analog sensor

int sensorpin = 0;                 // analog pin used to connect the analog sensor
int val = 0;                       // variable to store the values from sensor (initially zero)

void setup()
{
  Serial.begin(9600);              // starts the serial monitor
  delay(1000);                     // wait for a while to avoid spike
}

void loop()
{
  val = analogRead(sensorpin);     // reads the value of the analog sensor
  Serial.println(val);             // prints the value of the sensor to the serial monitor
  delay(400);                     // wait for this much time before printing next value
}
- CONTROL STRUCTURE HOMEWORK: In addition to continuing to work on your term projects, please complete the following assignment (worth 2% of your final grade): Create an Arduino sketch that blinks the onboard LED that changes the blinking speed using one of the following: 1. an if/else statement, 2. a while statement, 3. a for statement, or a 4. switch case statement. Bring your work to class on Wednesday.
Week 07b - Wednesday February 26th 2020
- 5 MINUTE DEMOS, W PEER REVIEW (+1 MIN) [1:00pm - 2:20pm]
- First: Everyone set up their projects to demo. You will need paper and pen for this activity.
- Second: One person has 60 seconds to give a demo.
- Third: The person to their left and the person directly across the table from them has 60 seconds to complete an graded evaluation for them. (Optional: other class members can provide written suggestions to improve the project.) Give these quick feedback forms/rubrics to the person. Include your name on it.
- Repeat until everyone has gone, aiming to be done at 2pm.
- BREAK
- REVIEW OF CONTROL STRUCTURE HOMEWORK: Create an Arduino sketch that blinks the onboard LED that changes the blinking speed using one of the following: 1. an if/else statement, 2. a while statement, 3. a for statement, or a 4. switch case statement. Bring your work to class on Wednesday.
- CONDITIONALS: Let's review the if/else, while, for, and switch case statements.
-
// This is a demonstration of conditional statements in Arduino,
// primarily using the onboard LED.
// Quickly written by Garnet Hertz on February 26th 2020 for his
// INTD310 Interaction Design course at Emily Carr
// http://conceptlab.com/teaching/intd310/
// This sketch runs without anything else plugged into the board,
// but to experiment with it a bit, plug an analog sensor into A0
// and attach a button to pin 12.


const int sensorMin = 0;      // used in blinkCaseSwitch - sensor minimum, discovered through experiment
const int sensorMax = 600;    // used in blinkCaseSwitch - sensor maximum, discovered through experiment


// The setup function runs once when you press reset or power the board.
void setup() {
  // initialize digital pin LED_BUILTIN as an output.
  pinMode(LED_BUILTIN, OUTPUT);
  pinMode(12, INPUT); // we are usign this as a button in the blinkIfElse function
  Serial.begin(9600); // This is so we can see what is going on.
}

// The loop function runs over and over again forever. This is the main program.
void loop() {

// Comment out some of the functions below and upload it to your board to see how they work.
// Open up your Serial Monitor to observe some of the messaging to see what is going on behind the scenes.

// blinkIfElse();           // This is a chunk of code that has been moved into a function (see below).
// blinkForLoop();          // This is a chunk of code that has been moved into a function (see below).
// blinkWhileStatement();   // This is a chunk of code that has been moved into a function (see below).
blinkSwitchCase();          // This is a chunk of code that has been moved into a function (see below).

}


// All functions are included below.

void blinkIfElse(){
    if (digitalRead(12 == HIGH)) { // check pin 12 (where our button is) if it is connected to 5V
      digitalWrite(LED_BUILTIN, HIGH);
      Serial.println("We are in the blinkIfElse function and Pin 12 is high. The LED should be on.");
      delay (1000);               // wait for a second
      } else {
          digitalWrite(LED_BUILTIN, LOW);
          Serial.println("We are in the blinkIfElse function and Pin 12 is low. The LED should be off.");
          delay (1000);               // wait for a second
      }
}

void blinkForLoop() {
  for (int timer = 1; timer < 50; timer++) {
    // turn the pin on:
    digitalWrite(LED_BUILTIN, HIGH);
    delay(timer);
    // turn the pin off:
    digitalWrite(LED_BUILTIN, LOW);
    delay(timer);
    // output what the timer variable is
    Serial.println(timer);
  }
}

void blinkWhileStatement() {
  while (digitalRead(12) == HIGH) {
    // turn the pin on:
    digitalWrite(LED_BUILTIN, HIGH);
    delay(100);
    // turn the pin off:
    digitalWrite(LED_BUILTIN, LOW);
    delay(1000);
  }
}

void blinkSwitchCase() {
  // This example is taken from https://www.arduino.cc/en/Tutorial/switchCase
  // This program first reads the photoresistor. Then it uses the map() function
  // to map its output to one of four values: 0, 1, 2, or 3. Finally, it uses the
  // switch() statement to print one of four messages back to the computer depending
  // on which of the four values is returned.
  // Hardware Required: Arduino or Genuino Board, photoresistor, or another analog
  // sensor, 10k ohm resistors, hook-up wires, breadboard
  // Circuit: The photoresistor is connected to analog in pin 0 using a voltage
  // divider circuit. A 10K ohm resistor makes up the other side of the voltage
  // divider, running from Analog in 0 to ground. The analogRead() function
  // returns a range of about 0 to 600 from this circuit in a reasonably lit indoor space.

  // read the sensor:
  int sensorReading = analogRead(A0);
  // map the sensor range to a range of four options:
  int range = map(sensorReading, sensorMin, sensorMax, 0, 3); // map is so damn amazing - really!
  // See https://www.arduino.cc/reference/en/language/functions/math/map/ for info. Learn it. Love it.

  // do something different depending on the range value:
  switch (range) {
    case 0:    // your hand is on the sensor
      Serial.println("Pin A0 says it's dark - turn on the light for 1 second");
      // turn the pin on:
      digitalWrite(LED_BUILTIN, HIGH);
      delay(1000);
      // turn the pin off:
      digitalWrite(LED_BUILTIN, LOW);
      delay(1000);
      break;
    case 1:    // your hand is close to the sensor
      Serial.println("Pin A0 says it's dim - turn on the light for 0.75 seconds");
      // turn the pin on:
      digitalWrite(LED_BUILTIN, HIGH);
      delay(750);
      // turn the pin off:
      digitalWrite(LED_BUILTIN, LOW);
      delay(1000);
      break;
    case 2:    // your hand is a few inches from the sensor
      Serial.println("medium");
      Serial.println("Pin A0 says it's medium - turn on the light for 0.5 seconds");
      // turn the pin on:
      digitalWrite(LED_BUILTIN, HIGH);
      delay(500);
      // turn the pin off:
      digitalWrite(LED_BUILTIN, LOW);
      delay(1000);
      break;
    case 3:    // your hand is nowhere near the sensor
      Serial.println("bright");
      Serial.println("Pin A0 says it's bright - turn on the light for 0.25 second");
      // turn the pin on:
      digitalWrite(LED_BUILTIN, HIGH);
      delay(250);
      // turn the pin off:
      digitalWrite(LED_BUILTIN, LOW);
      delay(1000);
      break;
  }
  delay(1);        // delay in between reads for stability
}
Week 08a - Monday March 2nd 2020
- WORK DAY! - Today we are just going to all work on our projects (Due Wednesday)
- Revised Course Roadmap Discussion [10 minutes, 1:05-1:15]
WEEK DATE ACTIVITY Week 01 Jan 06/08 Design Charettes, Reading, Project Brainstorm Sketches Week 02 Jan 13/14 What is Critical Design, Project Brainstorm Sketches, Reading Week 03 Jan 21/23 WE ARE CURRENTLY HERE - Project Brainstorm Sketches, Reading, Programmatic Thinking (Logic Diagrams, Program Organization) Week 04 Jan 27/29 More Project Brainstorm Sketches, Reading, Programmatic Thinking (Writing Pseudocode, Arduino Desktop IDE) Week 05 Feb 03/05 Guest Speaker, Even More Project Brainstorming, Rapid Prototyping (cardboard), Reading, Sensors / Switches Week 06 Feb 10/12 Selection of Project, 3D Printing Tutorial, Arduino Syntax, Installing Libraries Week 07 Feb 17/19 Reading Week - No Class (Fabrication and Coding) Week 08 Feb 24/26 Peer Reviews, Programming Skills, Conditionals Week 09 Mar 02/04 Semifunctional Project Due, Photography Session, (Optional: Continue Fabricating Project or Ditch it and Pick a New One) Week 10 Mar 09/11 Finishing Techniques, Code Stability, Drafting a Project Statement Week 11 Mar 16/18 Functional Project Due, Peer Reviews Week 12 Mar 23/25 Refinements, Documentation, Project Statements Week 13 Mar 30/01 Documentation Due, Project Statements Due, Book Layout Due Week 14 Apr 06/08 Book Production (print, fold, bind, trim, ship) - LAST DAY CLASSES APR 3RD, ATTENDANCE REQUIRED UNTIL APRIL 17 TBD TBD Party/Event (Date to be determined, possibly April 08) - Midterm Projects Due Wednesday - We will demo and photograph our projects on Wednesday. Hertz will circulate the room and have one-on-one discussion/crit with each student about their projects. This crit is worth 20% of your final grade. It is expected that your project functionally/technically works to some degree at this point. Please be prepared to provide an overview of the concept behind the project, plus an overview of the effort and prototyping you've done so far in class. This evaluation will be based off of the the first three columns (concept, effort, prototyping) of the peer review rubric. In other words, this midterm review is not being graded for the category of 'documentation'.
Week 08b - Monday March 4th 2020
- Midterm Projects Due Today - We will demo and photograph our projects today. Hertz will circulate the room and have one-on-one discussion/crit with each student about their projects. This crit is worth 20% of your final grade. It is expected that your project functionally/technically works to some degree at this point. Please be prepared to provide an overview of the concept behind the project, plus an overview of the effort and prototyping you've done so far in class. This evaluation will be based off of the the first three columns (concept, effort, prototyping) of the peer review rubric. In other words, this midterm review is not being graded for the category of 'documentation'.
- Homework for Monday - Please complete the revised Fill-in-the-Blanks Project Statement Form. This is worth 2% of your course grade.
Week 09a - Monday March 9th 2020
- Homework for Today - Please submit the revised Fill-in-the-Blanks Project Statement Form. This is worth 2% of your course grade. Thanks!
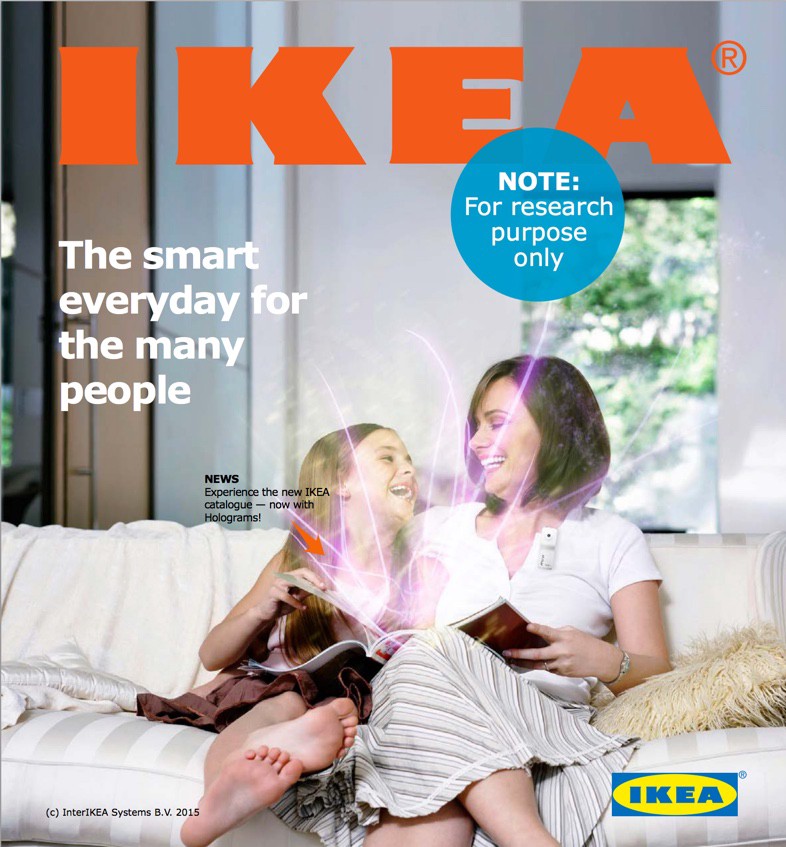
- Discussion on Book Concept - What if we made a fake "company" and had the book be a type of product catalogue? As an introduction to the idea of us making a catalogue, here are some other examples from The Near Future Laboratory and Maywa Denki:
- An Ikea Catalog from the Near Future by Near Future Laboratory
- The TBD Catalog by Near Future Laboratory
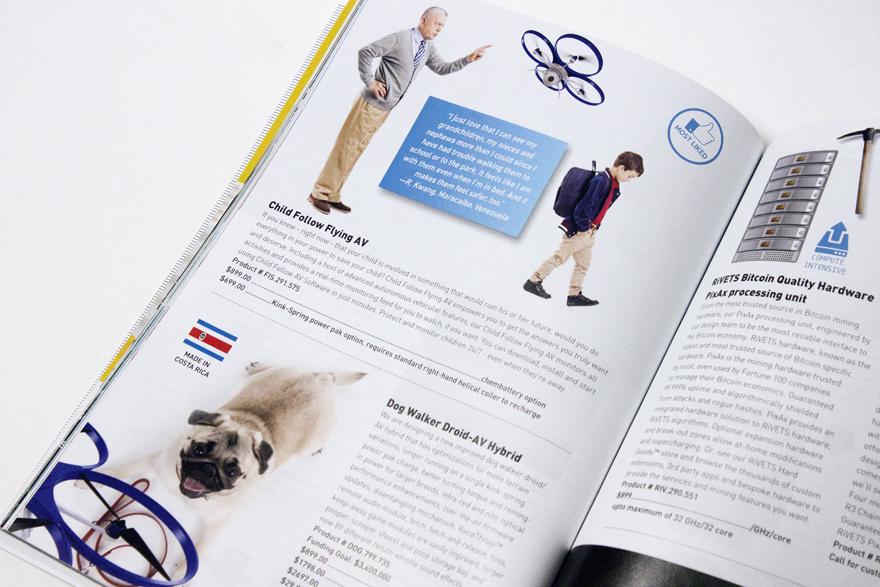
- Maywa Denki Overview

- Maywa Denki Books
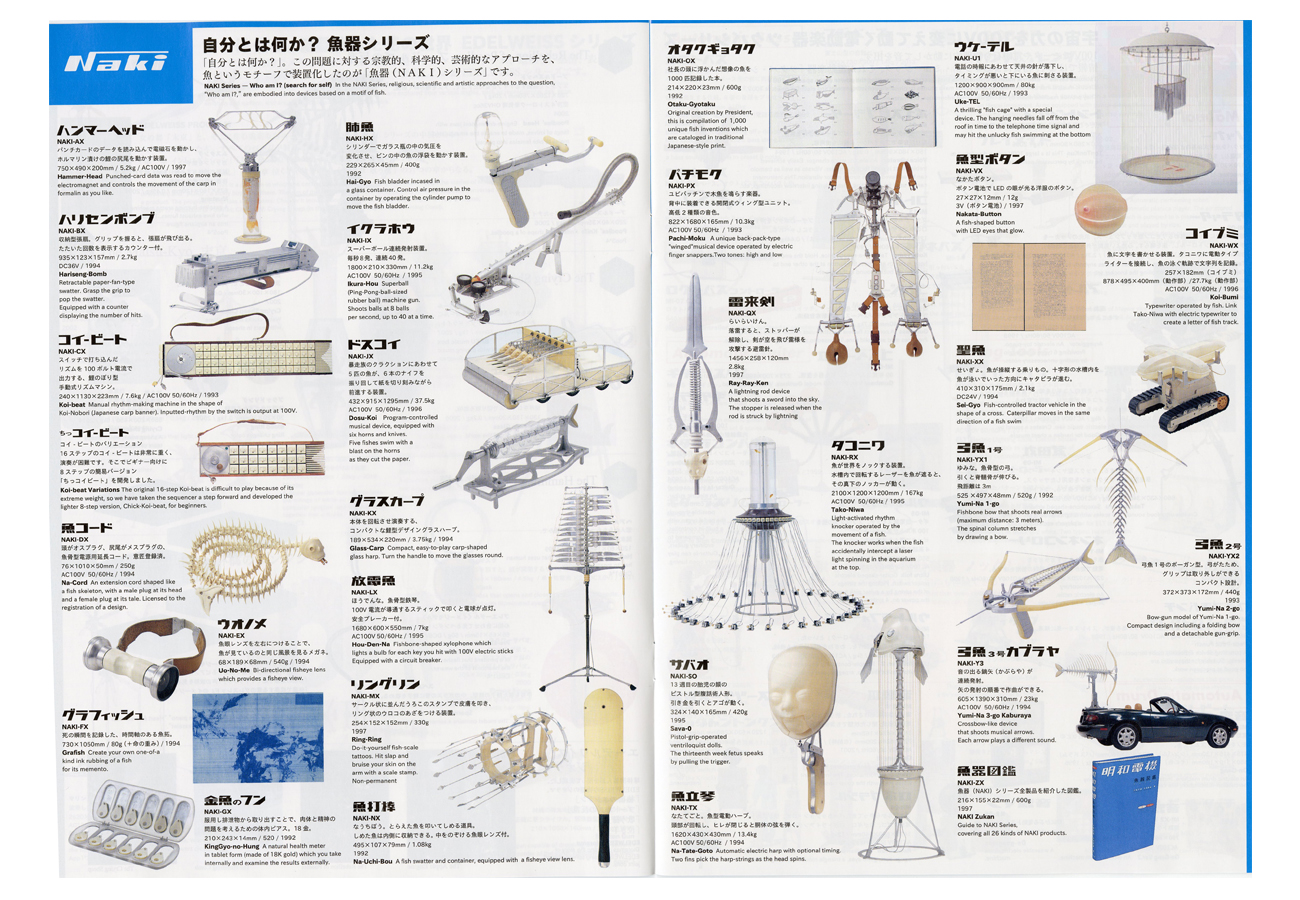
- An Ikea Catalog from the Near Future by Near Future Laboratory
- Walking Workshop - What ideas do you have for a book? Let's go for a walk around the block and chat about book ideas - this will determine our final deliverables.
- [BREAK]
- Project Development Tips: Using Protoboards & Batteries
- Sick of your breadboard falling apart when you move it? Consider getting a "protoshield" like this: https://leeselectronic.com/en/product/20131.html or this: https://leeselectronic.com/en/product/20134.html
- Protoshields (sometimes called "prototyping shields" or "protoboard shields")
- Batteries! Likely the easiest/cheapest way to make a low-powered project run on batteries is to use something like this: https://leeselectronic.com/en/product/21079.html
- A couple of things to remember when using power supplies or batteries:
- Too much voltage is bad.
- Too much amperage is good.
- For more detailed information, see http://robotics.lib-ieronimoub.gr/?p=715 on power issues related to Arduino.
- Sick of your breadboard falling apart when you move it? Consider getting a "protoshield" like this: https://leeselectronic.com/en/product/20131.html or this: https://leeselectronic.com/en/product/20134.html
- Homework Due Wednesday - Bring detailed drawings/plans/files/etc of what you need to fabricate. This will be worth 4% of your total grade. This will be graded on level of completeness and detail. All projects need to be well on their way to being fabricated. Optionally, if it is easier for you to just go ahead and fabricate, then you can bring your project in lieu of drawings.
- Please email Hertz before 9pm Monday March 9th 2020 if you have questions about this.
Week 09b - Wednesday March 11th 2020
- Today's class will be held online at 1:30pm on Zoom - please try to connect: https://zoom.us/j/3468217738
Week 10a - Monday March 16th 2020
- Today's class will be held online at 1:30pm on Zoom - please try to connect: https://zoom.us/j/3468217738
- Email sent March 16th before class:
Hi folks,
Obviously a lot has changed lately with in-person classes suspended. Just to let you know that I'm here to help and I'll do my best to try to help you in whatever you're going through.
To make a long story short, the following is suggested for all INTD classes:
1. Students can elect to have the class end now, and I give a grade in keeping with what you've earned so far. In our case, I've actually kept up with midterm grading etc and I think several people understand their grade. Basically, if you want to end the course now, you can.
2. Students can also elect to continue along in the course. As of right now, it is unsure if shops (3D printing, CNC, laser) will stay open. For those that want to continue, I'd suggest that students move to fabricating what they can on their own (likely refined foamcore models), shoot photos of it, and we go ahead and produce our book. I can also do instruction online - programming would be a decent thing that might work okay.
Anyhow, let's try to all connect on Zoom at https://zoom.us/j/3468217738 at 1:30pm today and talk there. I'd like to hear from each of you to hear how you're doing. Let's chat and go from there.
Also - if any of you are having a hard time and need help (in general) just give me a call anytime at 604-XXX-XXXX.
Thanks - talk to you soon,
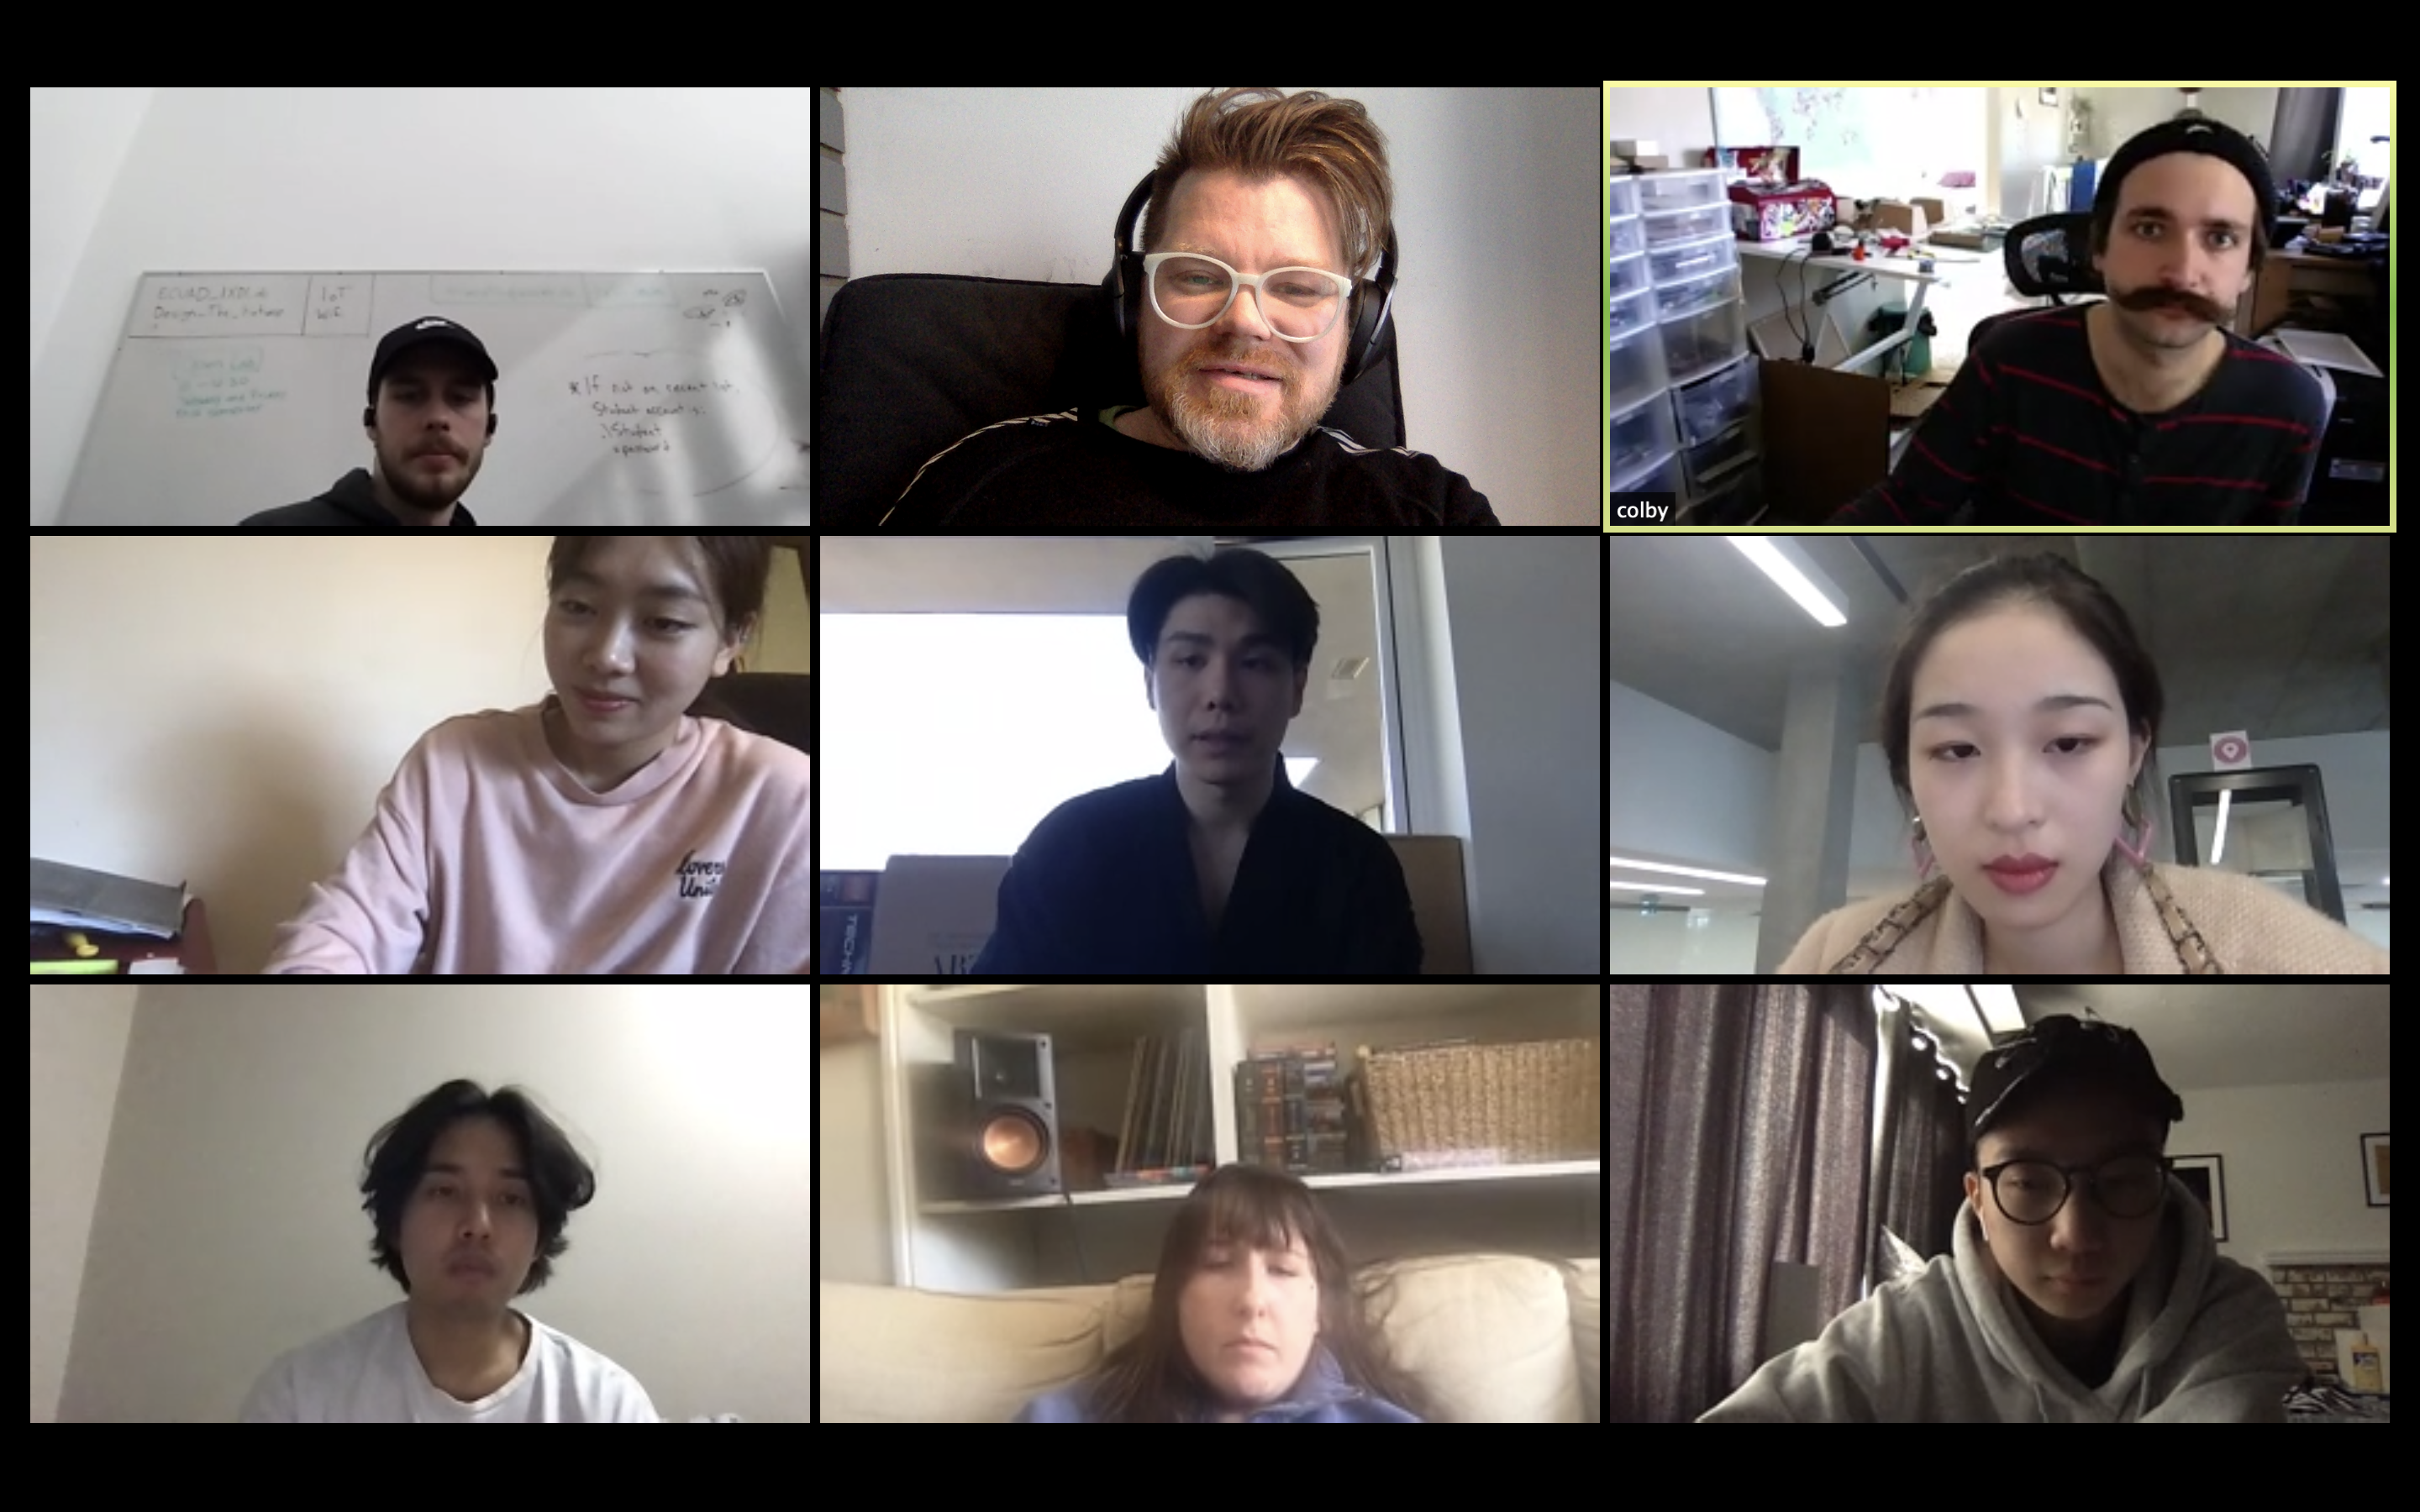
Garnet - We talked about how each of us are doing. Here are a couple of screenshots:

- Email sent March 16th after class:
Hi folks!
To follow up on our Zoom meeting today at https://zoom.us/j/3468217738 - thanks for connecting. It was nice to see you all. I ended up going on campus and helping Ann and Owen with their projects and some 3D printing in the Interaction Design lab.
A couple of things:
* Campus is basically closing on Thursday. If you've got stuff there you think you might need, it's not a bad idea to think about grabbing it. I've heard that it will be completely locked down with the exception of security and janitorial staff on Friday.
* Everything is subject to change, including the stuff below. Let me know if you're having a hard time. Take care!
* At this point, I'm still thinking it would be nice if we could do a book with projects that actually look good. I personally would rather be working on something and I'm optimistic enough to think we can do it.
* As I said on the call today, I'm happy to have the rest of the semester be a "bonus mark" to add to your midterm grade. In other words, let's assume right now that what was your midterm grade is actually now your final grade. If you want to keep participating in the class, it will count as a bonus addition to your grade.
* I plan on taking my Risograph machine home to my garage (near Renfrew Skytrain), as well as my papercutting and bookbinding stuff. It's a 1990s Japanese soy-based printing press that looks like this: https://www.flickr.com/photos/youraccount/49668517351/
* I ended up buying a cheap 3D printer yesterday for our class! https://www.amazon.ca/gp/product/B07K3SZBHJ/ref=ppx_od_dt_b_asin_title_s00?ie=UTF8&psc=1 It'll apparently arrive at my place on Friday. My friend has one of these units, and it's cheap as hell, has pretty amazing print quality, and should do most of what we need with a build volume of 220mm x 220mm x 250mm.
* We should be able to print anything that has a volume of 220mm x 220mm x 250mm or less. As long as the printer comes I will have white PLA (plastic) and will do prints for free. I'll initially get it set up and figured out and should be able to print all stuff for your projects. It might be good to try to redesign projects to this format (as opposed to CNC or laser cutting) - for larger projects like Han's they could possibly be printed in sections and then assembled.
* I checked my big 3D printer yesterday, and it's not useable - it was previously taken apart and only half put back together (which I only figured out today after firing it up for Ann).
* Ann: I was unable to get any of those 3D prints started/completed.
Thanks - more tomorrow (Wednesday). Jayme / Cass (and everybody else) - we were going to meet again on Zoom at https://zoom.us/j/3468217738 at 1:30pm on Wednesday and talk there.
Take care,
Garnet
Week 10a - Wednesday March 18th 2020
- Today's class will be held online at 1:30pm today on Zoom - connect here: https://zoom.us/j/3468217738
- At the start of our call, I briefly talked about the new emergency Covid19 aid plan announced this morning that will hopefully help alleviate some people's general concerns. Read about it here on CBC. Among other things, the emergency aid plan includes:
- A new Emergency Care Benefit of up to $900 biweekly, up to 15 weeks, to provide income support to workers, including the self-employed, who have to stay home and don't qualify for paid sick leave or employment insurance. The measure could disburse up to $10 billion.
- A new Emergency Support Benefit to provide up to $5 billion in support to workers who are not eligible for EI and who are facing unemployment.
- A six-month, interest-free reprieve on student loan payments.
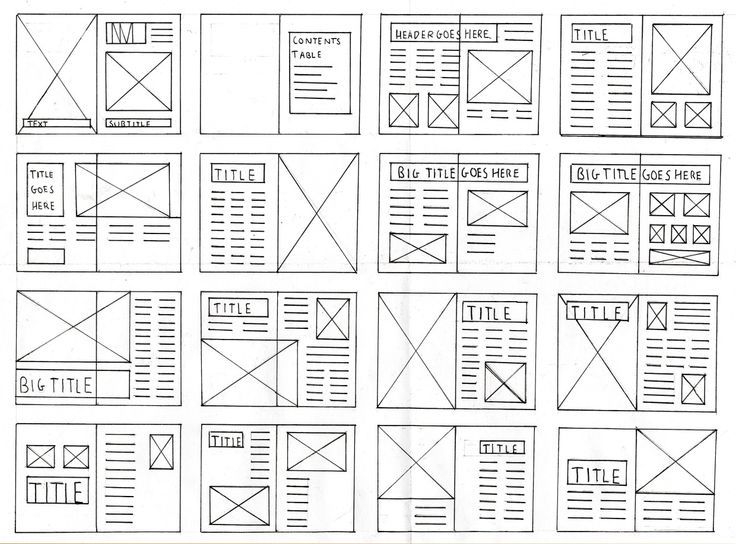
- After our Zoom conference today I made a page layout template - this is just a static GIF image (downloadable here) and a Photoshop file (downloadable here). It helps explain what I was talking about in terms of bleed and safe zones.
- LOOK AT WHAT 2 COLOR RISO LOOKS LIKE: https://www.google.com/search?q=risograph+2+color&tbm=isch&source=univ&safe=off
- RECAP: We agreed to all have a tabloid-sized layout of each of your projects completed by next Friday March 27th. Each student can determine their own layout. We will reconnect on Monday and Wednesday at 1:30pm on Zoom.
Week 11a - Monday March 23rd 2020
- Today's class will be held online at 1:30pm on Zoom - please try to connect:
https://zoom.us/j/3468217738

Week 11a - Monday March 25rd 2020
- Today's class will be held online at 1:30pm on Zoom - please try to connect: https://zoom.us/j/3468217738
- Email sent:
Hi folks,
First, I've attached an updated layout template. A Photoshop file is also available, but is too large to attach: download it from http://www.conceptlab.com/teaching/intd310/img/tabloid-bleed-template2.psd - The differences are as follows:
1. I now see that it was laid out on a 17.5" x 11" sheet. This should have been 17" x 11" since this will be our physical paper size.
2. I've added a suggested margin of 1" to the edge of the paper.
3. I've added a super quick example layout this time around on the right. The main things to pay attention here are:
- The bled background image goes all the way into the blue zone.
- The heading is inside the white zone.
- The body copy goes a little bit into the pink zone - and this is okay. Most of the text is inside the white.
4. I've added the inks that we have - but note that we will only use 2 of them across the entire book. For now, it's fine to just lay out your design in colour.
For layouts, I'll likely help each of you to redo what you give me on Friday. As a result, please package up and send me all of your original files that you've used.
Also, as I mentioned on the call, another way to do your design is to just lay out two pages that are 8.5" high x 11" wide (letter paper). If you are unfamiliar with InDesign, don't be afraid to use a template from Pages or something else - attached is a screenshot of some layouts in the template chooser. These templates will likely produce a better result than just hacking at InDesign if you're not familiar with it. Just prepare two pages and look at what they look like side-by-side.
Alternately, if you want general project layout ideas, look at http://www.disobedientelectronics.com/ - although this is designed for a physically smaller book, so your body copy will appear smaller. As a general design tip if you're stuck, try starting with a fully bled background image (as in my sample project layout attached) and place the text on top: it's a quick way to create something more visually dynamic than a white space with some pictures and text boxes. Flip through http://www.disobedientelectronics.com/ to get some ideas.
Lastly, the colours that I have available for printing are:
- Fluorescent Pink
- Yellow
- Medium Blue
- Purple
- Teal
- Black
I've included some example 'colorways' of different combinations of 2 inks - see the attached jpegs. More combinations are possible, but this should give an idea of what two spot colors look like. As another example, http://www.disobedientelectronics.com/ is printed with Fluorescent Pink and Black spot colours.
Thanks - and feel free to email me and I'll try to help.
Garnet
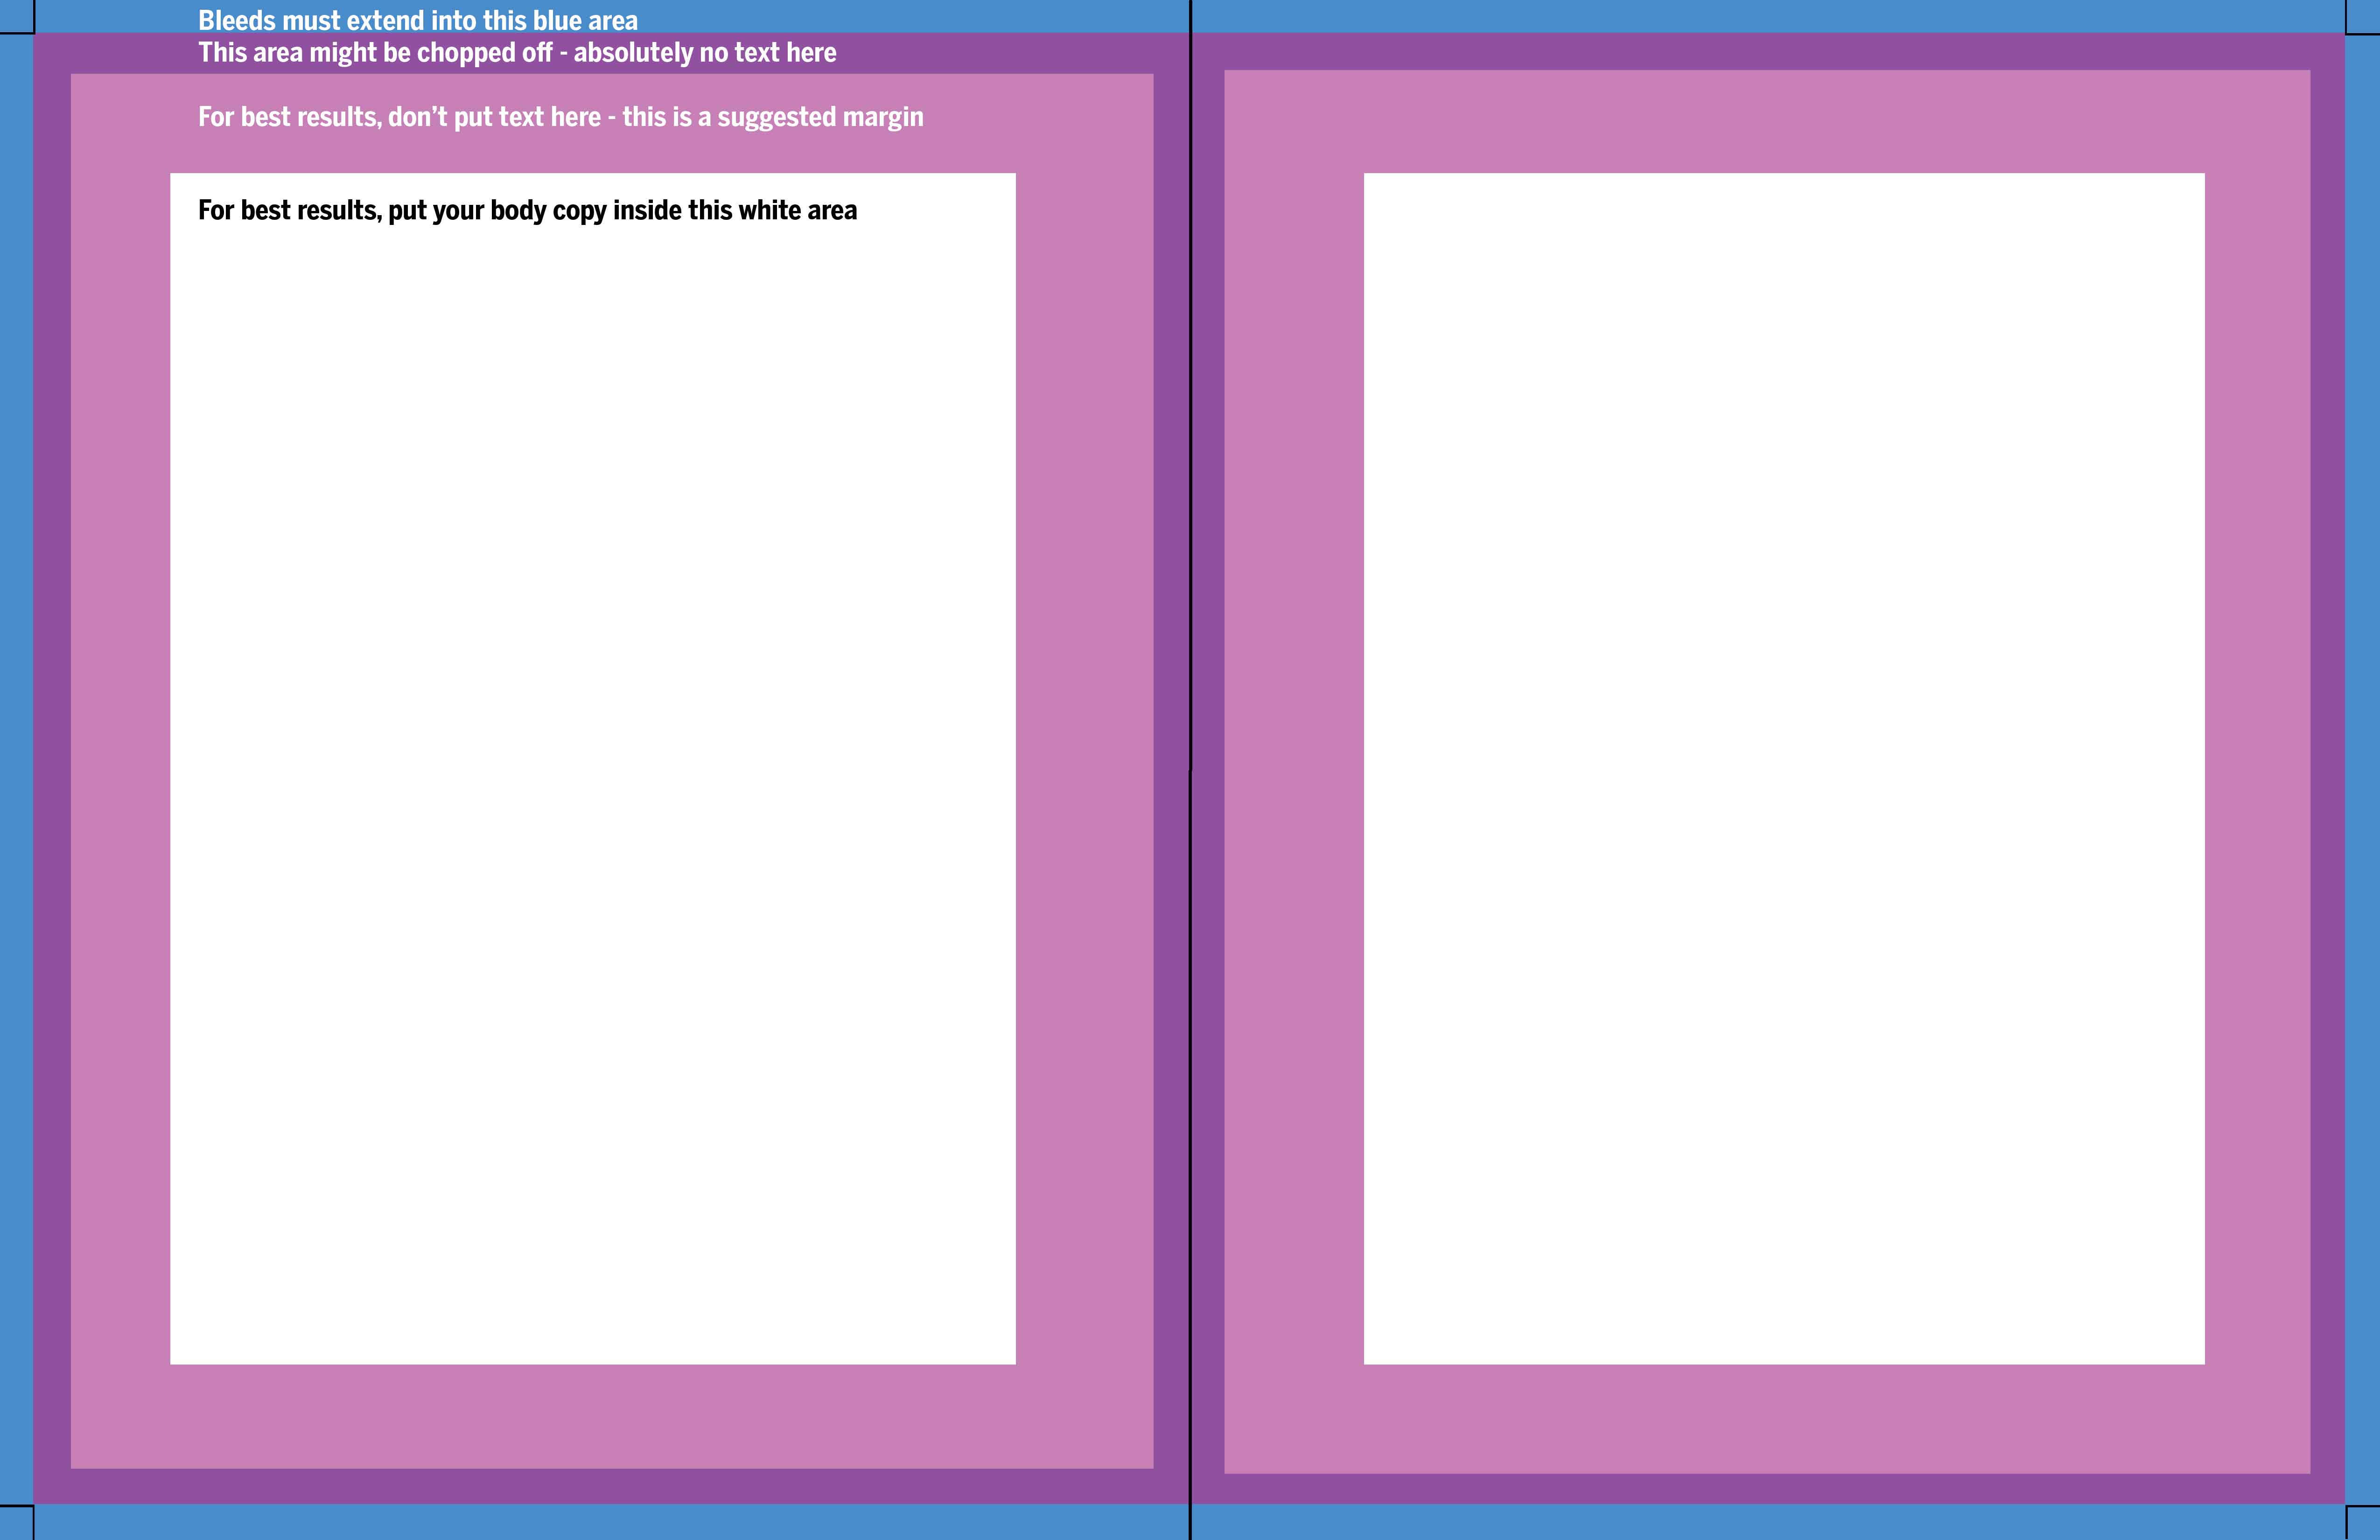
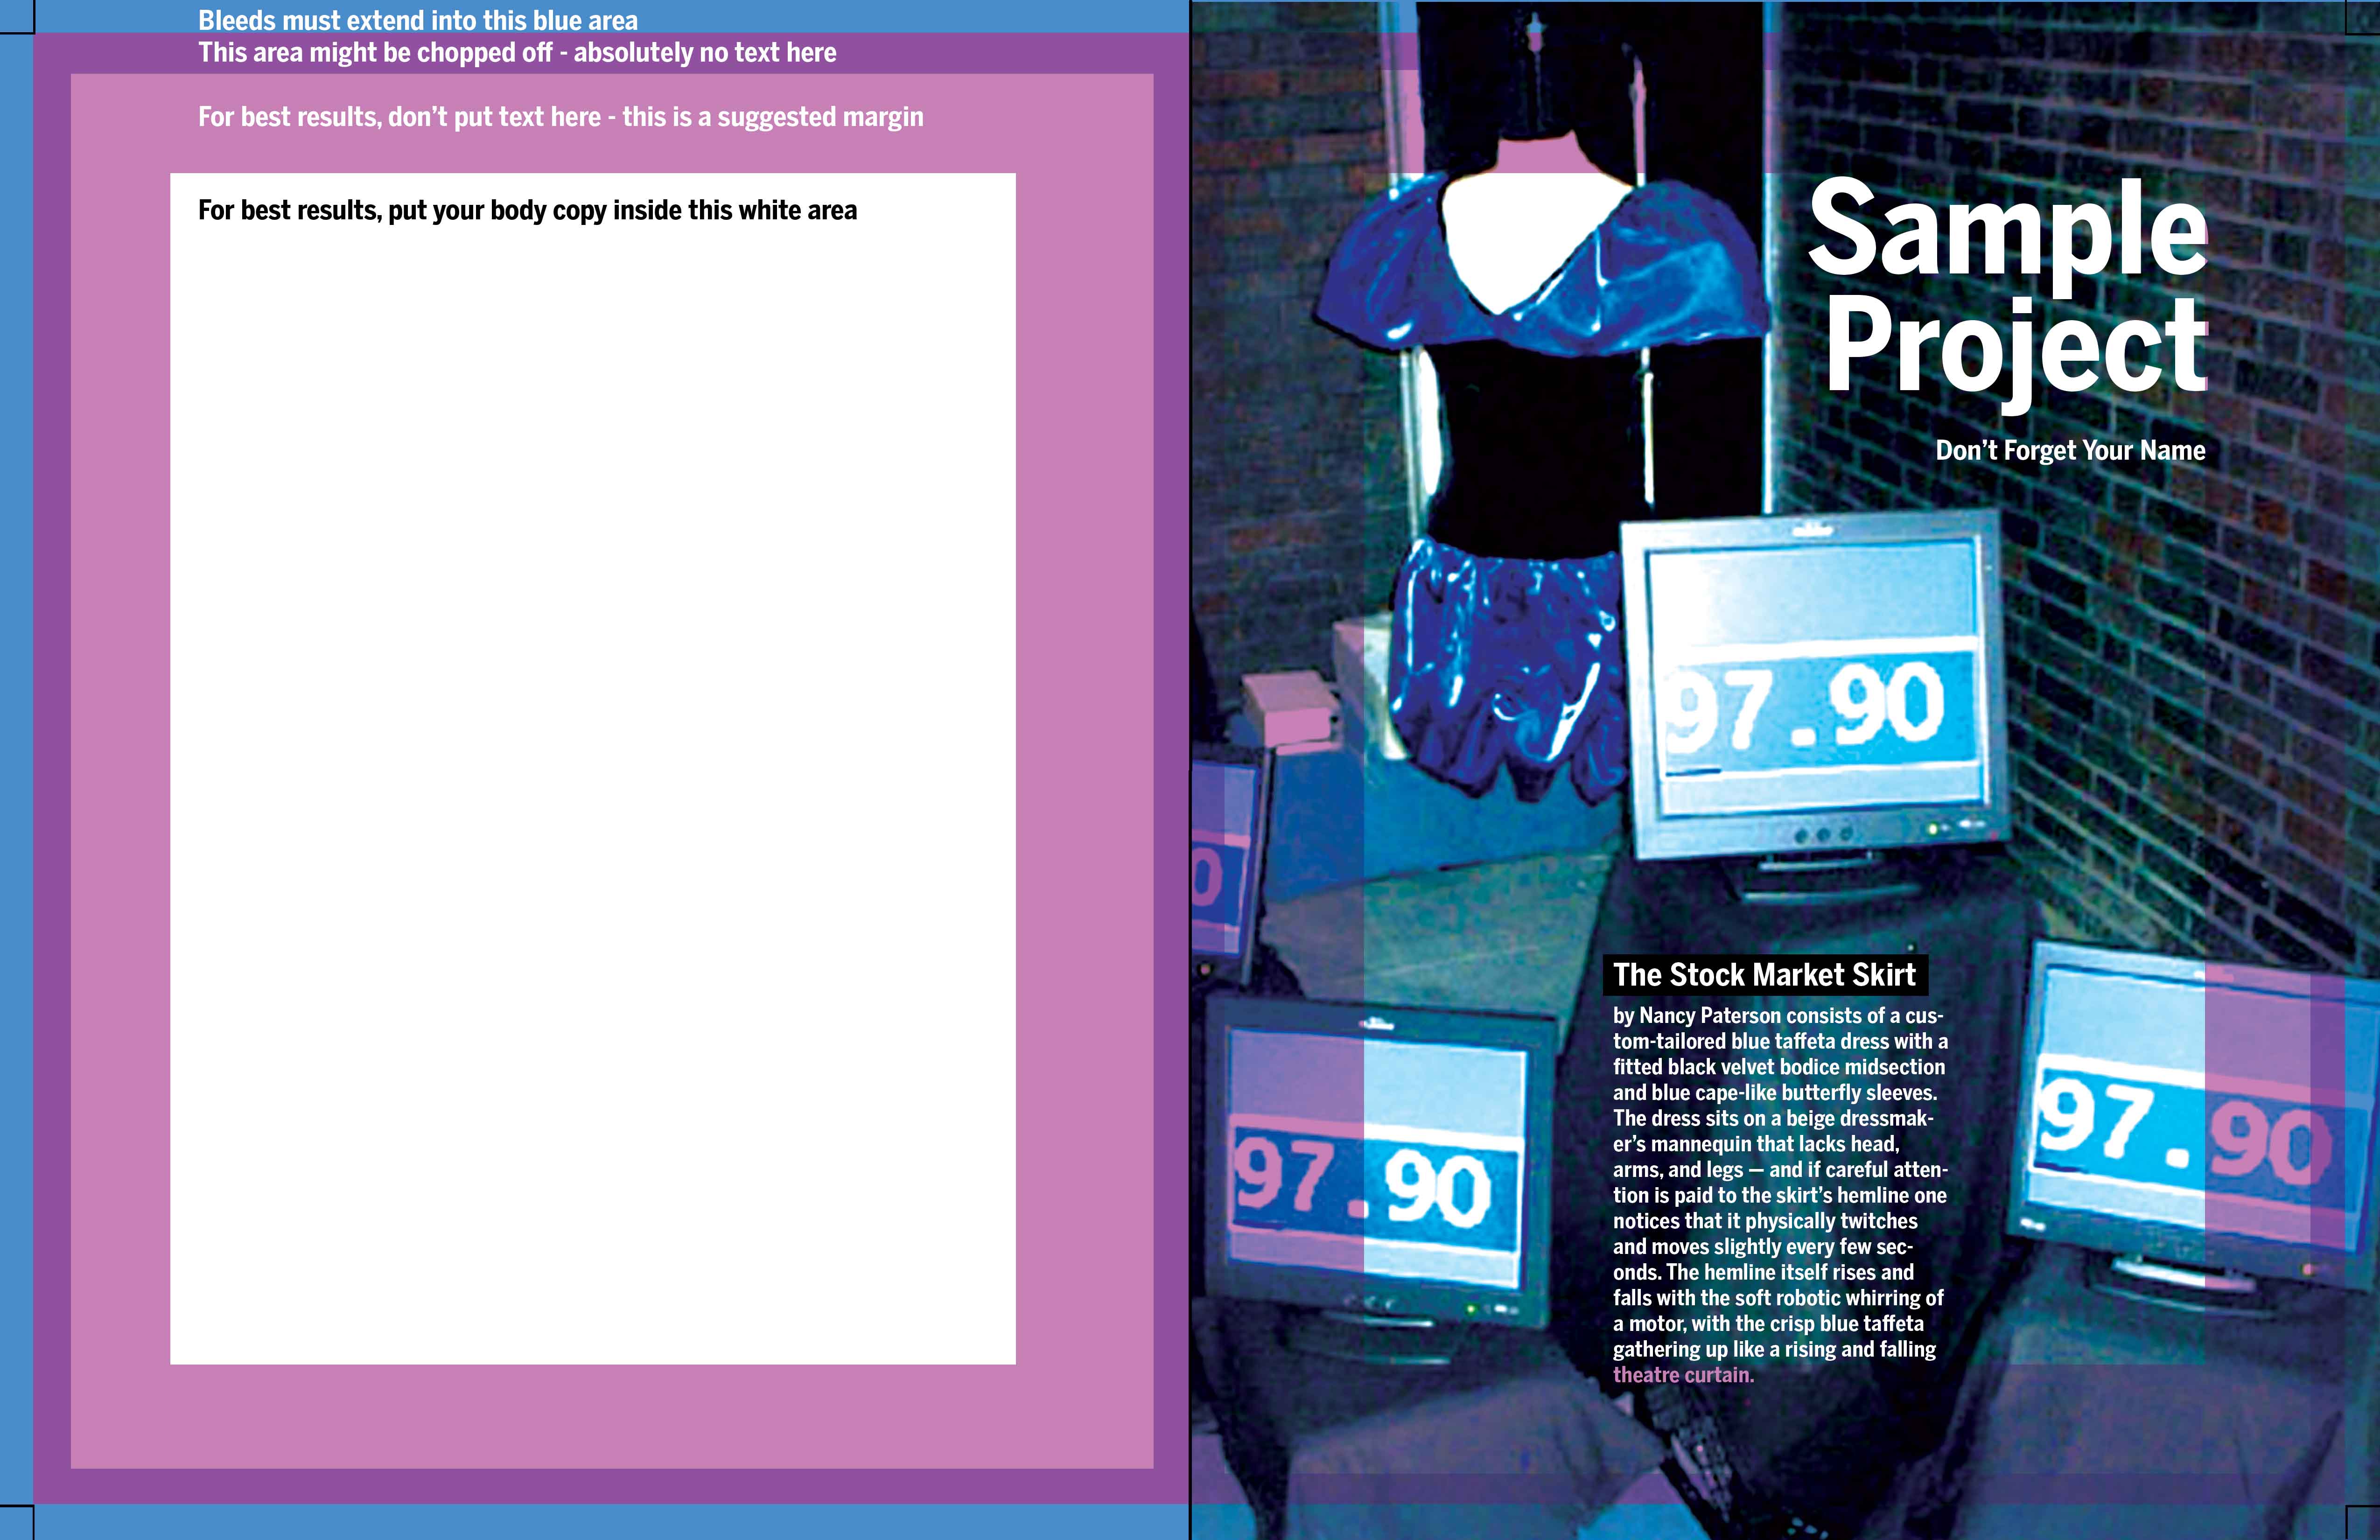
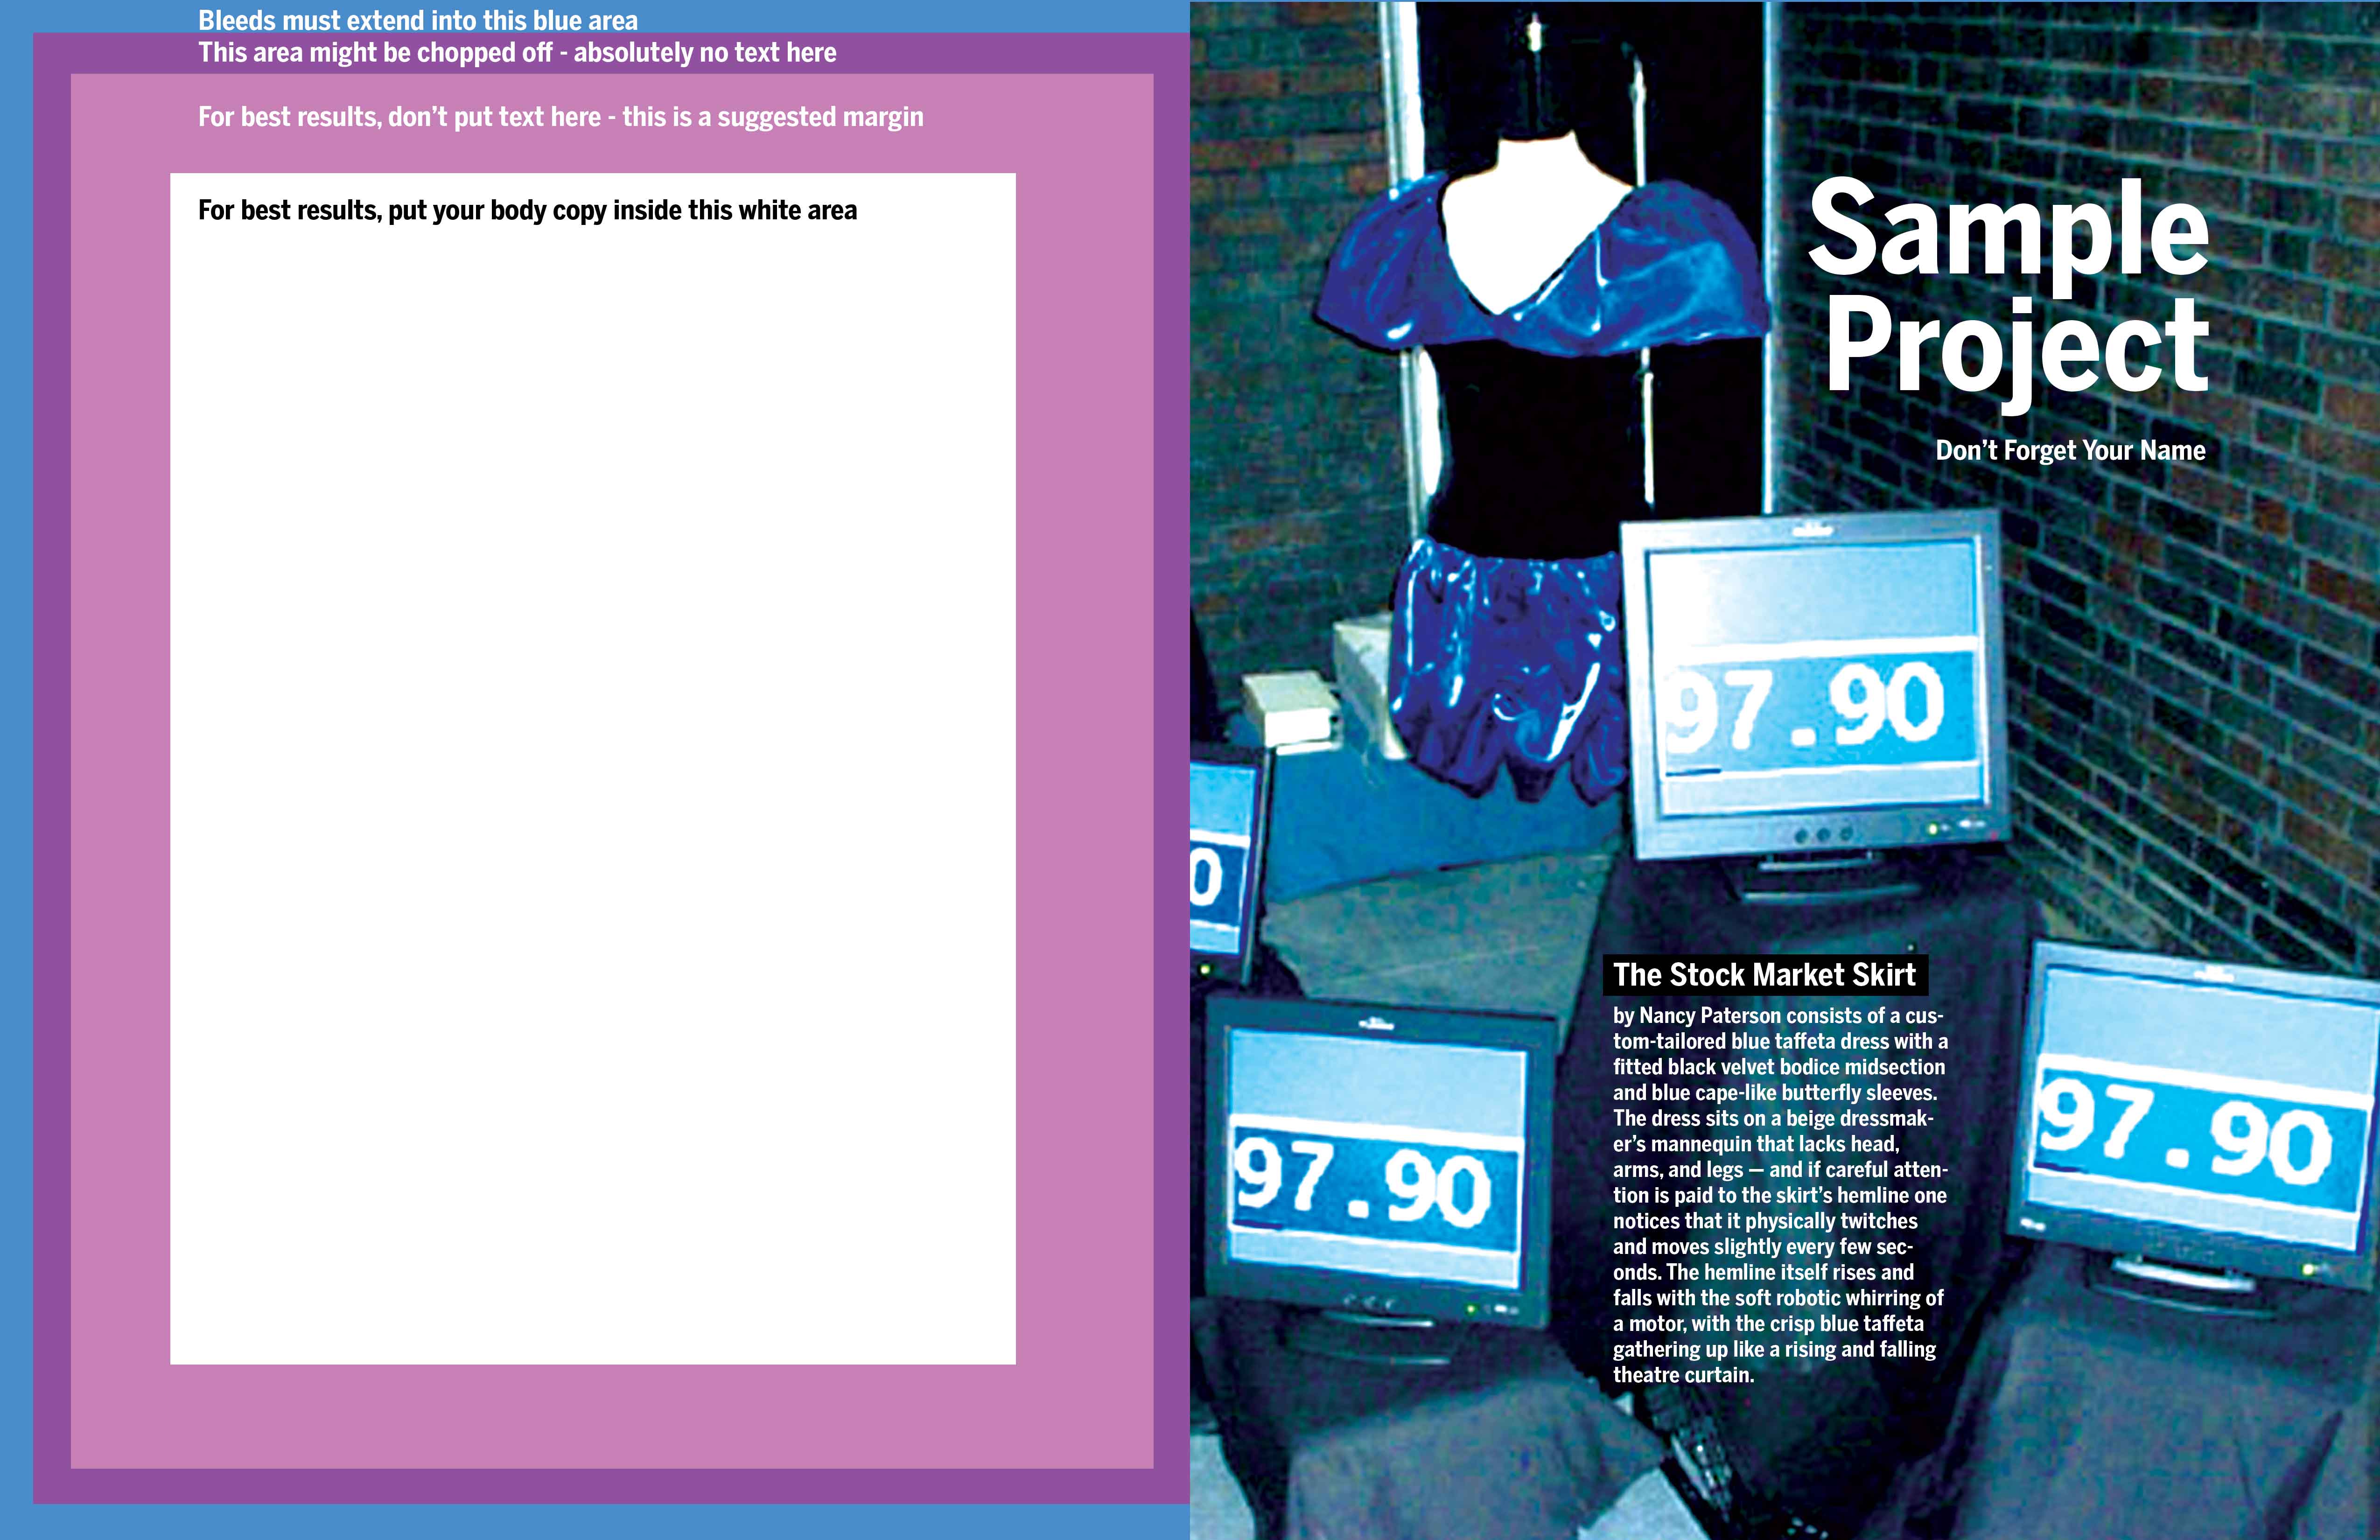
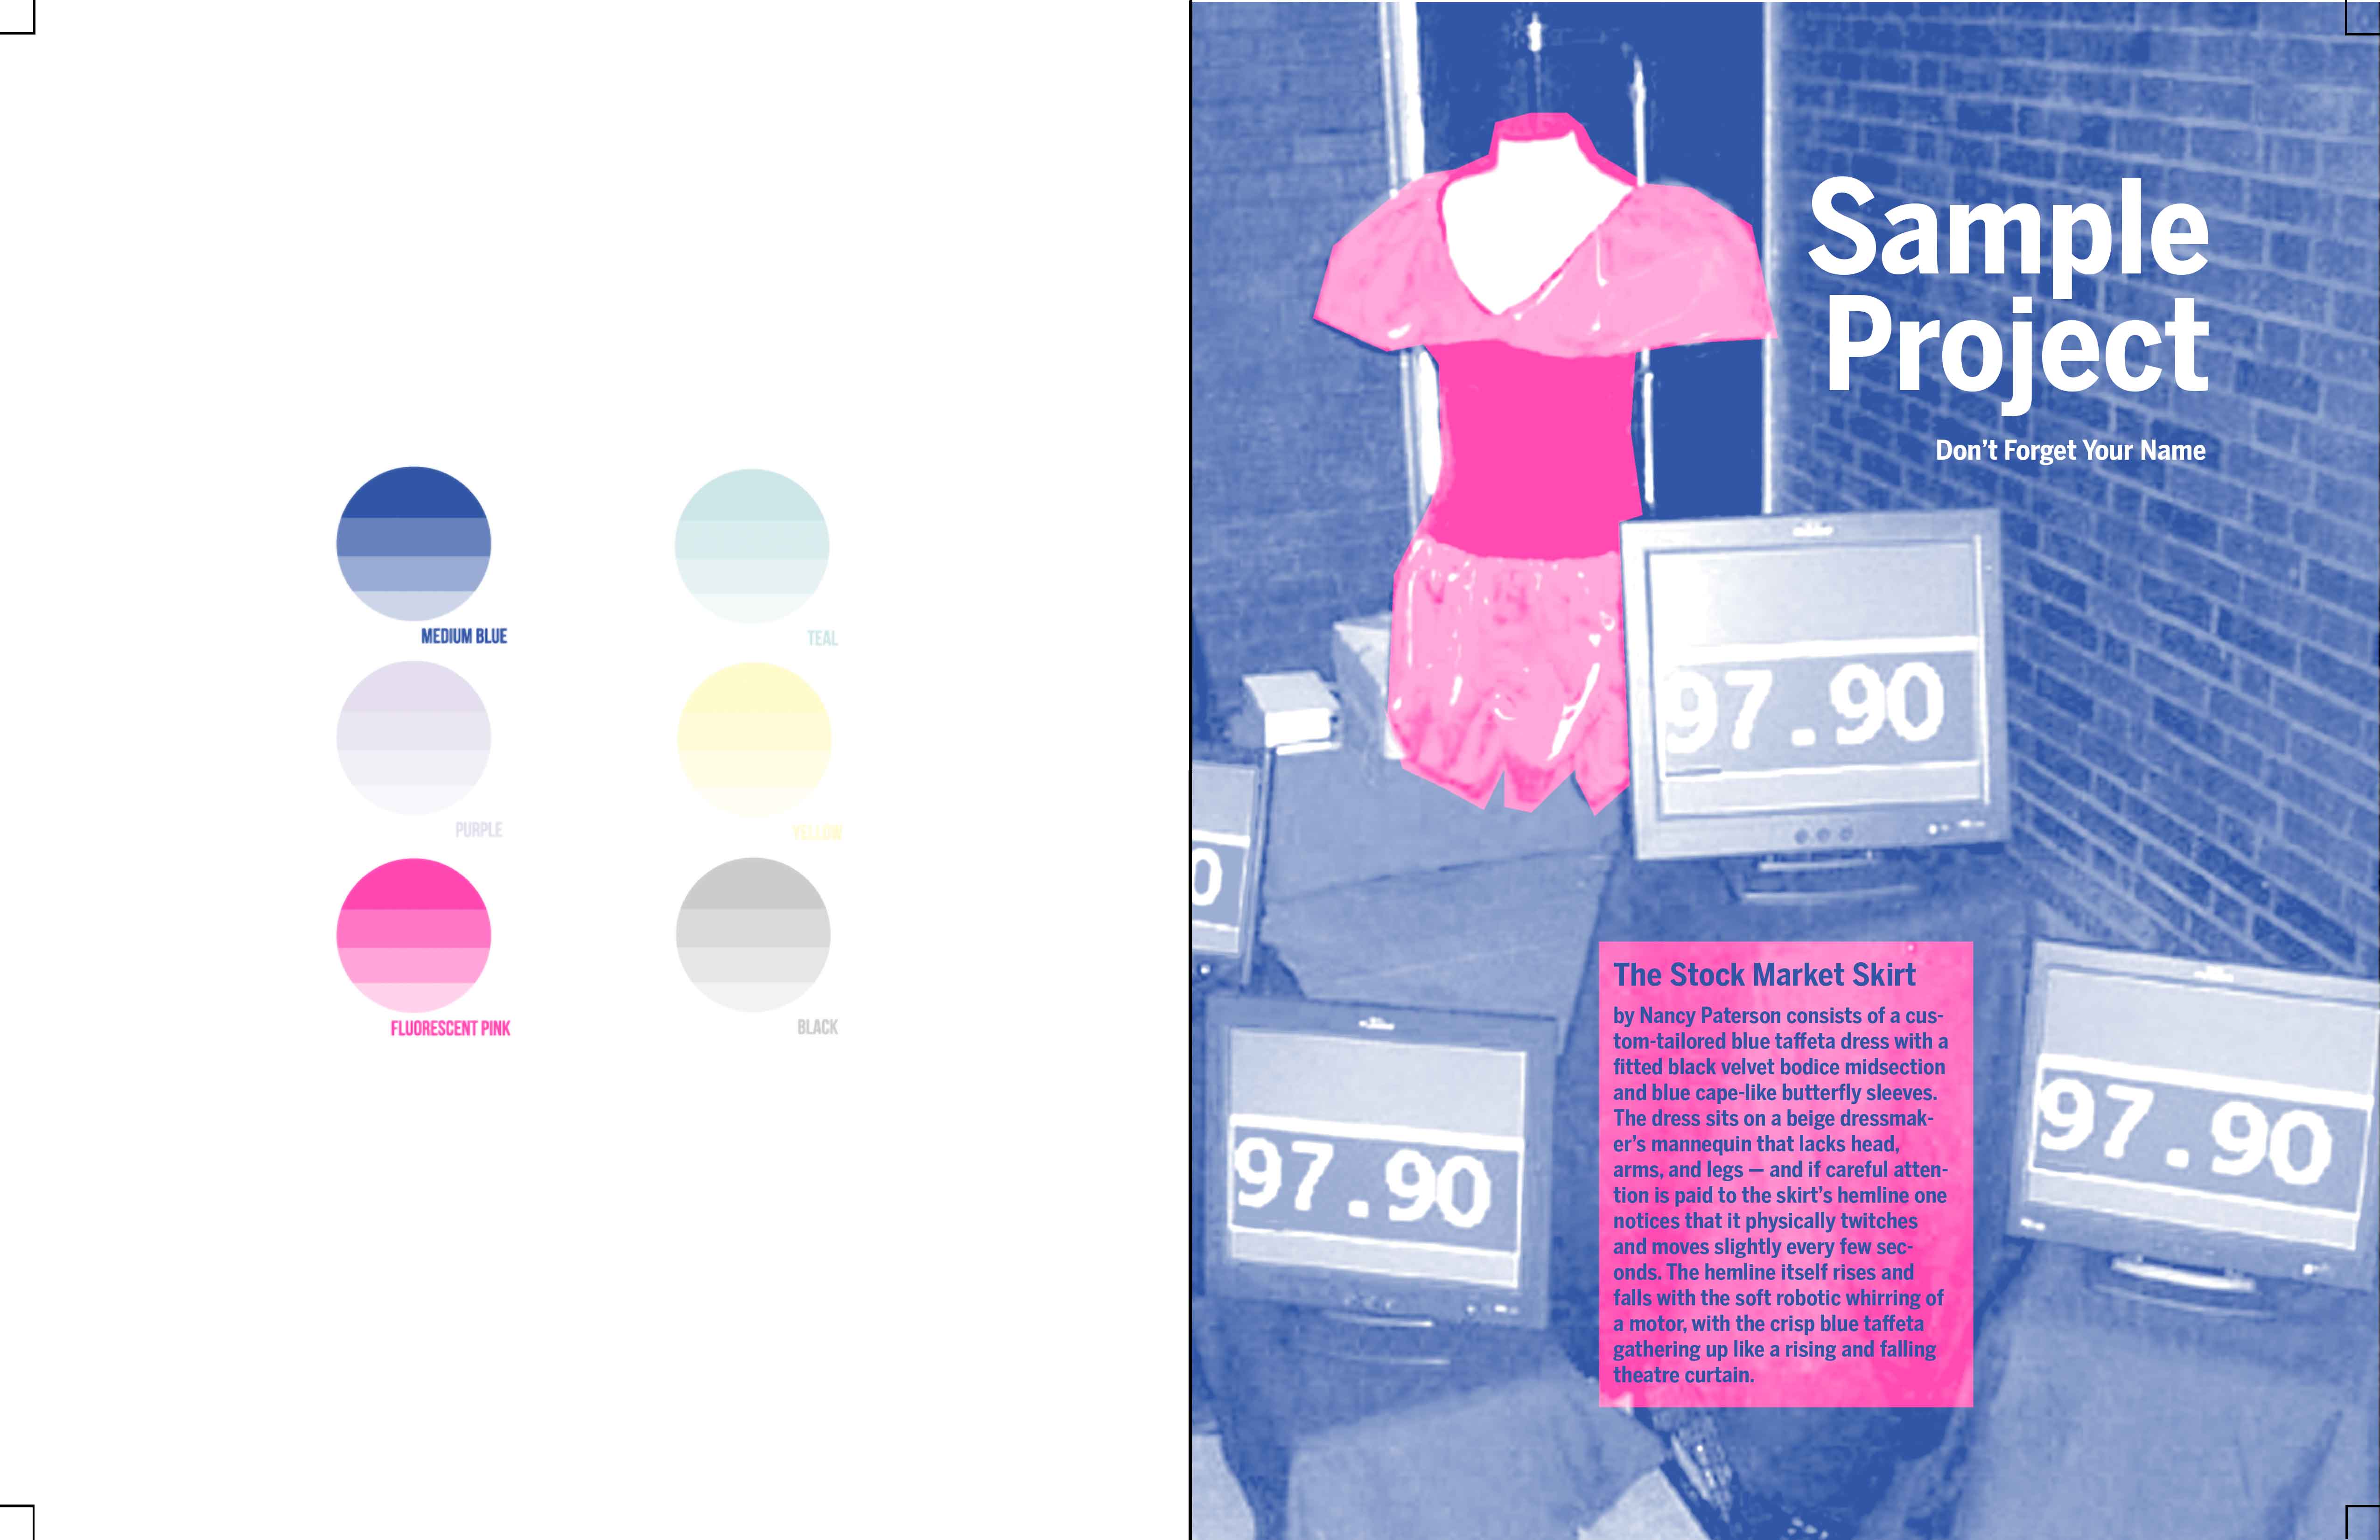
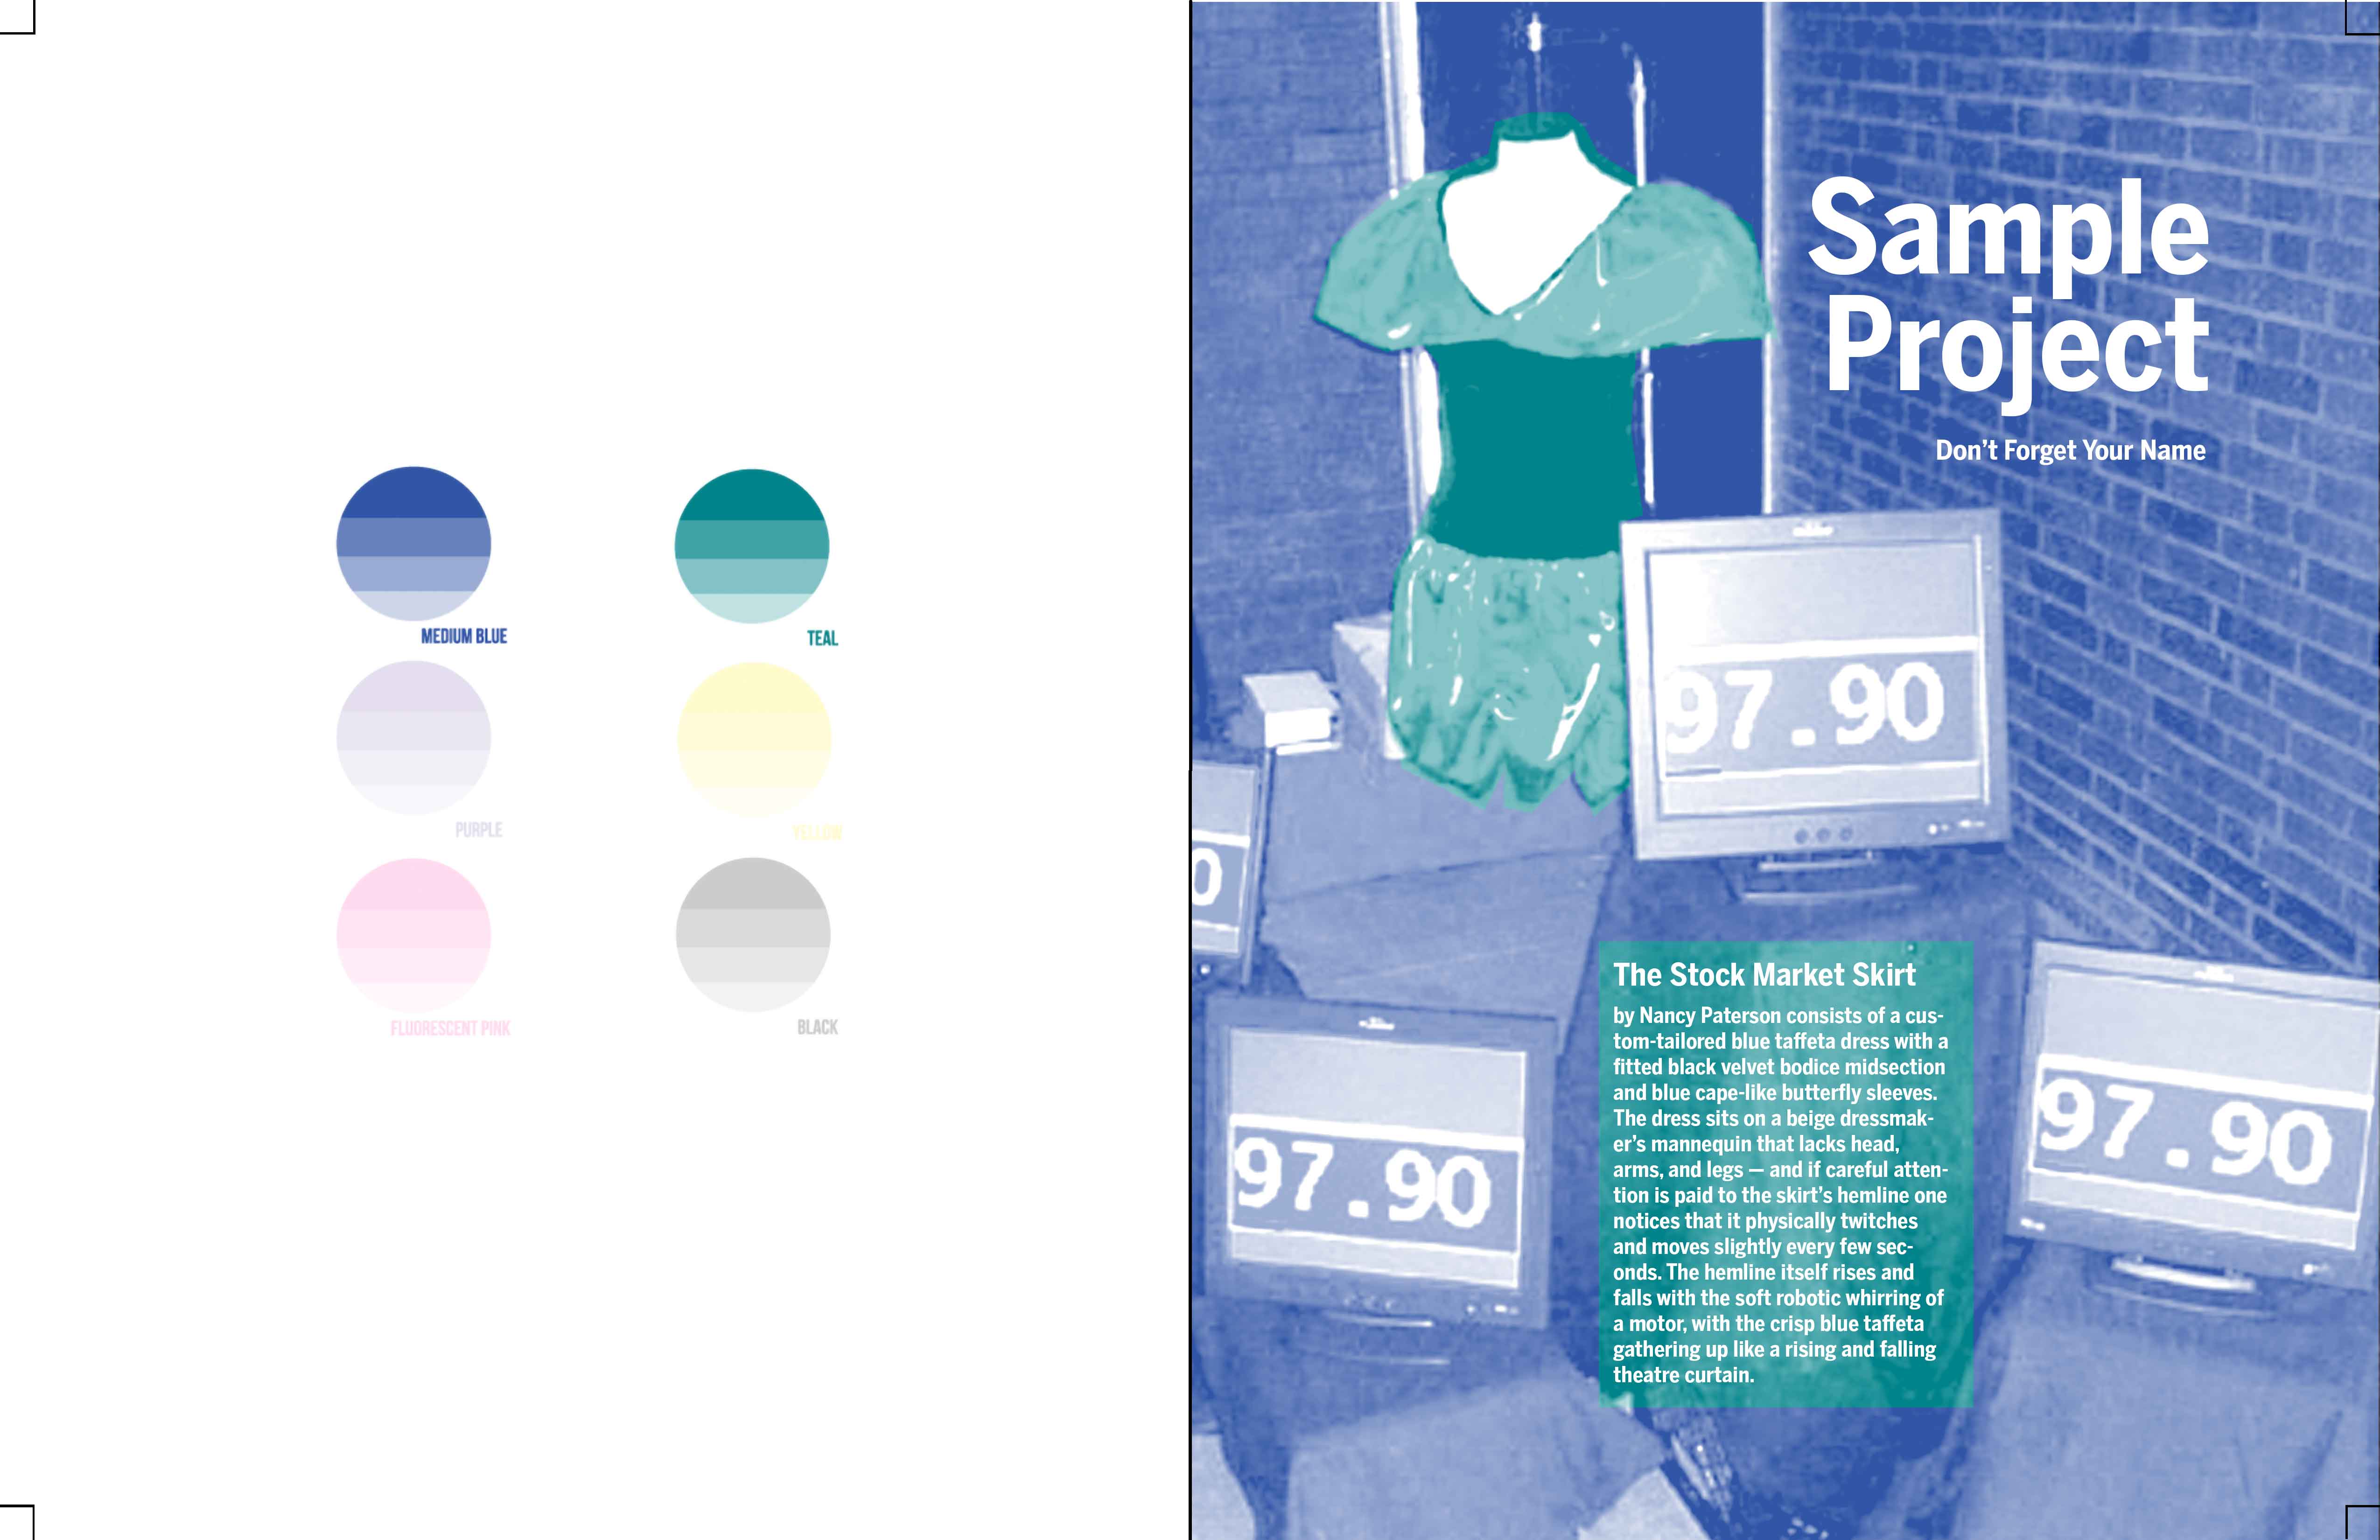
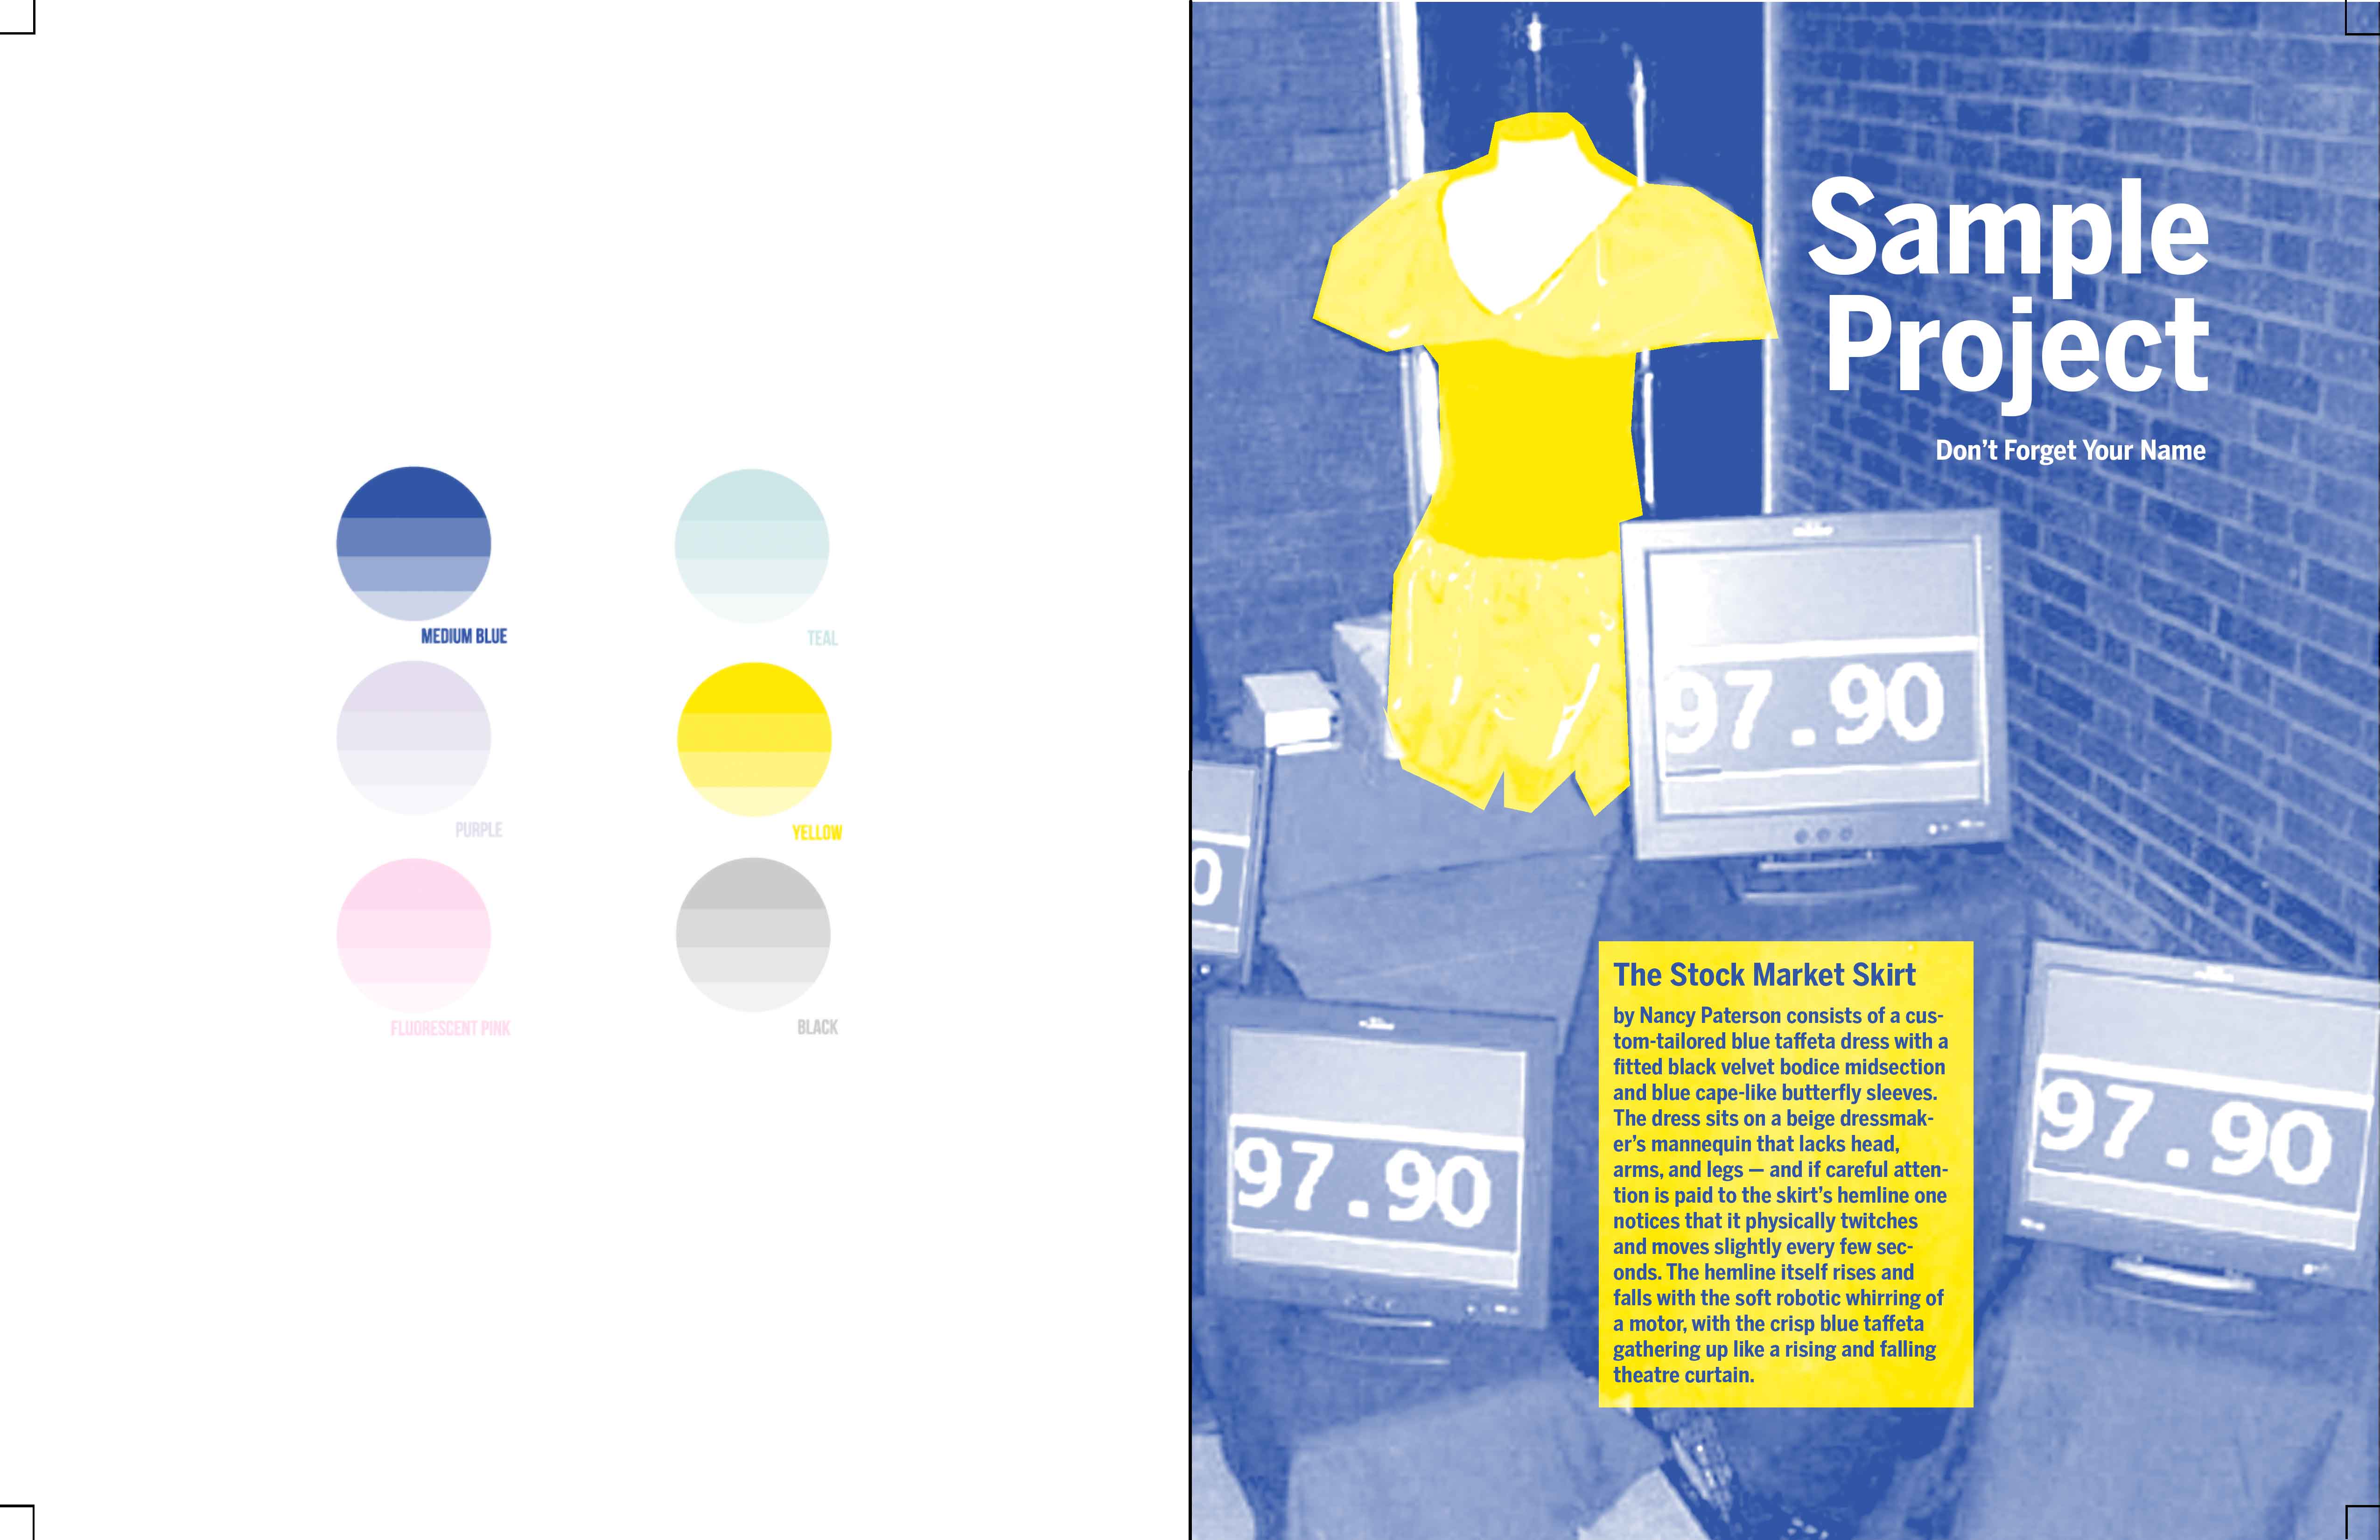
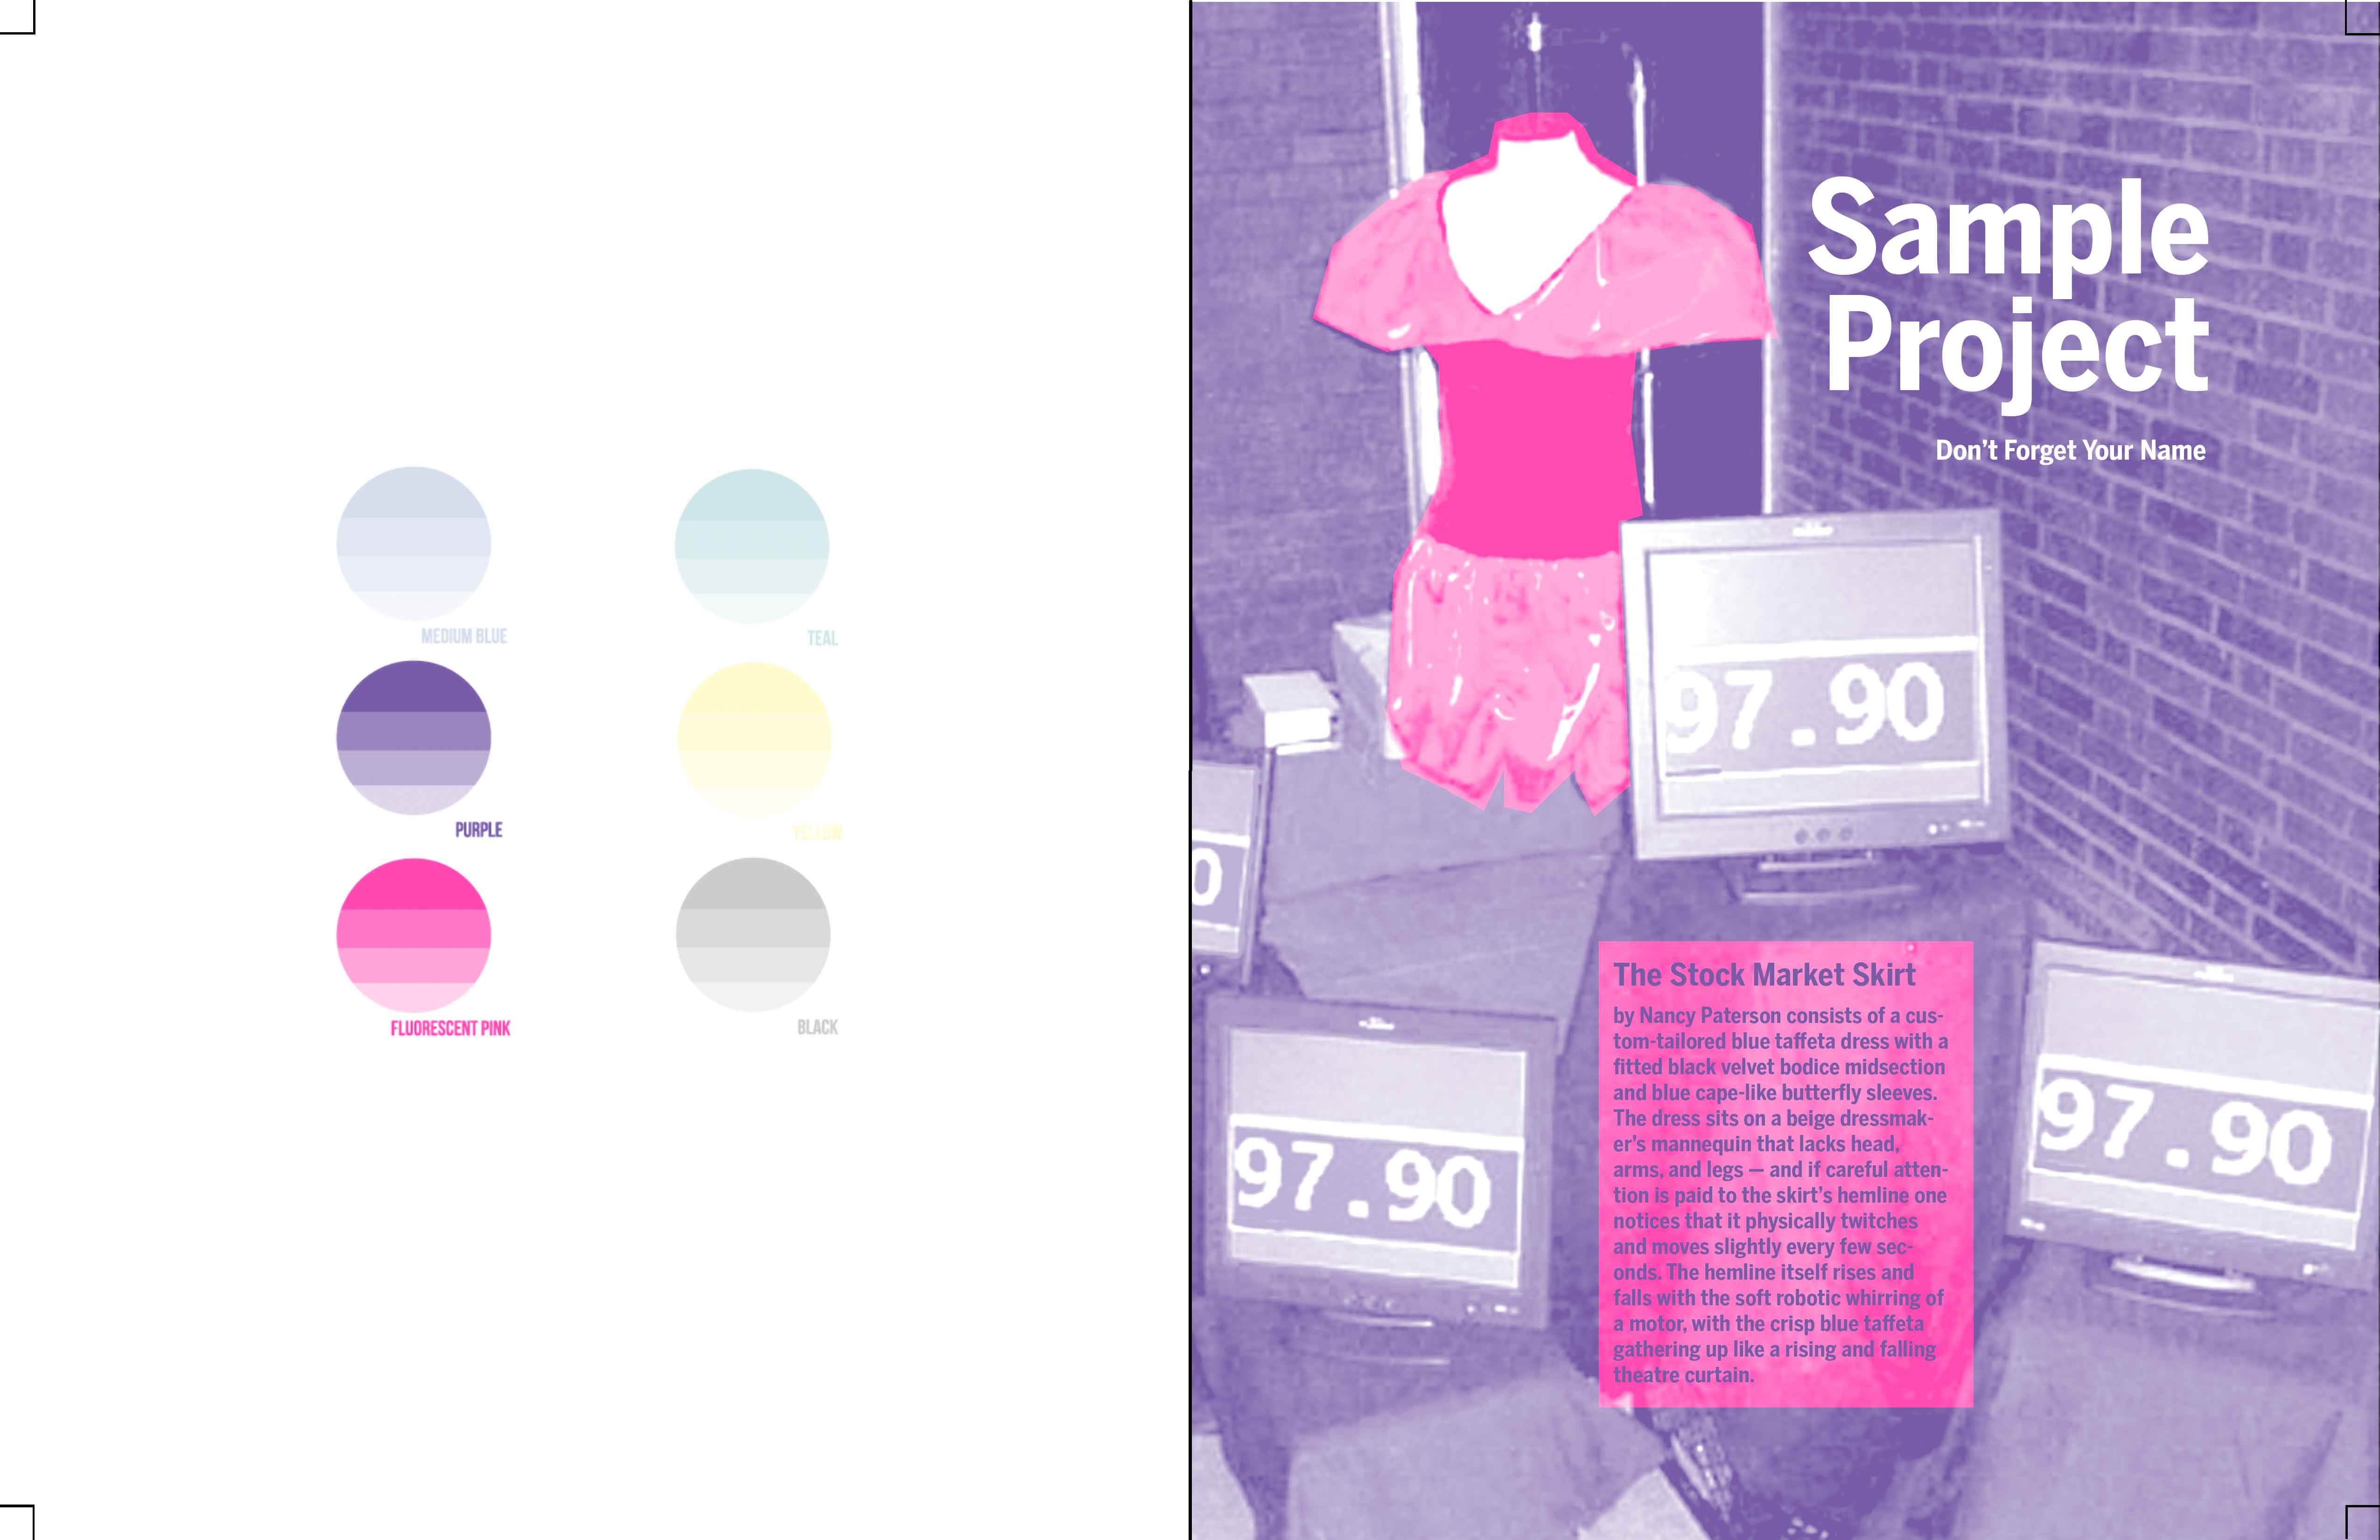
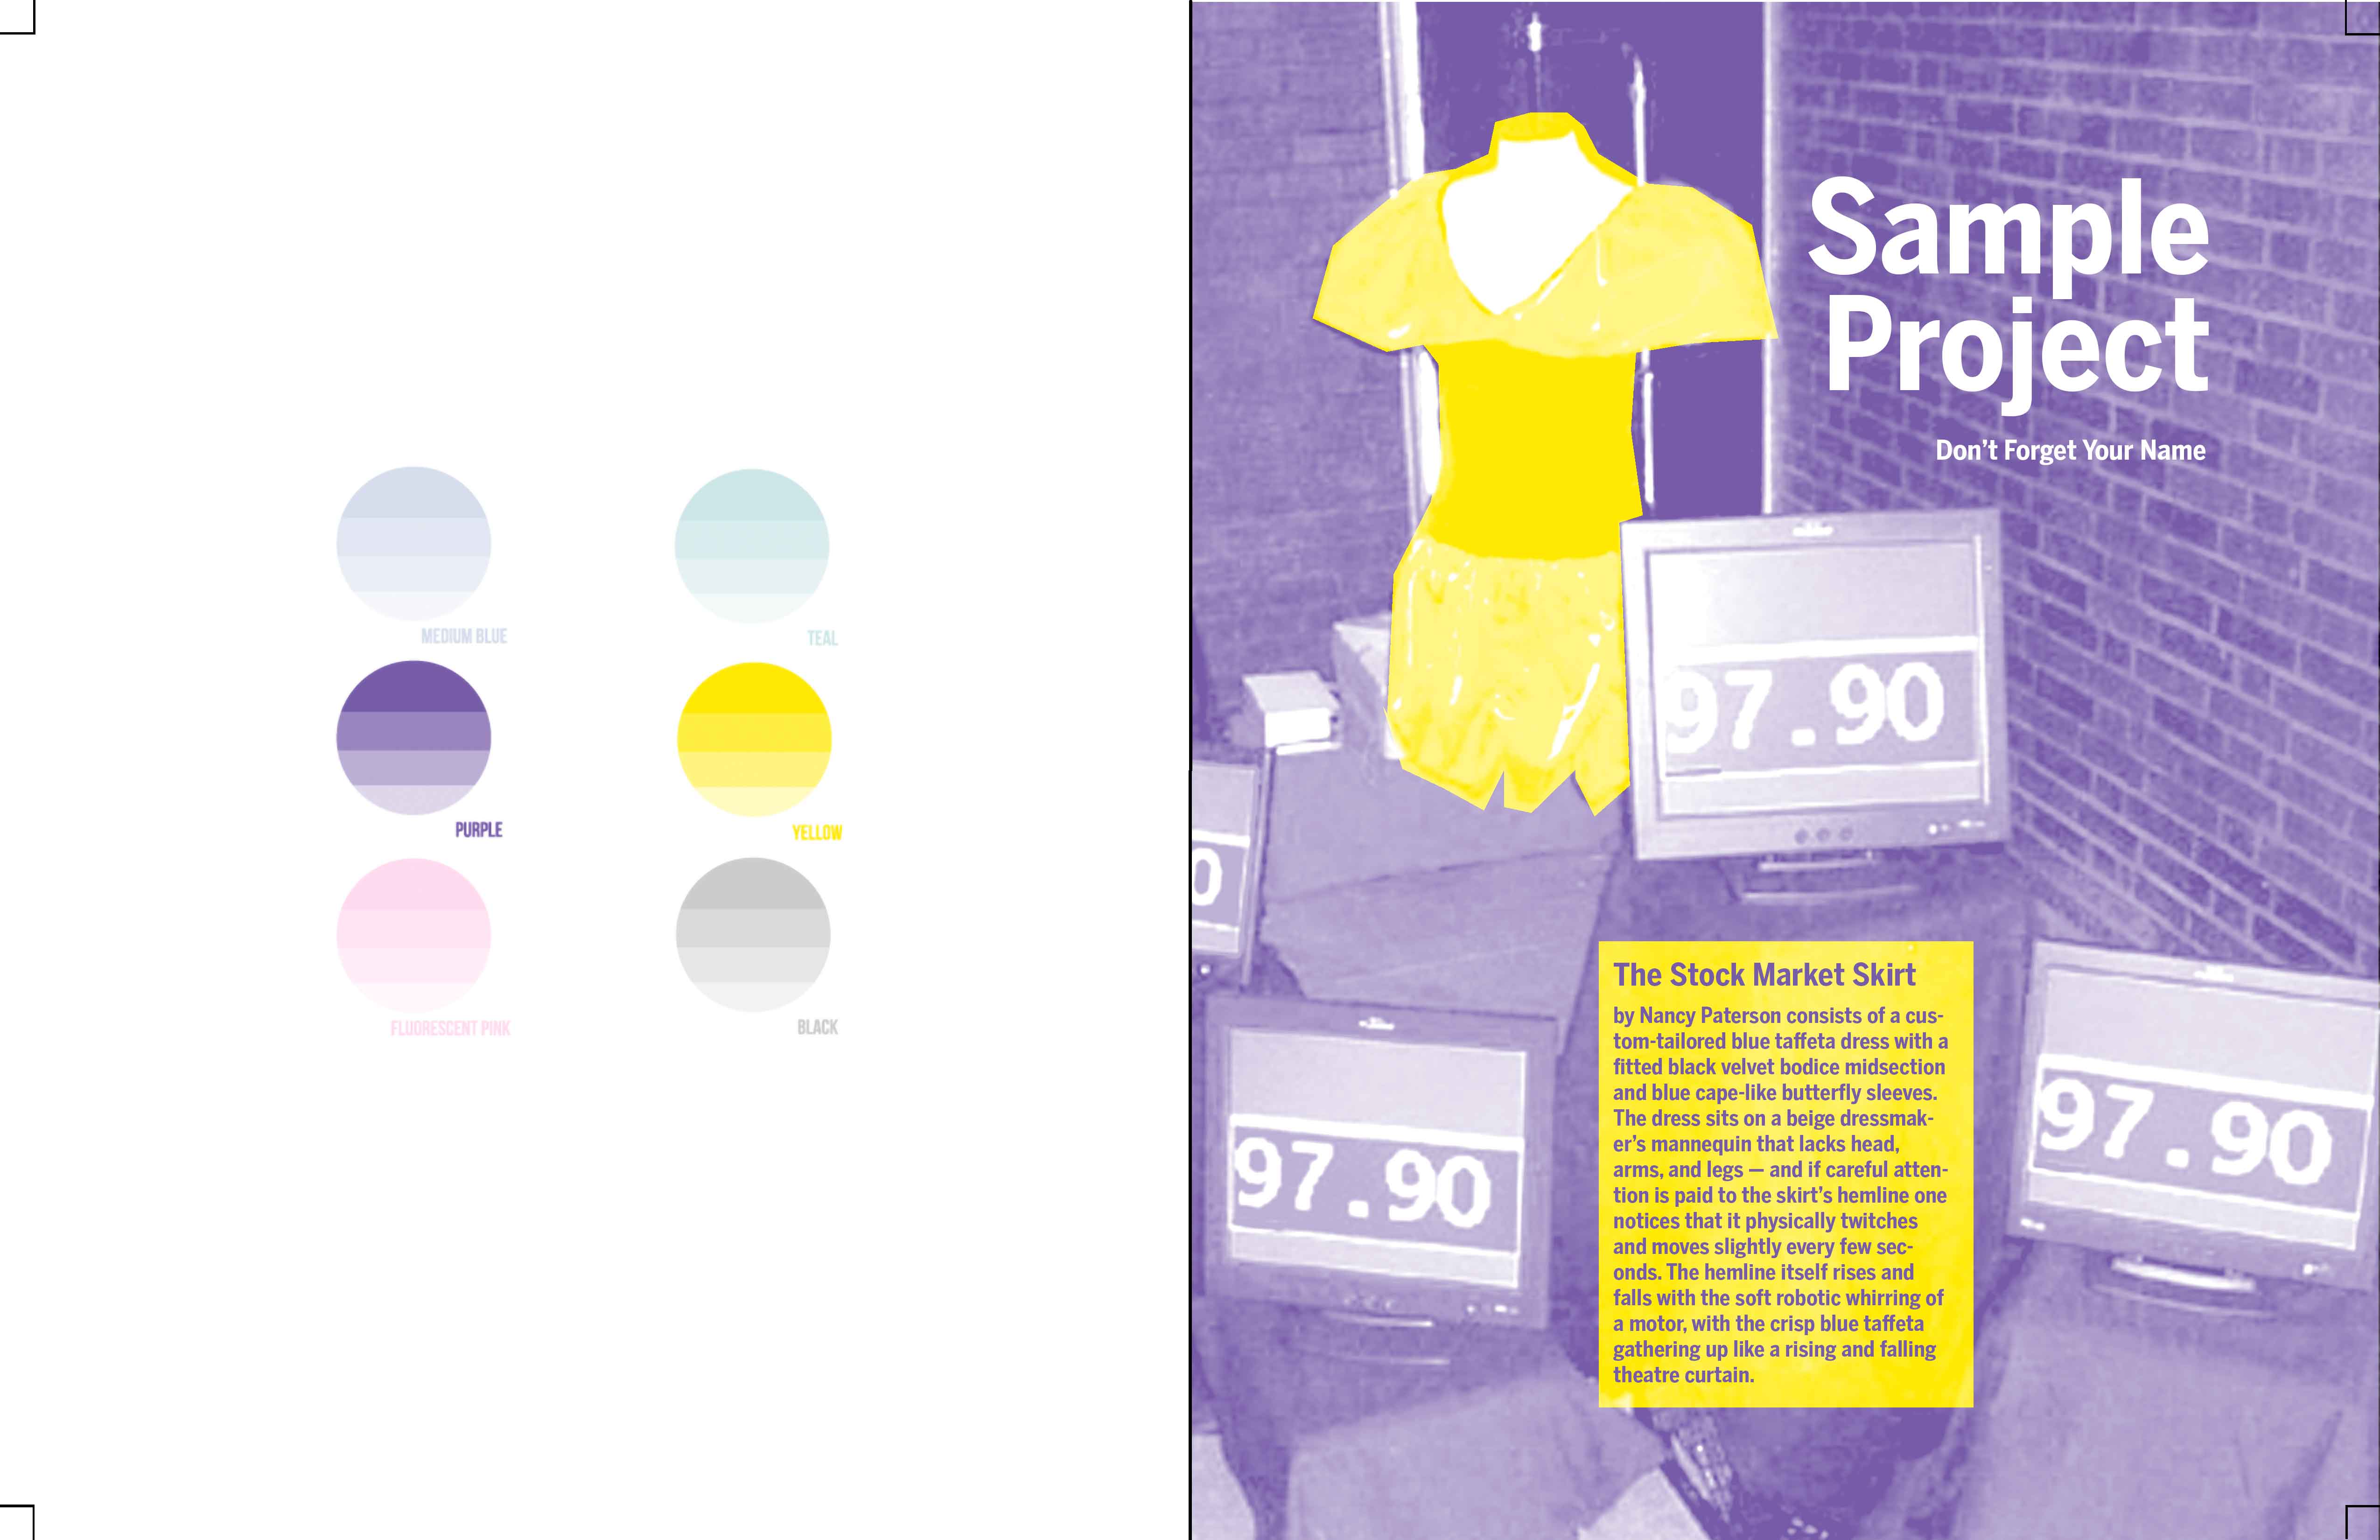
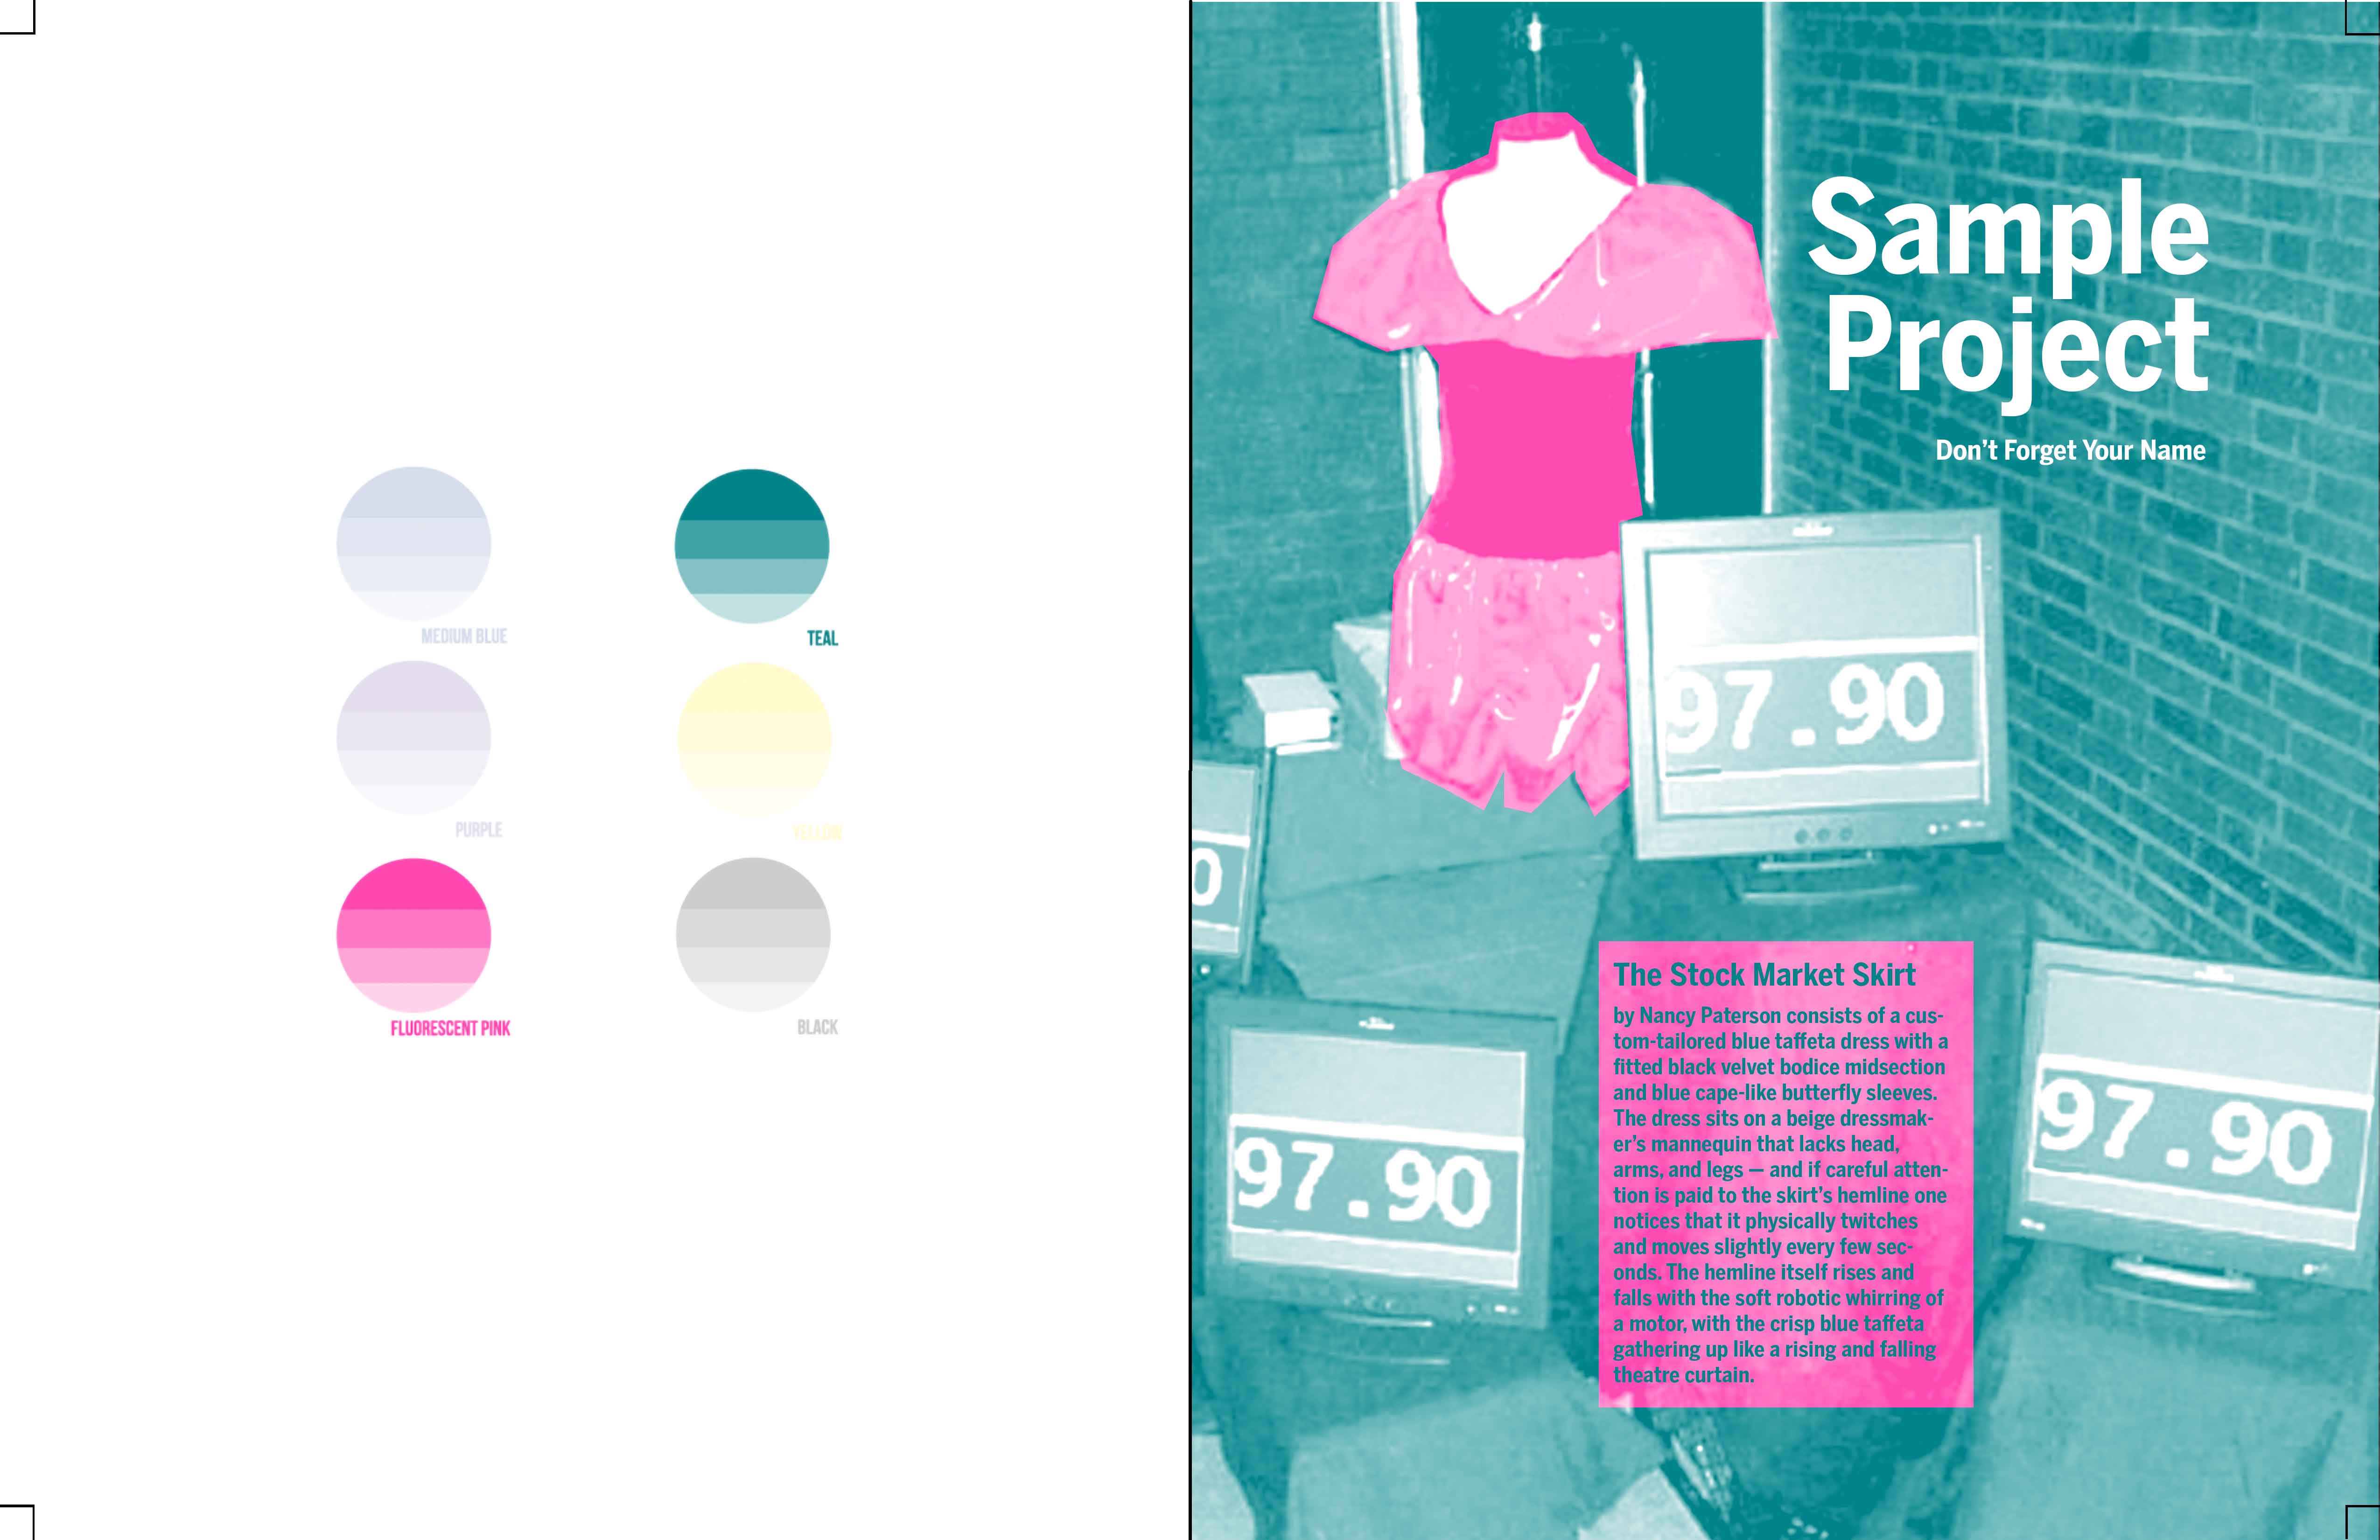
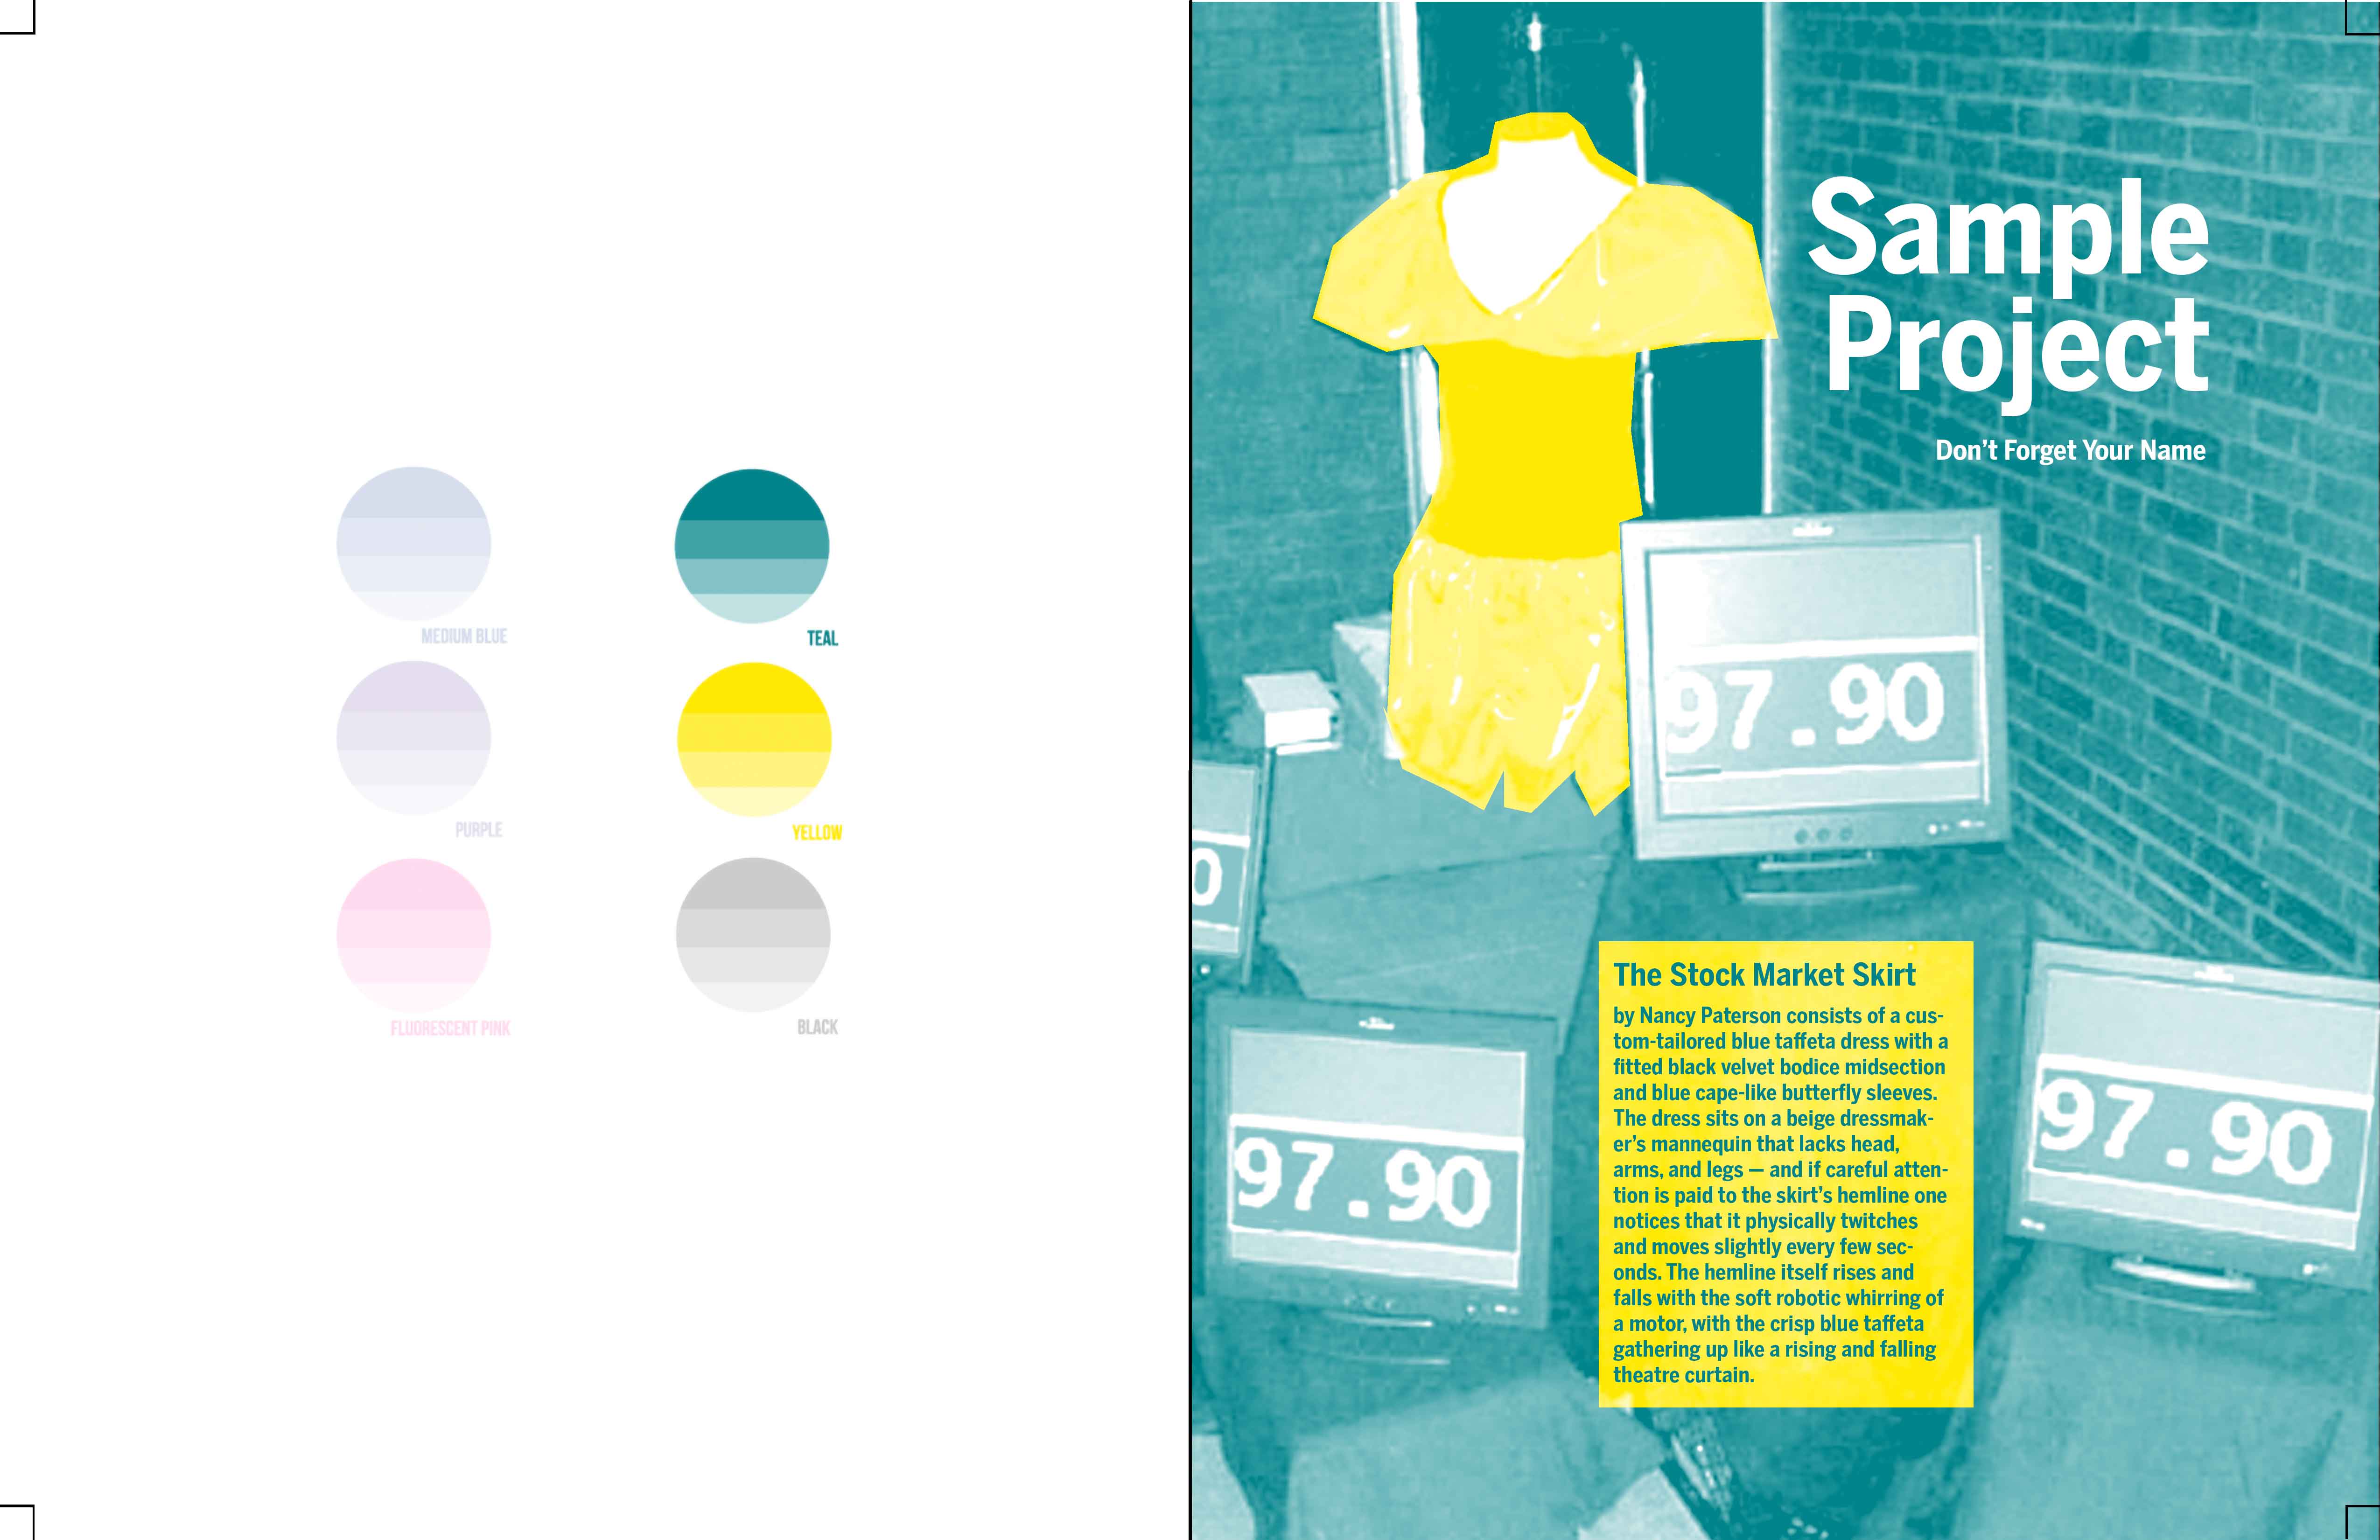

Week 12a - Monday March 30th 2020
- Today's class will be held online at 1:30pm on Zoom - please try to connect: https://zoom.us/j/3468217738
- Let's select colors - please complete the following poll - and you can vote for more than one colour combination: https://www.easypolls.net/poll.html?p=5e827d3fe4b019ec6883878e
survey services
Garnet Hertz, 2020
http://www.conceptlab.com/teaching
http://www.conceptlab.com/